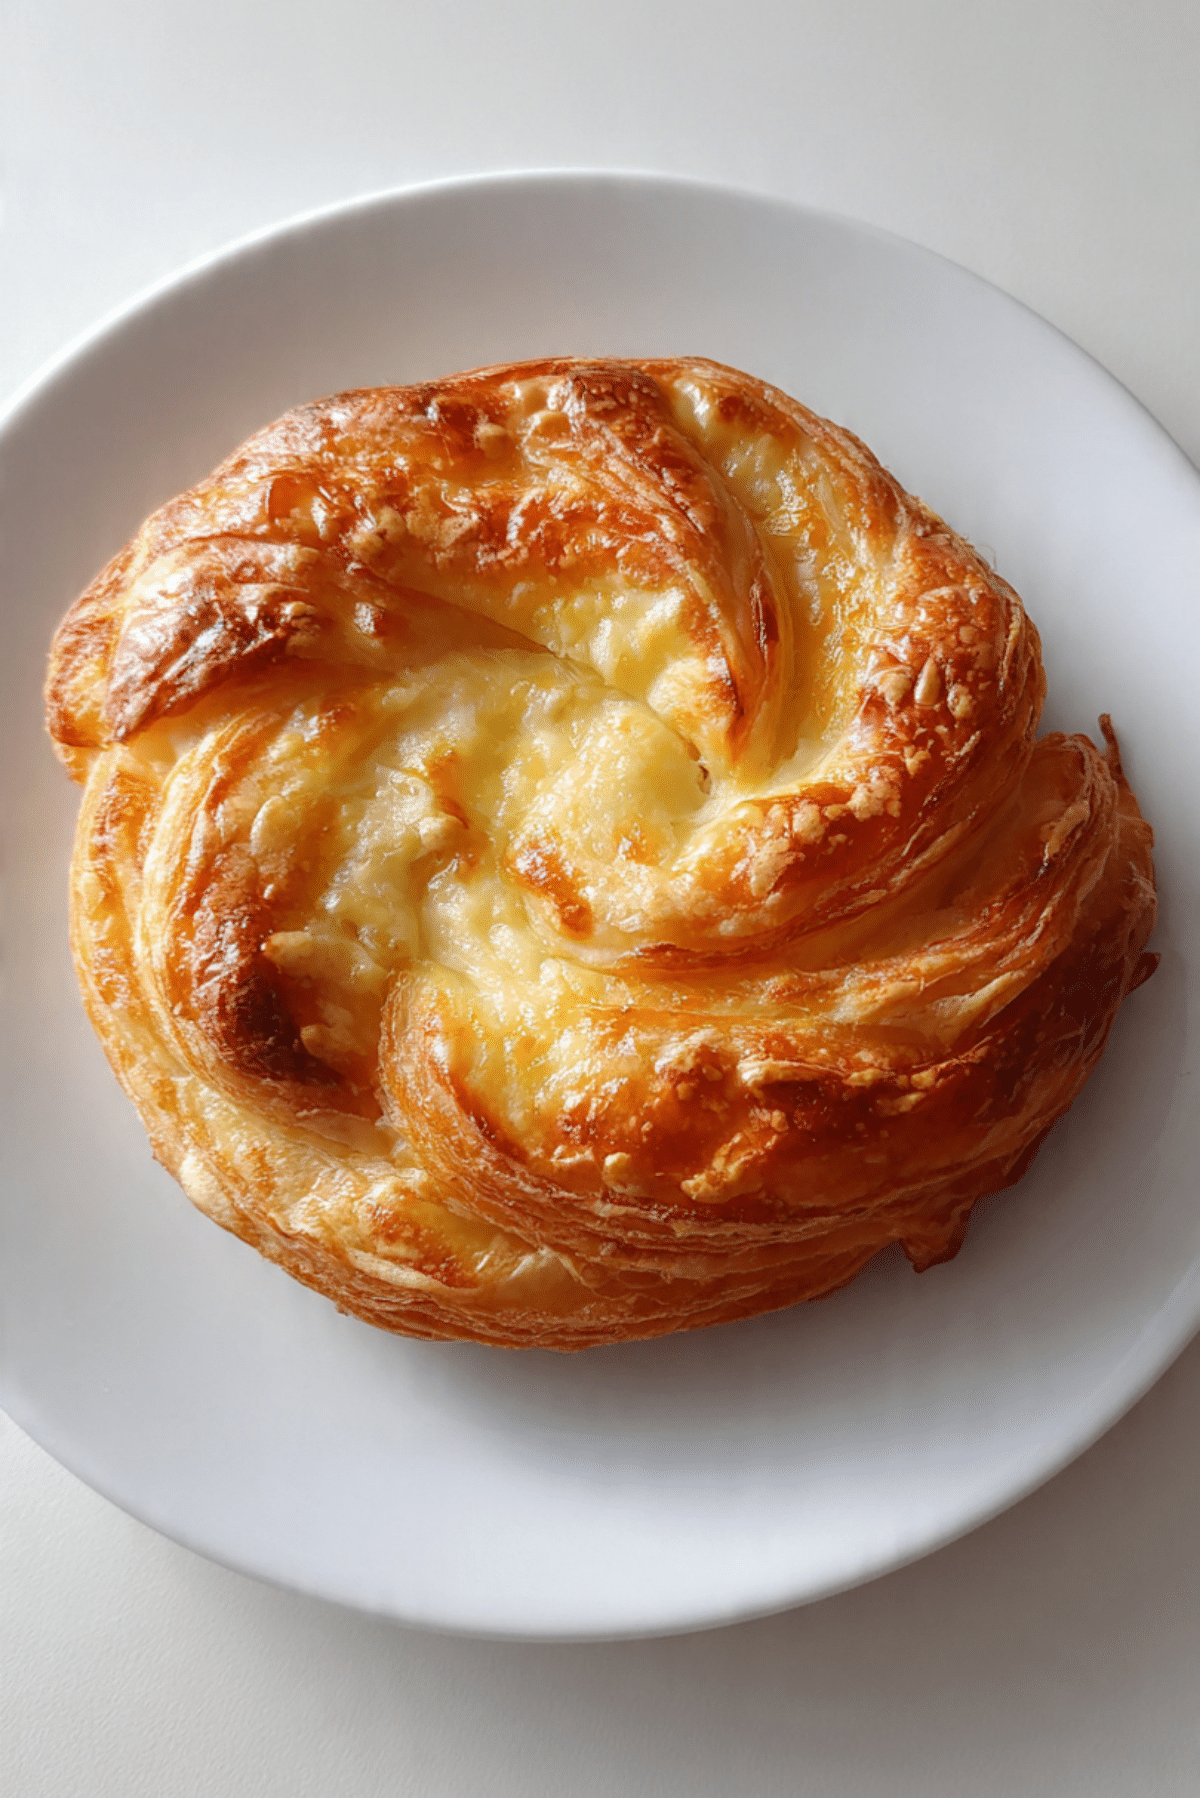
Cheese Danish Recipe
There’s something magical about pulling a fresh, golden cheese Danish from the oven. The buttery, flaky layers wrapped around a creamy, slightly tangy cheese center create a perfect balance of richness and lightness. Whether it’s for a lazy weekend brunch or an afternoon treat with coffee, this cheese Danish is the kind of pastry that makes the whole kitchen smell like a dream and leaves everyone reaching for seconds.
Behind the Recipe
This cheese Danish recipe was born from my craving for something nostalgic and bakery-style without having to make a trip to town. Growing up, I always picked the cheese Danish from the pastry box on Sunday mornings. I remember the soft creaminess inside, just sweet enough to feel indulgent, tucked into buttery folds of pastry. That little memory inspired me to recreate it at home, and let me tell you — it’s just as good, if not better.
Recipe Origin or Trivia
The cheese Danish has roots in the traditional “Danish pastry,” which actually came from Austrian bakers who influenced Danish baking in the 19th century. Over time, Danish bakers added their own twist by incorporating local dairy, and that’s how the cheese version came to be. These pastries are now iconic in American bakeries too, often found with different fillings like fruit or jam, but the classic cheese version remains a timeless favorite.
Why You’ll Love Cheese Danish
This recipe isn’t just delicious — it’s practical, versatile, and easy enough for anyone to master. Let’s dive into what makes it so special:
Versatile: Perfect for breakfast, dessert, or a sweet snack with coffee or tea.
Budget-Friendly: Uses simple pantry staples and one sheet of puff pastry.
Quick and Easy: Minimal prep thanks to ready-made puff pastry.
Customizable: Add fruit preserves, fresh berries, or swap flavors in the cheese mixture.
Crowd-Pleasing: A surefire hit for brunch gatherings or holiday mornings.
Make-Ahead Friendly: Prepare in advance and bake fresh when needed.
Great for Leftovers: Reheat easily or enjoy cold — still delicious.
Chef’s Pro Tips for Perfect Results
Want that bakery-level finish? Here’s how to get it just right:
- Soften Your Cream Cheese: Let it come to room temp so it mixes smoothly.
- Don’t Overfill: A little filling goes a long way. Too much can spill over.
- Chill the Pastry Before Baking: This helps it puff up beautifully.
- Use an Egg Wash: It adds that glossy, golden finish to the pastry.
- Cool Before Icing: Let it cool a bit before drizzling powdered sugar glaze so it doesn’t melt off.
Kitchen Tools You’ll Need
You don’t need fancy gadgets here, just a few basics from your kitchen.
Mixing Bowl: For blending the cheese filling smoothly.
Hand Mixer or Whisk: Helps cream the cheese mixture evenly.
Baking Sheet: A flat surface for even baking.
Parchment Paper: Prevents sticking and makes cleanup easy.
Pastry Brush: For applying that golden egg wash.
Knife or Pizza Cutter: For slicing the pastry into neat rectangles.
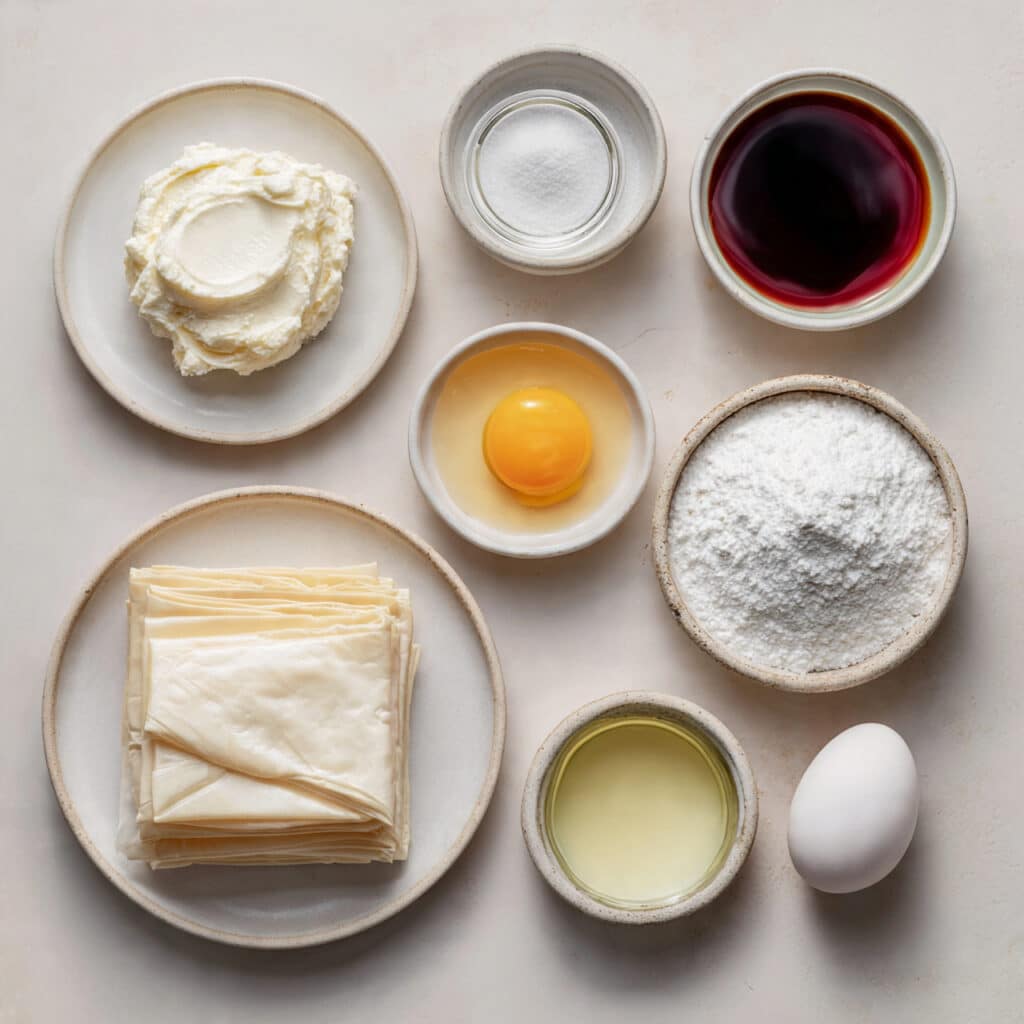
Ingredients in Cheese Danish
There’s a beautiful harmony between the creamy, citrusy filling and the crisp, buttery pastry. Here’s what you’ll need:
- Puff Pastry: 1 sheet, thawed – Forms the crisp, flaky layers that wrap around the filling.
- Cream Cheese: 8 oz, softened – Creates the rich, creamy base of the filling.
- Granulated Sugar: 1/3 cup – Adds just the right amount of sweetness.
- Vanilla Extract: 1 teaspoon – Infuses warmth and depth into the filling.
- Lemon Juice: 1 tablespoon – Brightens the cheese mixture with a little tang.
- Egg: 1 large – Used for egg wash to create a golden finish.
- Powdered Sugar: 1/2 cup – Mixed with a touch of milk for a simple icing drizzle.
Ingredient Substitutions
You can swap in a few things if needed — here’s how:
Cream Cheese: Mascarpone or ricotta for a softer, milder taste.
Granulated Sugar: Use honey or maple syrup, but reduce quantity slightly.
Puff Pastry: Crescent roll dough can work in a pinch.
Vanilla Extract: Try almond extract for a twist.
Lemon Juice: Lime juice or orange zest for different citrus vibes.
Ingredient Spotlight
Puff Pastry: This magical dough is what gives your danish its signature crunch and airy texture. The layers puff up when baked, creating that beautiful rise.
Cream Cheese: Tangy, smooth, and creamy — this is the soul of the Danish. It balances the richness of the pastry with a luscious texture.
Instructions for Making Cheese Danish
Let’s bring this pastry to life step-by-step. Don’t rush, enjoy the process.
- Preheat Your Equipment:
Preheat your oven to 400°F (200°C) and line a baking sheet with parchment paper. - Combine Ingredients:
In a bowl, beat the softened cream cheese, sugar, vanilla, and lemon juice until smooth and fluffy. - Prepare Your Cooking Vessel:
Roll out the puff pastry on a lightly floured surface and cut it into rectangles or squares, depending on your preferred shape. - Assemble the Dish:
Spoon a small amount of the cream cheese mixture into the center of each pastry square. Fold corners inward or create little pockets. Brush edges with beaten egg. - Cook to Perfection:
Bake for 15 to 18 minutes, or until golden brown and puffed. Let them cool slightly on a rack. - Finishing Touches:
Mix powdered sugar with a teaspoon of milk to create a glaze. Drizzle over cooled Danishes. - Serve and Enjoy:
Serve warm or at room temperature. Great with a cup of tea or coffee!
Texture & Flavor Secrets
What makes this cheese Danish irresistible is the contrast — buttery, crisp edges with a soft, creamy center. The sugar and lemon juice create a sweet yet balanced filling, while the puff pastry brings flaky richness in every bite.
Cooking Tips & Tricks
A few bonus pointers to keep things easy and stress-free:
- Use cold puff pastry and work quickly to keep it from getting too soft.
- Don’t overload the filling or it will leak while baking.
- Chill the assembled pastries for 10 minutes before baking to help them hold their shape.
What to Avoid
Let’s avoid the pitfalls for the best possible result:
- Overbaking: Can dry out the pastry or burn the bottoms.
- Warm Filling: Make sure your cheese mixture isn’t too warm before adding it.
- Skipping the Egg Wash: It’s what gives your Danish that perfect golden color.
Nutrition Facts
Servings: 6
Calories per serving: 320
Note: These are approximate values.
Preparation Time
Prep Time: 15 minutes
Cook Time: 18 minutes
Total Time: 33 minutes
Make-Ahead and Storage Tips
You can make these ahead by assembling and refrigerating the pastries overnight. Bake them fresh the next morning. Leftovers can be stored in an airtight container for up to 3 days. Reheat in the oven for a few minutes to revive crispiness. Avoid the microwave — it makes them soggy.
How to Serve Cheese Danish
Serve your Danish warm or at room temp with a dusting of powdered sugar. Pair it with coffee, tea, or even a light fruit salad. They also make a pretty addition to any brunch spread or dessert table.
Creative Leftover Transformations
Got extras? Turn them into something new:
- Danish French Toast Bake: Chop up and bake with an egg custard for a sweet breakfast.
- Sweet Croutons: Cube and toast them to sprinkle over yogurt.
- Dessert Parfait: Layer with whipped cream and fruit in a glass.
Additional Tips
- Add a teaspoon of fruit jam under the cheese for a fruity twist.
- A sprinkle of cinnamon or nutmeg adds warmth to the filling.
- Use a piping bag for the glaze if you want a cleaner drizzle.
Make It a Showstopper
Presentation matters! Stack a few on a wooden board and drizzle icing in a zigzag pattern. Garnish with lemon zest curls or a few fresh berries for a bakery-worthy finish.
Variations to Try
- Berry Cheese Danish: Add a spoon of raspberry or blueberry preserves.
- Cinnamon Sugar Danish: Sprinkle cinnamon sugar over the filling before baking.
- Almond Danish: Add almond extract to the filling and top with sliced almonds.
- Chocolate Swirl: Drizzle with melted chocolate instead of powdered sugar glaze.
- Mini Danish Bites: Cut puff pastry into smaller squares for party-ready treats.
FAQ’s
Q1: Can I freeze cheese Danish?
Yes, freeze after baking and cooling. Reheat in the oven for best results.
Q2: Can I make this without puff pastry?
You can try crescent dough, but puff pastry gives the flakiest result.
Q3: Do I need to use lemon juice?
It brightens the flavor, but you can skip it or use orange juice instead.
Q4: Can I use low-fat cream cheese?
Yes, but full-fat gives a richer texture and flavor.
Q5: How do I store leftovers?
Keep in an airtight container at room temp for 2 days or refrigerate up to 4.
Q6: Can I make them smaller for a party?
Absolutely. Cut the pastry into smaller squares and reduce bake time slightly.
Q7: What’s the best glaze for topping?
A simple mix of powdered sugar and milk or lemon juice works great.
Q8: Can I add fruit inside?
Yes, a small spoon of jam or fruit compote adds a fruity layer.
Q9: Is this recipe kid-friendly?
Definitely! The mild flavor and fun shape are usually a hit with kids.
Q10: Can I use phyllo dough instead?
Phyllo is much thinner and trickier. Stick to puff pastry for this one.
Conclusion
Whether it’s your first time making a Danish or your tenth, this cheese Danish recipe is one you’ll come back to again and again. It’s simple, satisfying, and every bite feels like a warm hug. Trust me, you’re going to love this.
Print
Cheese Danish Recipe
- Prep Time: 15 minutes
- Cook Time: 18 minutes
- Total Time: 33 minutes
- Yield: 6 danishes 1x
- Category: Breakfast, Brunch, Dessert
- Method: Baking
- Cuisine: Danish-American
- Diet: Vegetarian
Description
This cheese Danish recipe brings the bakery to your home with flaky puff pastry and a creamy, slightly sweet cheese filling, topped with a simple icing drizzle. Perfect for breakfast, brunch, or a cozy snack.
Ingredients
- 1 sheet puff pastry, thawed
- 8 oz cream cheese, softened
- 1/3 cup granulated sugar
- 1 teaspoon vanilla extract
- 1 tablespoon lemon juice
- 1 large egg
- 1/2 cup powdered sugar
- 1 teaspoon milk (for glaze)
Instructions
- Preheat oven to 400°F (200°C) and line a baking sheet with parchment paper.
- In a bowl, beat the cream cheese, sugar, vanilla extract, and lemon juice until smooth.
- Roll out puff pastry on a lightly floured surface and cut into rectangles or squares.
- Spoon a small amount of cream cheese filling into the center of each piece. Fold corners inward or form pockets. Brush edges with beaten egg.
- Place on prepared baking sheet and chill for 10 minutes if desired.
- Bake for 15–18 minutes, or until golden brown and puffed. Cool slightly on a wire rack.
- Mix powdered sugar and milk to make a glaze. Drizzle over cooled danishes before serving.
Notes
- Chill pastries before baking for better puff and shape.
- Use parchment to prevent sticking and for easy cleanup.
- Add fruit preserves or zest for flavor variations.
Nutrition
- Serving Size: 1 danish
- Calories: 320
- Sugar: 15g
- Sodium: 210mg
- Fat: 20g
- Saturated Fat: 12g
- Unsaturated Fat: 6g
- Trans Fat: 0g
- Carbohydrates: 30g
- Fiber: 1g
- Protein: 4g
- Cholesterol: 55mg
Keywords: cheese danish, puff pastry danish, cream cheese pastry, easy breakfast pastry, homemade danish