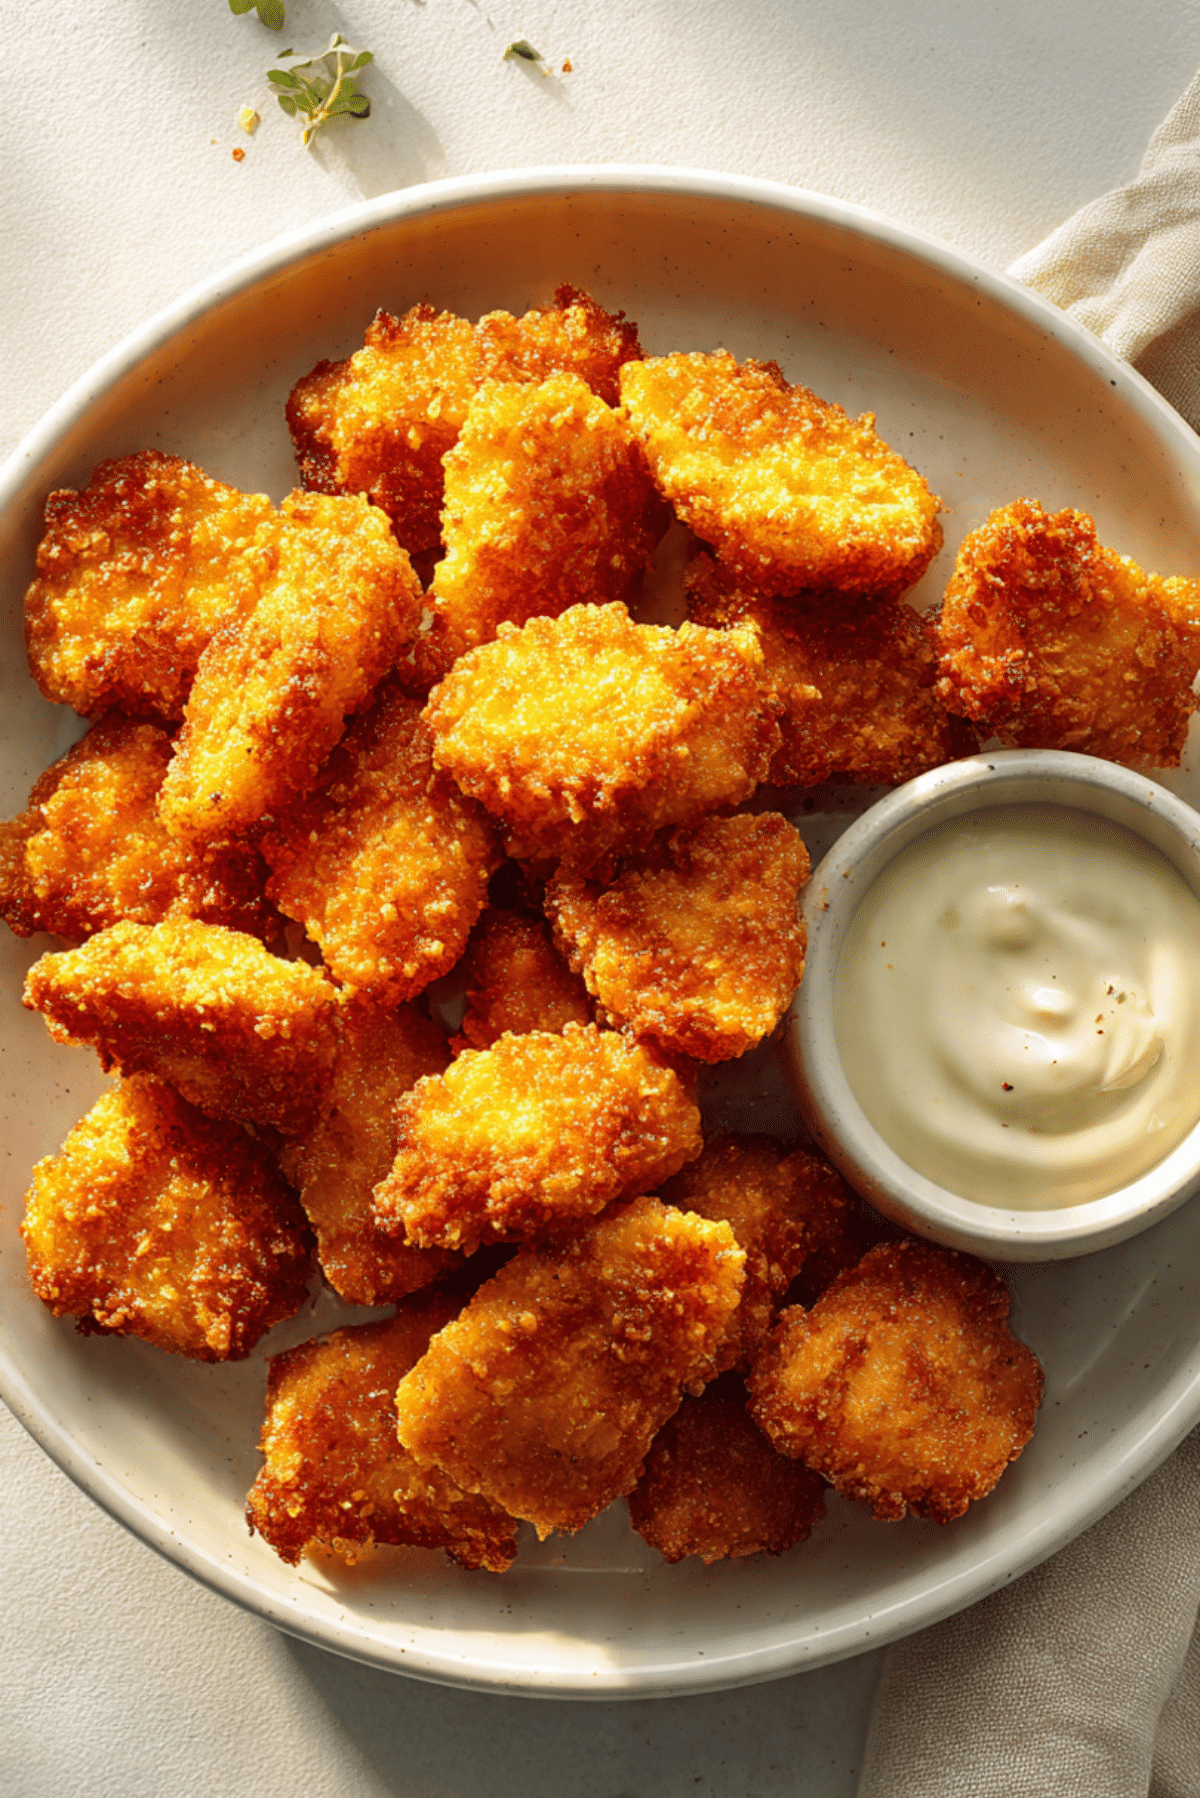
Chicken Nuggets
There is something about a tray of hot, crispy nuggets that instantly makes the kitchen feel fun. The outside turns beautifully golden, the inside stays juicy and tender, and every bite brings that perfect mix of crunch and comfort. Trust me, you’re going to love this, because this homemade version gives you all the nostalgic goodness you want, but with fresher flavor and a texture that feels extra satisfying right from the oven.
Why These Crispy Little Bites Keep Winning Everyone Over
Some recipes are just easy to fall for, and this is one of them. You get that familiar savory crunch, a tender center, and the kind of snackable dinner that disappears fast from the plate. Let me tell you, it’s worth every bite, especially when you dip each piece into your favorite sauce and hear that first delicate crunch.
The Story Behind This Comfort Food Favorite
Now that the craving has officially kicked in, let’s dive into where this style of dish comes from. Nuggets became especially popular as a quick and family-friendly way to enjoy breaded chicken in small, easy-to-eat pieces. Over time, home cooks started making their own versions, and honestly, that changed everything.
Making them at home means you get to control the seasoning, the texture, and the cooking method. It keeps all the fun of the classic version, while tasting fresher, crispier, and more personal.
Why This Recipe Works So Well Every Single Time
Once you know a bit of the background, it makes sense why so many people keep coming back to it. This one’s a total game-changer because it is simple, reliable, and packed with crowd-friendly flavor.
Versatile: These nuggets fit into lunch, dinner, snack time, or party platters so easily. You can serve them with fries, salad, wraps, or a big lineup of dipping sauces.
Budget-Friendly: The ingredients are basic pantry staples and a pound of chicken goes a long way. It is a smart way to make a satisfying meal without spending much.
Quick and Easy: The steps are straightforward and easy to follow. Once the breading station is set up, the whole process moves along smoothly.
Customizable: You can adjust the spices, switch the crumbs, or serve them with different sauces. It is one of those recipes that happily bends to your mood.
Crowd-Pleasing: Kids love them, adults keep reaching for more, and nobody complains when these hit the table. That alone makes them worth saving.
Make-Ahead Friendly: You can bread the pieces ahead of time and chill them until you are ready to bake. That makes dinner feel much less hectic.
Great for Leftovers: They reheat surprisingly well and can be tucked into wraps, chopped over salads, or served in lunchboxes the next day.
Smart Kitchen Secrets for Extra Crispy Results
Before we get to the ingredients, a few little tricks make a big difference here. These are the things that take the texture from good to seriously impressive.
- Pat the chicken dry: Dry chicken helps the flour cling better, which helps every layer stay in place.
- Press the crumbs on well: Do not just roll the chicken lightly. Give each piece a gentle press so the coating sticks and bakes up crisp.
- Use a wire rack if you have one: It lets hot air move around the nuggets and helps the bottoms stay less soggy.
- Do not crowd the pan: Leave space between the pieces so they roast instead of steam.
- Flip once during baking: That one simple move helps both sides turn golden and evenly crisp.
The Tools That Make This Recipe Feel Easy
And now that the technique is in place, let’s talk about the kitchen basics that make the whole process smoother.
Sharp Knife: You will use this to cut the chicken into even bite-sized pieces, which helps everything cook at the same pace.
Cutting Board: A stable board makes prep easier and keeps the process neat.
Three Shallow Bowls: These help you build a clean breading station with flour, egg, and seasoned crumbs.
Baking Sheet: This is where the nuggets bake until crisp and golden.
Parchment Paper or Lightly Oiled Surface: It helps prevent sticking and makes cleanup easier.
Wire Rack: This is optional, but it helps air circulate around the nuggets for better texture.
What You’ll Need to Build the Best Batch
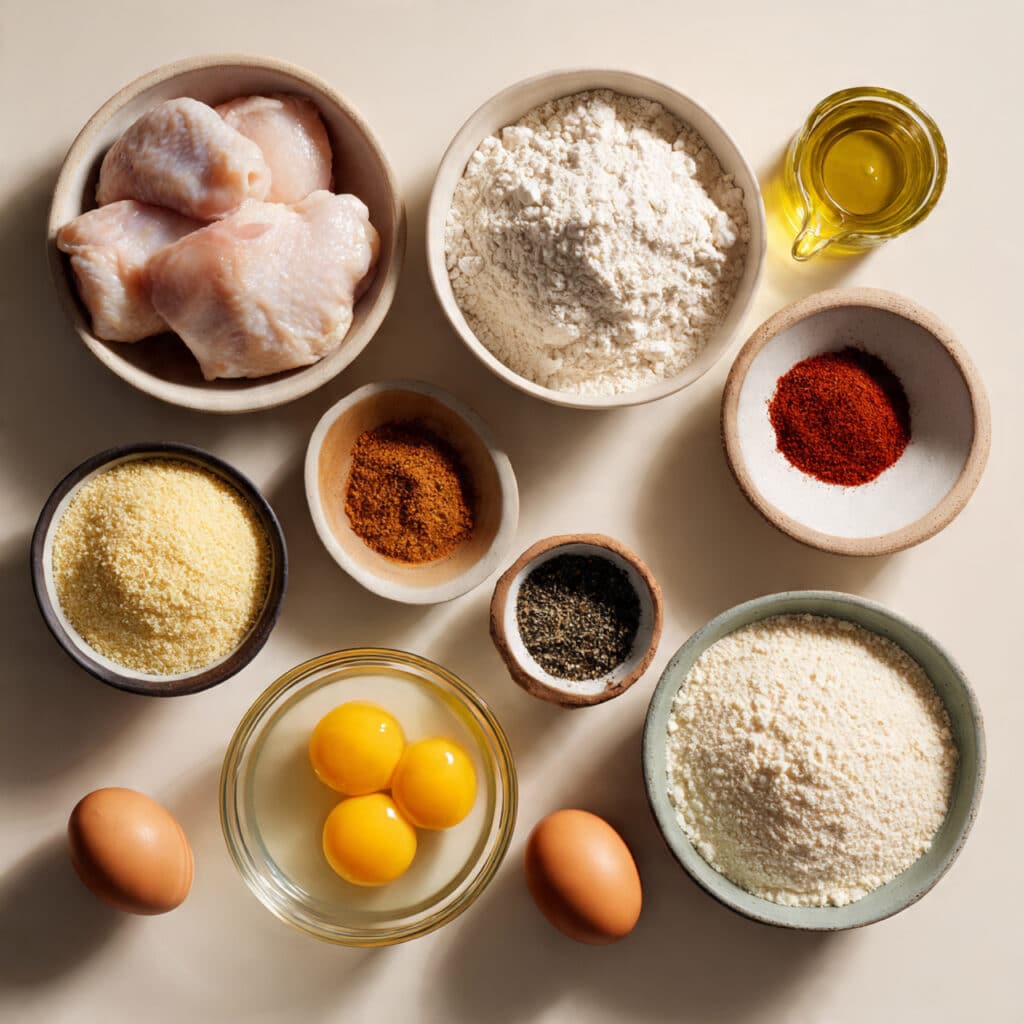
Now let’s get into the ingredients, because this is where the flavor starts layering in. Each one plays a simple but important part, and together they create that irresistible crispy outside and juicy center.
- Chicken: 1 pound boneless, skinless chicken, cut into bite-sized pieces. This is the heart of the dish and stays tender while the coating turns golden.
- All-Purpose Flour: 1 cup. This first layer helps the egg stick and creates the base for an even crust.
- Eggs: 2 large eggs, beaten. They act like the glue that helps the breadcrumbs cling beautifully.
- Panko Breadcrumbs: 1 1/2 cups. These keep the coating light, crisp, and airy instead of heavy.
- Garlic Powder: 1 teaspoon. It adds savory depth without overpowering the chicken.
- Onion Powder: 1 teaspoon. This brings a mellow sweetness and rounds out the seasoning.
- Paprika: 1 teaspoon. It adds warmth, color, and a gentle smoky note.
- Salt: 1 teaspoon. This lifts all the other flavors and keeps the chicken from tasting flat.
- Black Pepper: 1/2 teaspoon. A little pepper gives the coating just enough edge.
- Olive Oil: 2 tablespoons. Mixed with the crumbs, it helps the coating brown and crisp up in the oven.
Easy Swaps When You Need Flexibility
If you are missing something, do not worry. This recipe is forgiving, and a few simple substitutions still give you a delicious result.
All-Purpose Flour: Gluten-free all-purpose flour.
Panko Breadcrumbs: Crushed cornflakes or regular breadcrumbs.
Olive Oil: Neutral cooking oil.
Paprika: Smoked paprika or a mild chili powder.
Chicken: Boneless, skinless chicken thighs.
Two Ingredients That Deserve a Little Spotlight
Before we start breading, it is worth pausing for the ingredients that really shape the final bite.
Panko Breadcrumbs: These are the reason the coating feels so crisp and light. They create little ridges and flakes that catch heat beautifully in the oven.
Paprika: This may seem small, but it adds warmth and that lovely golden tone that makes the finished nuggets look extra appetizing.
Let’s Turn These Into Golden Crispy Bites
This is the fun part, and once you get going, the rhythm feels easy. Set everything out, keep one hand for dry ingredients and one for wet if you can, and enjoy the process.
- Preheat Your Equipment: Heat your oven to 425°F and line a baking sheet with parchment paper or lightly oil it. If using a wire rack, place it on top of the baking sheet.
- Combine Ingredients: In one bowl, add the flour. In a second bowl, beat the eggs. In a third bowl, combine the panko breadcrumbs, garlic powder, onion powder, paprika, salt, black pepper, and olive oil, then mix until the crumbs are lightly coated.
- Prepare Your Cooking Vessel: Arrange your lined baking sheet or rack so it is ready for the breaded pieces. This keeps the process clean and quick once the chicken is coated.
- Assemble the Dish: Dip each piece of chicken into the flour, then the beaten eggs, then the seasoned breadcrumb mixture. Press the crumbs on gently so they stick well, then place the coated pieces on the prepared baking sheet with space between them.
- Cook to Perfection: Bake for 16 to 18 minutes, flipping once halfway through, until the coating is golden and the chicken is cooked through.
- Finishing Touches: Let the nuggets rest for 2 to 3 minutes after baking. This helps the crust settle and keeps the juices inside.
- Serve and Enjoy: Serve hot with your favorite dipping sauces while the coating is still crisp and the centers are juicy.
The Texture and Flavor Magic Happening in Every Bite
As the nuggets bake, the crumbs toast and turn deeply golden, while the seasoned coating develops a savory, slightly garlicky flavor. The paprika adds warmth and color, the pepper brings a gentle kick, and the chicken inside stays moist and tender. That contrast is what makes these so hard to stop eating. You get crisp edges first, then a soft, juicy center, and it all comes together in one really satisfying bite.
Handy Tricks That Make a Good Batch Even Better
A few extra details can make this recipe feel even more dependable the next time you make it.
- Use even-sized chicken pieces: This helps everything cook at the same speed.
- Spray lightly with oil if needed: A quick mist over the tops can boost browning.
- Serve right away for best crunch: They are at their crispiest fresh from the oven.
- Keep sauces on the side: This prevents the coating from softening too soon.
Common Slip-Ups and How to Dodge Them
Even easy recipes have a few things to watch for, and knowing them ahead of time makes the whole experience smoother.
- Skipping the drying step: Wet chicken can make the coating slide off, so pat it dry first.
- Crowding the tray: Too many pieces packed together can create steam and soften the crust.
- Not flipping halfway: One turn helps both sides cook evenly and brown nicely.
- Under-seasoning the crumbs: The coating needs flavor, so do not be shy about seasoning it well.
A Quick Look at the Nutrition
These nuggets feel indulgent, but they are also easy to portion and serve with lighter sides if you want balance.
Servings: 4
Calories per serving: 390
Note: These are approximate values.
Time Breakdown So You Can Plan Dinner Easily
And because timing matters on busy days, here is the full picture.
Prep Time: 20 minutes
Cook Time: 18 minutes
Total Time: 38 minutes
Make-Ahead, Store, Freeze, and Reheat with Confidence
If you want to get ahead, you can bread the chicken pieces a few hours early and keep them covered in the refrigerator until baking time. Once cooked, leftovers keep well in an airtight container in the fridge for up to 3 days. For longer storage, freeze the cooked nuggets in a single layer first, then transfer them to a freezer-safe bag for up to 2 months.
To reheat, bake them in a hot oven or air fryer until warmed through and crisp again. The microwave works in a pinch, but the coating will be softer.
Fun Ways to Serve Them
These are easy to dress up or keep simple, depending on the moment. Serve them with classic ketchup, honey mustard, barbecue sauce, or ranch. Pair them with crispy potato wedges, a crunchy slaw, or a bright green salad for contrast. They also work really well tucked into wraps with lettuce and a drizzle of sauce.
Leftovers That Turn Into Something New
If you happen to have extras, they can do more than just sit in the fridge. Slice them into strips for wraps, chop them over a salad, or tuck them into a sandwich with pickles and a creamy sauce. You can even serve them with rice and roasted vegetables for a quick second dinner that barely feels like leftovers.
Extra Little Things That Help Every Time
Once you have made these once, they get even easier, and a few final pointers can make them feel completely effortless.
Keep your breading bowls in order from left to right so the workflow stays neat. Use a fork in the egg bowl if you want less mess. And if you want extra color, let the nuggets bake another minute or two, just keeping an eye on them so the coating stays golden, not too dark.
Make Them Look Party-Ready
Presentation is part of the fun here, especially if you are serving these for family movie night or a casual gathering. Pile them onto a platter while they are still hot, add little bowls of dipping sauces, and finish with a clean, simple setup that lets the crispy coating shine. A sprinkle of chopped parsley is fine if you like, but even plain, they look inviting and golden.
Flavor Twists Worth Trying Next
Once you love the base version, it is easy to have fun with it.
Spicy Version: Add 1/2 teaspoon cayenne to the breadcrumb mixture for a little heat.
Herby Version: Stir 1 teaspoon dried Italian seasoning into the crumbs for a more aromatic coating.
Cheesy Version: Mix in 1/4 cup finely grated Parmesan with the breadcrumbs for a richer crust.
Cornflake Version: Replace the panko with crushed cornflakes for extra crunch.
Air Fryer Version: Cook at 400°F for about 10 to 12 minutes, flipping halfway through, until golden and cooked through.
FAQ’s
1. Can I use chicken thighs instead?
Yes, absolutely. They stay juicy and work very well in this recipe.
2. Can I fry these instead of baking them?
Yes. Fry them in hot oil until golden and cooked through, but keep the pieces small and even for best results.
3. How do I know when they are done?
The coating should be golden and the chicken should be fully cooked in the center with no pink remaining.
4. Can I make them gluten-free?
Yes. Use gluten-free flour and gluten-free breadcrumbs.
5. Why is my coating falling off?
This usually happens if the chicken is too wet or the crumbs were not pressed on well enough.
6. Can I freeze them before baking?
Yes. Freeze the breaded pieces on a tray first, then store them in a freezer bag and bake from frozen, adding a few extra minutes.
7. What sauces go best with these?
Honey mustard, ketchup, ranch, barbecue sauce, and spicy mayo all work beautifully.
8. Can kids help with this recipe?
Yes, older kids can help with coating the pieces, which makes this a fun kitchen activity.
9. Can I use regular breadcrumbs instead of panko?
Yes, though the texture will be a little finer and slightly less airy.
10. What should I serve with them for dinner?
Fries, roasted vegetables, salad, coleslaw, or buttered corn all make great sides.
Conclusion
By the time these come out of the oven, the kitchen smells warm, savory, and completely inviting. The coating is crisp, the centers are juicy, and the whole tray feels like pure comfort. This one’s a total game-changer for easy dinners, fun snacks, and those moments when you want something homemade that still feels playful. Trust me, once you make them this way, you will want to keep this recipe close.
Print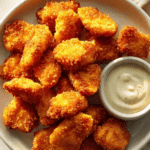
Chicken Nuggets
- Prep Time: 20 minutes
- Cook Time: 18 minutes
- Total Time: 38 minutes
- Yield: 4 servings 1x
- Category: Main Course
- Method: Baked
- Cuisine: American
- Diet: Low Lactose
Description
Golden, crispy chicken nuggets baked until crunchy on the outside and juicy in the center. This easy homemade version is packed with simple seasoning and perfect for dipping.
Ingredients
- 1 pound boneless, skinless chicken, cut into bite-sized pieces
- 1 cup all-purpose flour
- 2 large eggs, beaten
- 1 1/2 cups panko breadcrumbs
- 1 teaspoon garlic powder
- 1 teaspoon onion powder
- 1 teaspoon paprika
- 1 teaspoon salt
- 1/2 teaspoon black pepper
- 2 tablespoons olive oil
Instructions
- Preheat the oven to 425°F and line a baking sheet with parchment paper or lightly oil it. Place a wire rack on top if using.
- Set up three bowls. Put the flour in the first bowl. Add the beaten eggs to the second bowl. In the third bowl, mix the panko breadcrumbs, garlic powder, onion powder, paprika, salt, black pepper, and olive oil.
- Dip each piece of chicken into the flour, then into the beaten eggs, then into the seasoned breadcrumb mixture. Press gently so the crumbs stick well.
- Arrange the coated chicken pieces on the prepared baking sheet with space between them.
- Bake for 16 to 18 minutes, flipping once halfway through, until golden and cooked through.
- Let the nuggets rest for 2 to 3 minutes after baking.
- Serve hot with your favorite dipping sauces.
Notes
- Pat the chicken dry before breading so the coating sticks better.
- Do not crowd the pan or the nuggets may steam instead of crisp up.
- For extra browning, lightly spray the tops with oil before baking.
- Store leftovers in the refrigerator for up to 3 days and reheat in the oven or air fryer.
Nutrition
- Serving Size: 1/4 of recipe
- Calories: 390
- Sugar: 2g
- Sodium: 780mg
- Fat: 12g
- Saturated Fat: 2.5g
- Unsaturated Fat: 8g
- Trans Fat: 0g
- Carbohydrates: 34g
- Fiber: 2g
- Protein: 34g
- Cholesterol: 135mg
Keywords: chicken nuggets, homemade nuggets, baked chicken bites, crispy chicken, easy dinner recipe