Corn Cheese Cups
There is something almost magical about the way sweet corn and melted cheese come together. The first time I pulled these warm, golden Corn Cheese Cups out of the oven, the kitchen smelled rich and buttery, with that gentle sweetness from the corn and a savory hint of toasted cheese on top. They looked simple, almost humble, but trust me, you are going to love this. Each bite is creamy, slightly sweet, a little salty, and perfectly comforting.
And now, let me take you through why this little dish deserves a permanent spot in your kitchen.
Why These Little Bites Disappear So Fast
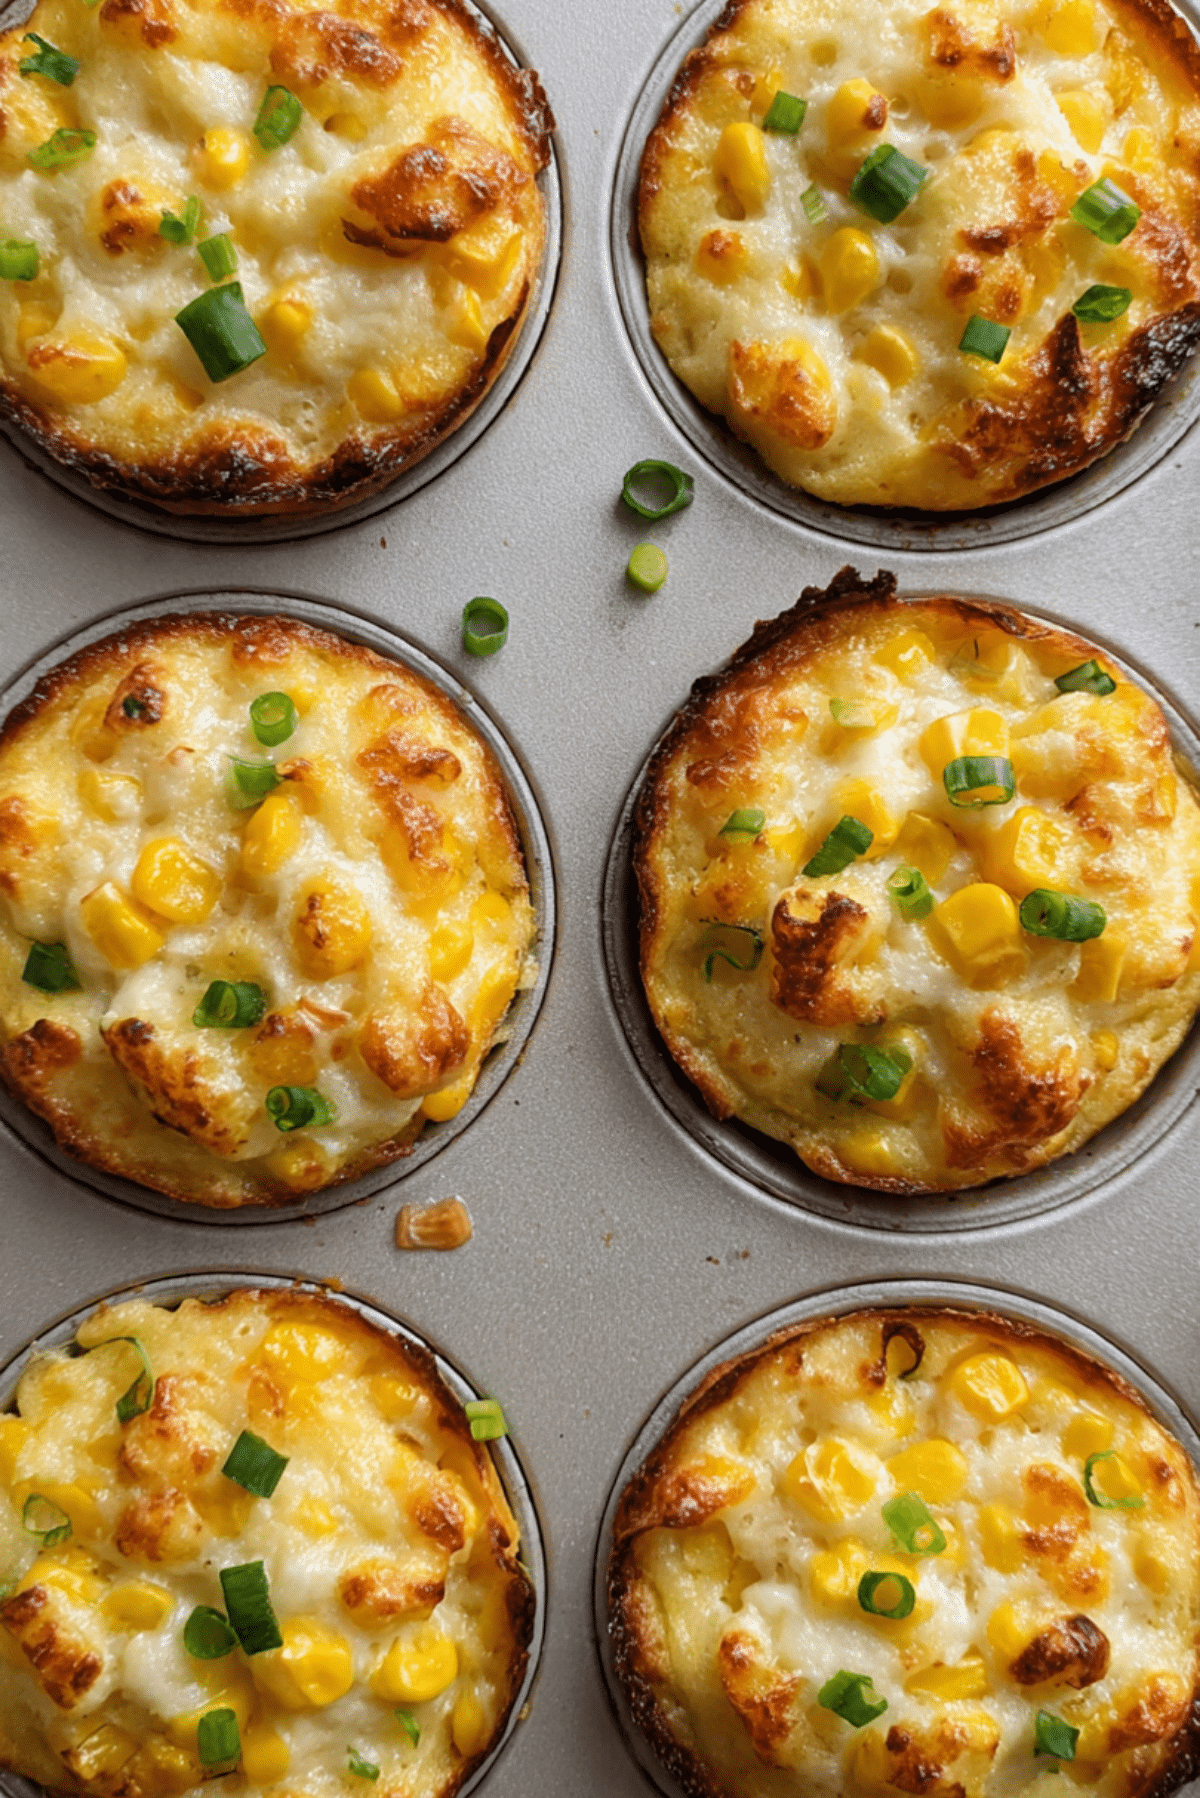
There is something irresistible about individual portions. They feel special, like everyone gets their own perfectly baked treasure. These cups have soft, creamy centers filled with juicy corn kernels, surrounded by gooey melted cheese that turns lightly golden on top. The edges get just slightly crisp from the oven, giving you that satisfying contrast between creamy and lightly toasted.
They work as party appetizers, after school snacks, or even a cozy side dish for dinner. This one is a total game changer when you need something easy but impressive.
A Cozy Classic With Global Roots
Corn and cheese is a pairing loved in many parts of the world. From Korean street style corn cheese baked in sizzling pans to American casseroles served at family gatherings, this combination crosses cultures effortlessly. Sweet corn has long been a staple ingredient, especially in North and South America, and when cheese became widely available, the two naturally found their way into the same dish.
These cups are a playful twist on that tradition. Instead of serving it in a big baking dish, we portion it into individual servings, which makes it both practical and charming.
Why You Can Trust This Recipe Every Time
Before we dive into the details, let me tell you why this version works so well.
Versatile: You can serve these as an appetizer, snack, or side dish. They fit into almost any meal without feeling out of place.
Budget-Friendly: Corn, cheese, and a few pantry staples are all you need. Nothing fancy, just simple ingredients that deliver big flavor.
Quick and Easy: Minimal prep, simple mixing, and straight into the oven. It is the kind of recipe you can make even on a busy weekday.
Customizable: Add a pinch of chili flakes, swap cheeses, or mix in herbs. You can easily make it your own.
Crowd-Pleasing: Kids love it. Adults love it. There is something about melted cheese that wins everyone over.
Make-Ahead Friendly: You can mix everything ahead and bake when ready.
Great for Leftovers: If you have any left, they reheat beautifully and stay creamy inside.
Chef Secrets for Perfect Corn Cheese Cups
A few small details make a big difference here.
- Use freshly shredded cheese for better melting and texture.
- Drain the corn well if using canned, excess moisture can make the cups watery.
- Do not overbake, you want golden tops but still soft centers.
- Let them rest for a few minutes after baking so they set properly.
These little steps are simple, but they truly elevate the final result.
Essential Tools for Success
Before we move forward, gather these tools to make everything smooth and stress free.
Mixing Bowl: Large enough to combine all ingredients evenly without spilling.
Muffin Tin: This shapes the mixture into perfect individual cups.
Spatula or Spoon: For mixing and portioning the mixture evenly.
Oven: Preheated properly so the cups bake evenly and develop that golden top.
Now that the tools are ready, let us talk ingredients.
Ingredients You Will Need For Corn Cheese Cups
The beauty of this dish lies in how a few humble ingredients create something rich and satisfying.
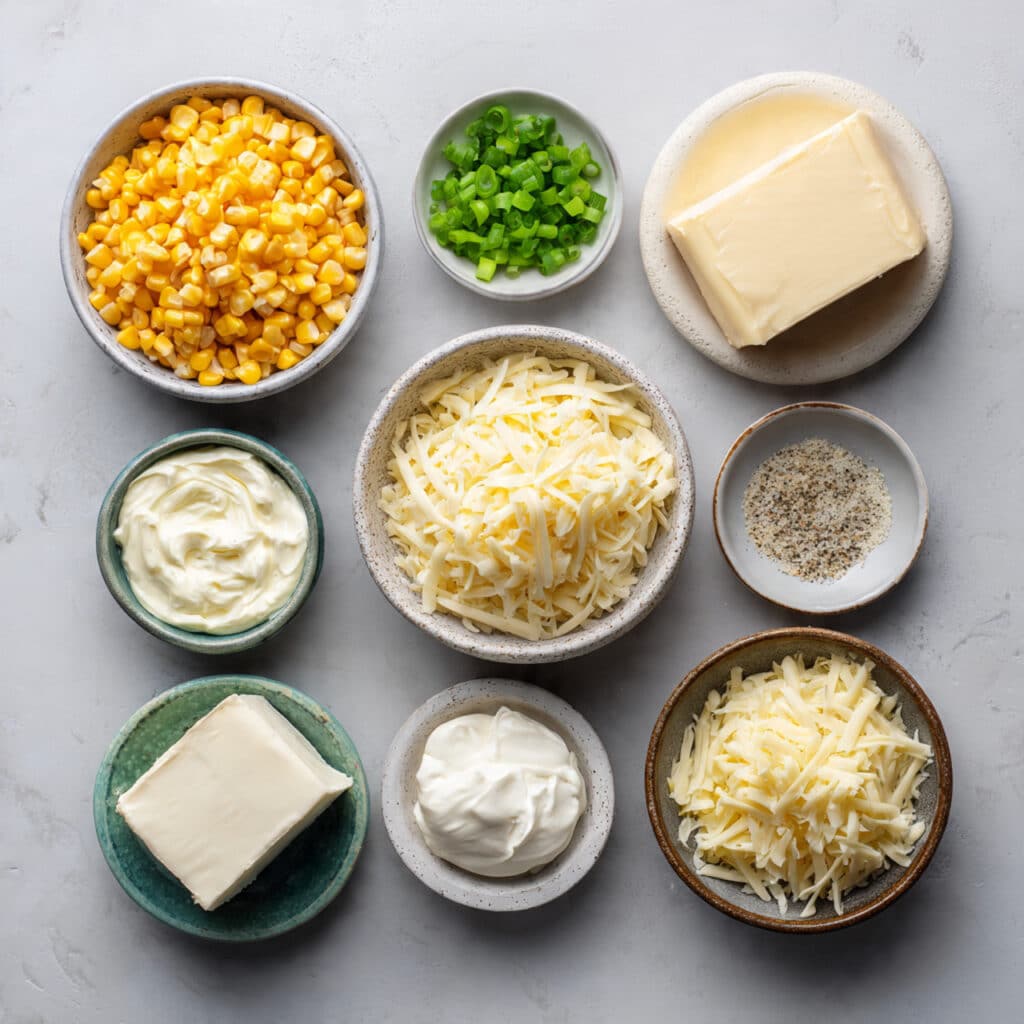
- Sweet Corn Kernels: 2 cups, fresh or well drained canned, they bring natural sweetness and juicy texture.
- Shredded Mozzarella Cheese: 1 cup, for that stretchy, gooey melt.
- Shredded Cheddar Cheese: 1 cup, adds sharpness and deeper flavor.
- Cream Cheese: 4 ounces, softened, creates the creamy base.
- Unsalted Butter: 2 tablespoons, melted, for richness.
- Mayonnaise: 2 tablespoons, enhances creaminess and binds everything together.
- Garlic Powder: 1 teaspoon, for subtle savory depth.
- Salt: 1 teaspoon, balances sweetness.
- Black Pepper: 1/2 teaspoon, adds gentle warmth.
- Chopped Green Onions: 2 tablespoons, fresh and bright for contrast.
Easy Ingredient Swaps If Needed
Sometimes you work with what you have, and that is perfectly fine.
Mozzarella Cheese: Use Monterey Jack for a similar melt.
Cheddar Cheese: Try Colby or a mild Gouda.
Mayonnaise: Greek yogurt can work for a lighter option.
Green Onions: Fresh chives make a lovely substitute.
Spotlight on the Stars
A couple of ingredients truly define this dish.
Sweet Corn Kernels: They provide natural bursts of sweetness and a juicy pop in every bite.
Cream Cheese: This is what makes the texture so luscious and smooth, holding everything together beautifully.
Let Us Bake These Together
This is where the magic happens. Preheat your oven and let us walk through it step by step.
- Preheat Your Equipment: Set your oven to 375°F and lightly grease a standard muffin tin.
- Combine Ingredients: In a large mixing bowl, add sweet corn, mozzarella, cheddar, softened cream cheese, melted butter, mayonnaise, garlic powder, salt, black pepper, and chopped green onions. Mix until evenly combined and creamy.
- Prepare Your Cooking Vessel: Spoon the mixture evenly into the greased muffin cups, filling each almost to the top.
- Assemble the Dish: Smooth the tops gently with the back of a spoon to ensure even baking.
- Cook to Perfection: Bake for 18 to 22 minutes, or until the tops are golden and bubbling.
- Finishing Touches: Remove from the oven and let them rest for 5 minutes so they set slightly.
- Serve and Enjoy: Carefully lift them out and serve warm while the centers are still creamy and irresistible.
Texture and Flavor Harmony in Every Bite
As they bake, the cheeses melt together into a silky base that hugs each corn kernel. The top develops a light golden crust, giving you a subtle crisp contrast. Inside, it stays creamy and rich, with little bursts of sweetness from the corn. The garlic powder and black pepper quietly round everything out, while the green onions add a fresh finish.
Let me tell you, it is worth every bite.
Smart Tips for Even Better Results
If you want to take it one step further, keep these in mind.
- Lightly spray the muffin tin well to prevent sticking.
- Use room temperature cream cheese for smoother mixing.
- Sprinkle a little extra cheddar on top for a more golden finish.
Common Mistakes and How to Avoid Them
Even simple dishes have small pitfalls.
- Do not skip draining canned corn properly, excess liquid makes them soggy.
- Avoid overmixing, which can break down the corn texture.
- Do not bake too long, or they may dry out.
Nutrition Facts
Servings: 12 cups
Calories per serving: 180
Note: These are approximate values.
Time Breakdown at a Glance
Prep Time: 10 minutes
Cook Time: 20 minutes
Total Time: 30 minutes
Make Ahead and Storage Guide
You can prepare the mixture up to 24 hours in advance and store it covered in the refrigerator. When ready, simply portion and bake. Leftover baked cups can be stored in an airtight container in the refrigerator for up to 3 days. Reheat in the oven at 350°F for about 8 minutes or until warmed through. They can also be frozen after baking, then reheated directly from frozen until hot.
Serving Ideas to Make It Special
Serve them alongside grilled chicken, burgers, or a fresh green salad. They also make a fantastic addition to brunch spreads. For parties, arrange them on a platter with a sprinkle of extra chopped green onions for color.
Transforming Leftovers Into Something New
If you somehow have extras, crumble them over scrambled eggs, tuck them into wraps, or chop and mix into a quesadilla filling for a cheesy corn twist.
Extra Tips for Flavor and Ease
A tiny pinch of smoked paprika adds depth. A sprinkle of chili flakes gives a gentle kick. And always taste the mixture before baking to adjust seasoning.
Make It Look Irresistible
Serve on a white platter to highlight the golden tops. Garnish lightly with fresh green onions for color contrast. Presentation matters, and these little cups shine when displayed simply.
Fun Variations to Try
- Add diced jalapenos for a spicy version.
- Mix in finely diced red bell pepper for color and sweetness.
- Stir in a tablespoon of cream for extra richness.
- Add a sprinkle of Parmesan on top for a sharper finish.
FAQ’s
Q1: Can I use frozen corn?
Yes, just thaw and drain it well before mixing.
Q2: Can I make this ahead?
Absolutely, you can prepare the mixture in advance and bake later.
Q3: How do I prevent sticking?
Grease the muffin tin generously.
Q4: Can I make it lighter?
You can reduce the mayonnaise slightly and use light cream cheese.
Q5: Can I double the recipe?
Yes, simply double all ingredients and use two muffin tins.
Q6: What cheese melts best?
Mozzarella and cheddar together create the best balance of melt and flavor.
Q7: Can I bake this in a small baking dish?
Yes, adjust baking time slightly and bake until golden.
Q8: How do I know when they are done?
The tops should be golden and the centers set but still creamy.
Q9: Can I add protein?
Cooked shredded chicken works well if you want a heartier version.
Q10: Are they good for kids?
Yes, they are mild, creamy, and very kid friendly.
Conclusion
Corn Cheese Cups are simple, comforting, and packed with creamy, cheesy goodness. They come together quickly, they please everyone at the table, and they feel just a little special in their individual portions. Trust me, once you make them, you will keep coming back to this recipe again and again.
Print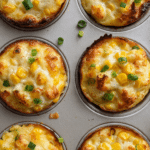
Corn Cheese Cups
- Prep Time: 10 minutes
- Cook Time: 20 minutes
- Total Time: 30 minutes
- Yield: 12 cups 1x
- Category: Appetizer
- Method: Baking
- Cuisine: American
- Diet: Vegetarian
Description
Creamy, cheesy corn baked into perfectly portioned golden cups with a lightly crisp top and soft, gooey center. These are easy to make, crowd-pleasing, and ready in just 30 minutes.
Ingredients
- 2 cups sweet corn kernels (fresh or well drained canned)
- 1 cup shredded mozzarella cheese
- 1 cup shredded cheddar cheese
- 4 ounces cream cheese, softened
- 2 tablespoons unsalted butter, melted
- 2 tablespoons mayonnaise
- 1 teaspoon garlic powder
- 1 teaspoon salt
- 1/2 teaspoon black pepper
- 2 tablespoons chopped green onions
Instructions
- Preheat oven to 375°F and lightly grease a standard muffin tin.
- In a large mixing bowl, combine sweet corn, mozzarella, cheddar, softened cream cheese, melted butter, mayonnaise, garlic powder, salt, black pepper, and chopped green onions. Mix until evenly combined.
- Spoon the mixture evenly into the prepared muffin tin, filling each cup almost to the top.
- Smooth the tops gently with the back of a spoon.
- Bake for 18 to 22 minutes, or until the tops are golden and bubbling.
- Remove from the oven and let rest for 5 minutes before carefully removing from the tin.
- Serve warm and enjoy.
Notes
- Drain canned corn thoroughly to avoid excess moisture.
- Use freshly shredded cheese for better melting and texture.
- Do not overbake to keep the centers creamy.
- You can prepare the mixture up to 24 hours in advance and bake when ready.
Nutrition
- Serving Size: 1 cup
- Calories: 180
- Sugar: 4g
- Sodium: 320mg
- Fat: 13g
- Saturated Fat: 7g
- Unsaturated Fat: 5g
- Trans Fat: 0g
- Carbohydrates: 10g
- Fiber: 1g
- Protein: 6g
- Cholesterol: 30mg
Keywords: corn cheese cups, cheesy corn appetizer, baked corn cups, easy corn snack, muffin tin corn recipe