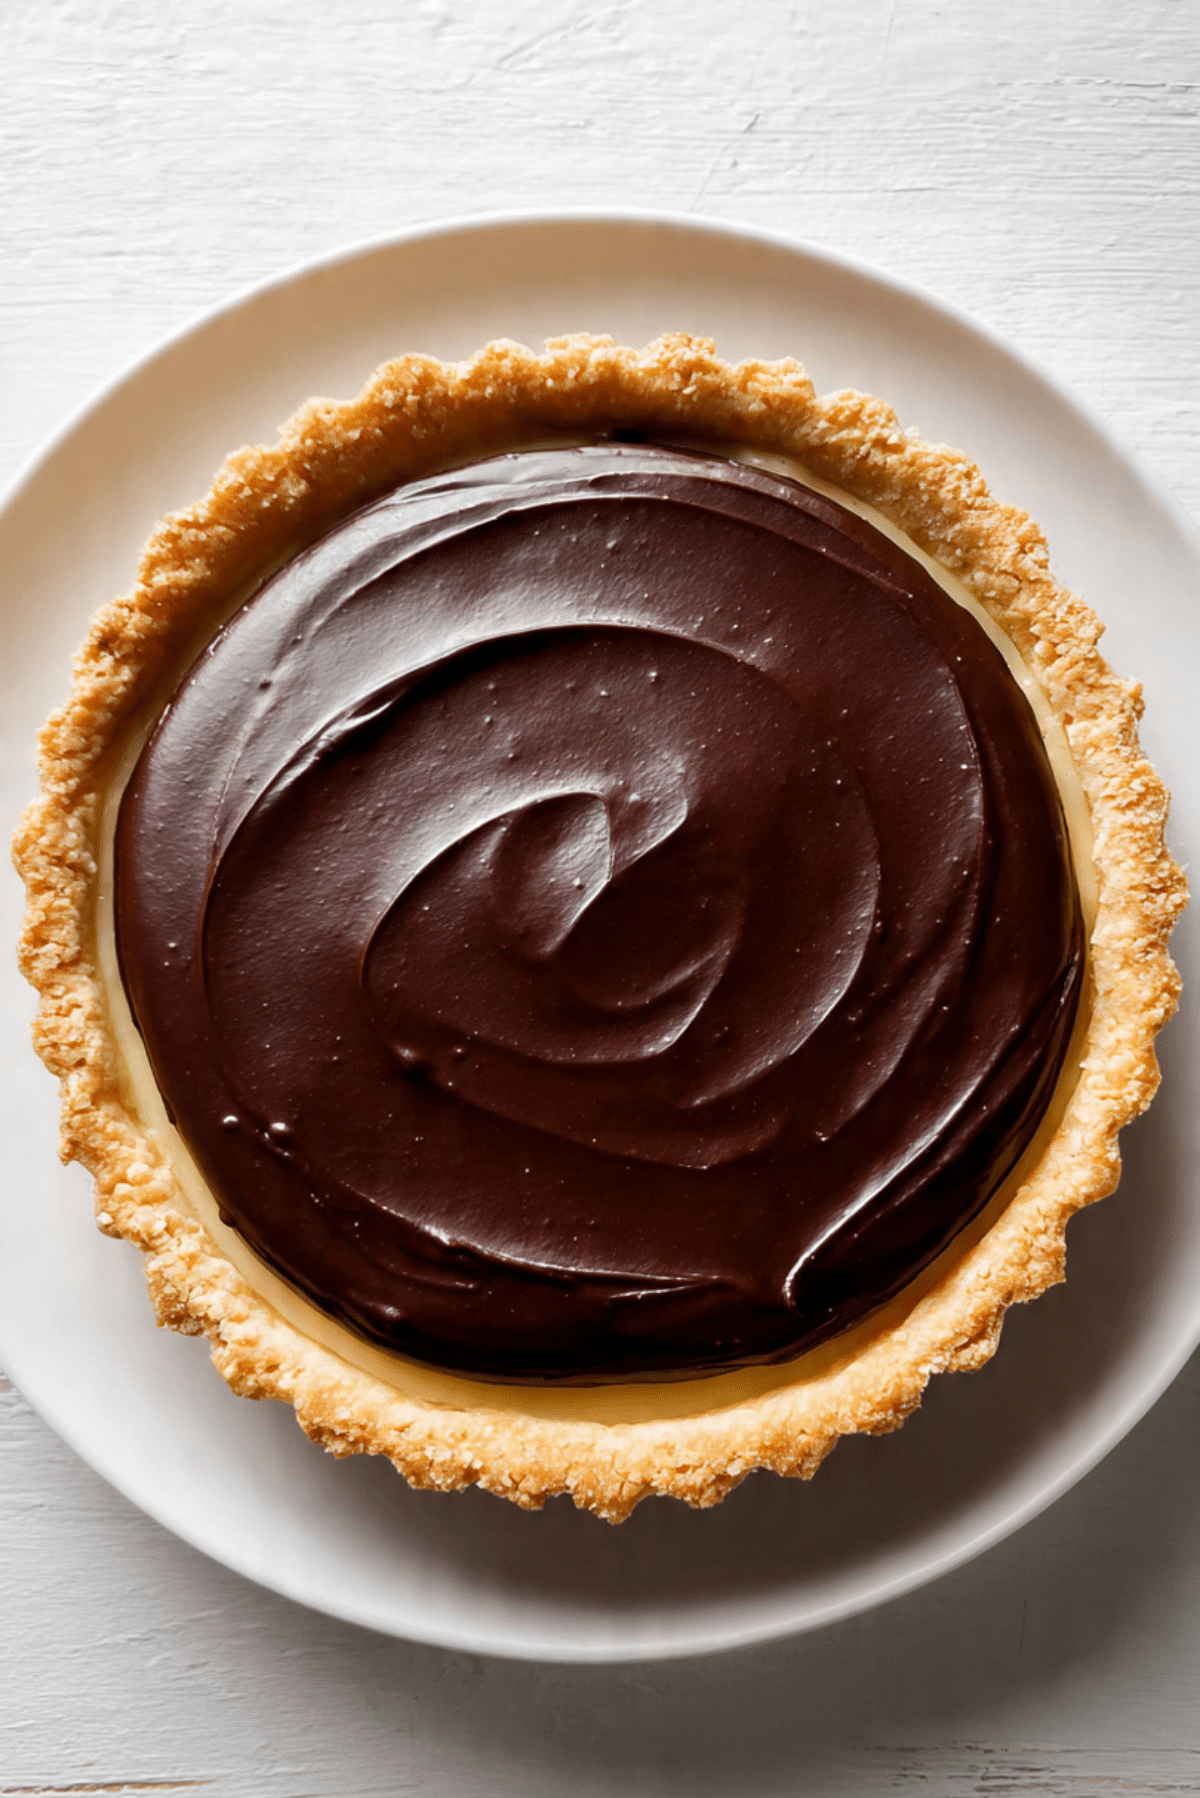
Creamy Torta Susanna
There is something so comforting about a dessert that feels elegant and familiar at the same time, and this one does exactly that. You get a tender pastry shell, a creamy ricotta center, and that glossy chocolate finish that makes every slice feel a little special. Trust me, you’re going to love this, because it brings together softness, richness, and just enough sweetness in a way that feels classic and completely irresistible.
The Dessert That Feels Fancy Without Being Fussy
Some sweets win you over with big drama, but this tart has a quieter kind of charm. It looks beautiful on the table, yet the flavors feel warm and homey from the very first bite. The contrast between the lightly crisp crust, the silky middle, and the smooth chocolate top is what makes it so memorable.
It is the kind of dessert that works for a weekend family dinner, a holiday spread, or even a slow afternoon when you want to bake something that feels meaningful. This one’s a total game-changer, especially if you love desserts that taste rich without feeling too heavy.
A Sweet Slice of Parma Tradition
As lovely as the texture is, the story behind this tart makes it even more special. This dessert comes from Parma in Italy’s Emilia-Romagna region, where it is known for its pastry shell, ricotta filling, and chocolate topping. It is traditionally served chilled, which helps the flavors settle and the texture become even more luscious. :contentReference[oaicite:0]{index=0}
That regional background explains a lot about its character. It feels rustic and refined all at once, which is something Italian baking does so well. Let me tell you, it’s worth every bite, especially once that cool creamy filling meets the rich chocolate layer on top.
Why This Tart Earns a Spot in Your Baking Rotation
Before we get into the details, it helps to know why this dessert is one that people come back to again and again. It has that rare balance of being simple enough to make at home and impressive enough to serve proudly.
Versatile: It fits beautifully as an after-dinner dessert, a holiday centerpiece, or a coffee-time treat. You can dress it up with berries or keep it simple and let the layers speak for themselves.
Budget-Friendly: The core ingredients are pantry and fridge staples like flour, sugar, eggs, butter, ricotta, cream, and chocolate. You get a bakery-style dessert without needing anything too fancy.
Quick and Easy: The process is straightforward, with a simple pastry, a mixed filling, and an easy chocolate topping. Each step feels manageable, even if the final result looks polished.
Customizable: You can add citrus zest, use a darker chocolate topping, or serve it with whipped cream or fruit. Small changes can make it feel personal without changing the soul of the dessert.
Crowd-Pleasing: It has the kind of texture and flavor contrast that makes almost everyone reach for a second slice. Creamy, chocolatey, and lightly crisp is a winning combination.
Make-Ahead Friendly: This tart actually benefits from chilling, which means you can prepare it in advance and let time do some of the work. That makes serving day a lot easier.
Great for Leftovers: A chilled slice the next day is every bit as good, maybe even better. The layers settle, the chocolate firms up gently, and the flavor gets deeper.
Smart Baker Secrets for a Flawless Finish
Now that you know why it is such a keeper, let’s dive into the little details that make it even better. A few smart choices can take it from good to unforgettable.
- Use well-drained ricotta so the filling stays creamy and set, not watery.
- Chill the dough before shaping it, which helps the crust keep its structure in the oven.
- Do not overbake the center, because a slight wobble means it will finish setting as it cools.
- Let the tart cool fully before adding the chocolate topping so the layers stay neat and defined.
- Chill the finished tart before slicing for the cleanest, prettiest pieces.
The Kitchen Tools That Make It Easy
Every great bake starts to feel easier when the right tools are within reach. Nothing here is complicated, but a few basics will make the whole process smoother.
Mixing Bowls: You will need a few bowls to keep the pastry, filling, and topping organized.
Electric Mixer or Whisk: This helps create a smooth ricotta filling with no lumps.
9-inch Tart Pan or Cake Pan: A round pan with enough depth helps hold the creamy center and pastry shell properly.
Spatula: Perfect for smoothing the filling and later spreading the chocolate topping evenly.
Saucepan or Heatproof Bowl: Useful for warming the cream and making the topping silky and glossy.
Cooling Rack: Helps the tart cool evenly before it goes into the fridge.
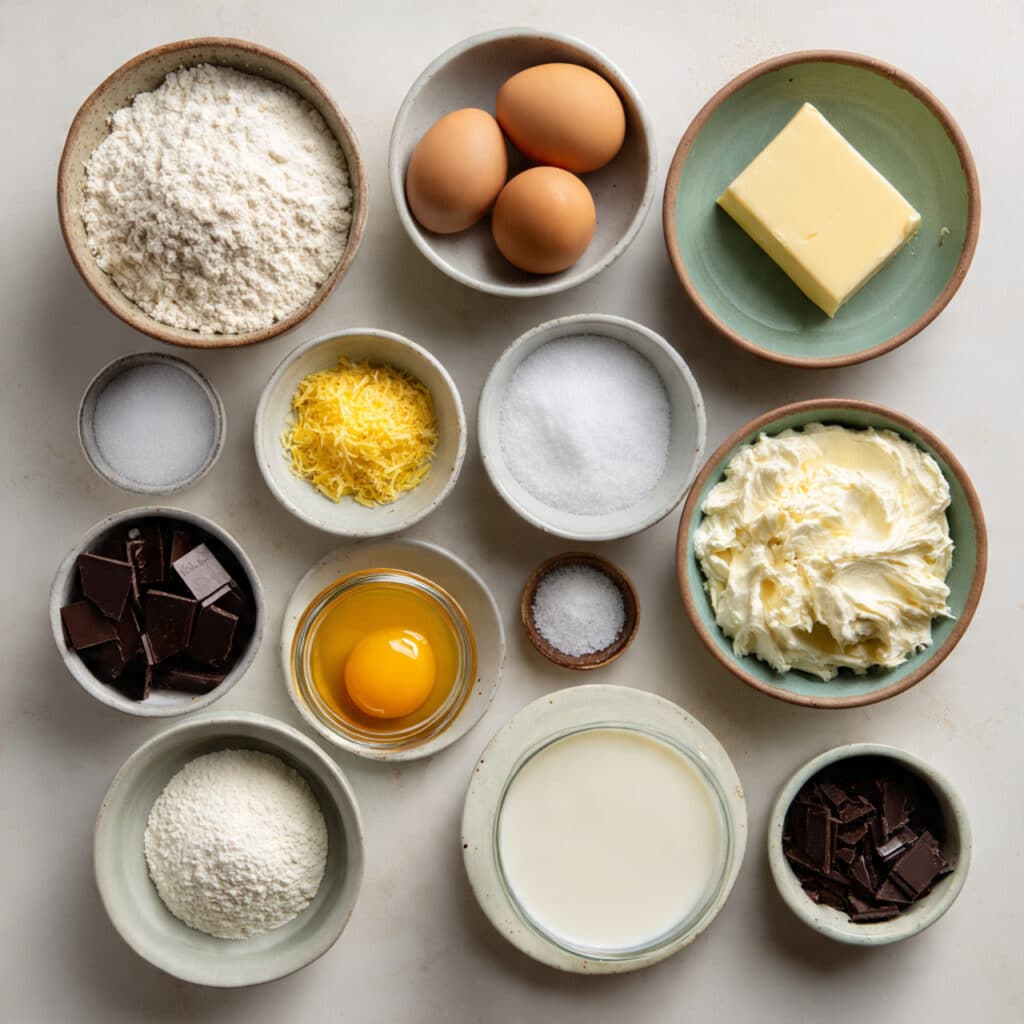
The Ingredients That Build Every Layer Beautifully
And now we get to the heart of it, the ingredients that give this tart its character. Each one has a clear role, and together they create that lovely contrast between delicate pastry, creamy filling, and rich topping.
- All-Purpose Flour: 2 cups (250 g), this forms the base of the pastry shell and gives it structure without making it heavy.
- Granulated Sugar: 1 1/4 cups (250 g total), divided, this sweetens both the pastry and the filling while keeping the flavor balanced.
- Cold Unsalted Butter: 10 1/2 tablespoons (150 g total), divided, this gives the crust tenderness and adds richness to the filling and topping.
- Egg: 1 large, this helps bind the pastry dough so it holds together smoothly.
- Egg Yolks: 5 large, divided, these enrich both the crust and the filling, giving the tart a deeper color and velvety texture.
- Baking Powder: 1 3/4 teaspoons (8 g), this gives the pastry a slightly lighter bite.
- Fine Salt: 1 pinch, this rounds out the sweetness and keeps the flavors from tasting flat.
- Whole Milk Ricotta: 1 2/3 cups (400 g), this is the creamy heart of the tart and gives the filling its soft, delicate texture.
- Lemon Zest: 1 teaspoon, this lifts the filling with a fresh citrus note that keeps everything bright.
- Dark Chocolate: 5.3 ounces (150 g), this creates the glossy topping that adds richness and contrast.
- Heavy Cream: 2/3 cup (150 ml), this melts the chocolate into a smooth topping.
- Honey: 1 teaspoon, this adds a gentle shine and a subtle rounded sweetness to the chocolate layer.
Easy Swaps When You Need a Little Flexibility
Even traditional desserts can leave room for practical swaps, and that is part of the fun. If you are missing an ingredient or want a small twist, these substitutions can help without changing the spirit of the tart too much.
Whole Milk Ricotta: Mascarpone mixed with a little cream cheese for a richer, denser filling.
Lemon Zest: Orange zest for a slightly sweeter and warmer citrus note.
Dark Chocolate: Semisweet chocolate if you want a softer, sweeter finish.
Heavy Cream: Full-fat cooking cream, as long as it pours easily and heats smoothly.
All-Purpose Flour: Type 00 flour if you want a slightly finer, more delicate pastry texture.
The Star Ingredients That Do the Heavy Lifting
Some ingredients quietly support a dessert, and some define it. In this tart, there are two that really shape the whole experience.
Ricotta: This is what gives the center its soft, creamy texture and light tang. It keeps the filling feeling elegant instead of overly dense.
Dark Chocolate: This topping brings depth, gloss, and just enough bitterness to balance the sweet pastry and creamy middle.
Let’s Bake This Beauty Step by Step
At this point, you can already picture how good that first chilled slice is going to be. So let’s dive into the process and bring each layer together in a way that feels easy and rewarding.
- Preheat Your Equipment: Preheat your oven to 350°F (180°C). Lightly grease a 9-inch tart or cake pan, or line the base with parchment paper for easier removal.
- Combine Ingredients: In a mixing bowl, combine the flour, 150 g of the sugar, baking powder, and salt. Rub in 100 g of cold butter until the mixture looks sandy. Add the whole egg and 1 egg yolk, then mix until a soft dough forms. In another bowl, beat the remaining 4 egg yolks with the remaining 100 g sugar until lighter in color, then mix in the ricotta, 50 g melted butter, and lemon zest until smooth.
- Prepare Your Cooking Vessel: Press the pastry dough into the pan, covering the base and building the sides up evenly. Prick the bottom gently with a fork so the crust bakes neatly.
- Assemble the Dish: Spoon the ricotta filling into the pastry shell and smooth the top with a spatula so it bakes evenly.
- Cook to Perfection: Bake for 40 to 45 minutes, until the edges are lightly golden and the center looks just set. Remove from the oven and let it cool completely in the pan.
- Finishing Touches: Warm the heavy cream until just hot, then pour it over the chopped dark chocolate. Add the honey and 20 g butter if using from your measured total, then stir until smooth and glossy. Spread the chocolate topping over the cooled tart in an even layer.
- Serve and Enjoy: Chill the tart for at least 4 hours, or until the topping is set and the filling is fully firm. Slice and serve cold for the best texture and cleanest finish.
Where the Texture and Flavor Really Come Alive
Once it is chilled, this tart becomes something truly special. The pastry holds a gentle bite around the edges, the ricotta center turns smooth and almost mousse-like, and the chocolate top settles into a glossy layer that snaps ever so slightly under the knife.
Flavor-wise, it is beautifully balanced. The ricotta brings mild sweetness and softness, the lemon zest adds brightness, and the dark chocolate gives depth. Every bite moves from buttery to creamy to rich, which is exactly what makes this dessert so satisfying.
Little Tricks That Make a Big Difference
By now, you have the full picture, and a few extra tips can make the whole experience even smoother from start to finish.
- Drain the ricotta well: Excess moisture can keep the filling from setting properly.
- Cool completely before topping: Warm pastry and chocolate do not always play nicely together.
- Use good chocolate: Since the topping is simple, the flavor of the chocolate really matters.
- Chill before slicing: This gives you neat layers and that classic bakery-style finish.
Common Slip-Ups and How to Avoid Them
Even a simple tart can go sideways if a few details get overlooked, so it helps to know what to watch for before you begin.
- Overworking the dough: This can make the crust tougher than it should be. Mix only until it comes together.
- Using watery ricotta: A wet filling may bake unevenly and stay too loose in the center.
- Overbaking the tart: If the filling bakes too long, it can lose that soft creamy texture.
- Pouring topping onto a warm tart: This can make the chocolate layer messy instead of smooth and defined.
A Quick Look at the Nutrition
Before serving that first slice, here is a simple overview of what to expect nutritionally. This is a rich dessert, so a modest slice goes a long way and feels wonderfully satisfying.
Servings: 8
Calories per serving: 430
Note: These are approximate values.
Timing It All Out So the Process Feels Easy
One of the nicest things about this dessert is that the active work is very manageable. Most of the patience comes later, when the fridge helps everything settle into those beautiful layers.
Prep Time: 30 minutes
Cook Time: 45 minutes
Total Time: 1 hour 15 minutes, plus chilling time
How to Prep Ahead and Store It Well
Since this tart loves time in the fridge, it is an excellent make-ahead dessert. You can bake it the day before, add the topping, and let it chill overnight so the flavors deepen and the slices come out beautifully clean.
Store leftovers covered in the refrigerator for up to 4 days. For longer storage, freeze individual slices well wrapped, then thaw them in the fridge before serving. A cold slice straight from the fridge is honestly part of the charm.
The Best Ways to Serve It
Serving this tart is where you can keep things classic or add a little flourish. It is lovely on its own, but a small finishing touch can make it feel extra special.
Try it with a spoonful of softly whipped cream, a few fresh raspberries, or a dusting of cocoa powder. It also pairs beautifully with espresso, black coffee, or tea, especially when you want to lean into that rich chocolate finish.
Clever Ways to Use Up Leftover Slices
If you happen to have leftovers, which is never guaranteed, there are a few fun ways to enjoy them beyond a straight slice from the fridge.
Turn a piece into a plated dessert with whipped cream and berries. Chop a small slice and layer it into a dessert glass with extra cream for an easy trifle-style treat. You can even serve thin chilled wedges alongside coffee for a simple little afternoon sweet.
Extra Details That Help It Shine
Sometimes it is the smallest choices that make homemade desserts feel truly polished. A little care here goes a long way.
Use room temperature filling ingredients for a smoother mixture. Spread the chocolate topping gently so it stays glossy. Let the tart chill uncovered for a short while before covering it fully, which helps the top stay neat and clean.
A Few Touches That Make It Look Bakery-Worthy
Presentation matters, especially with a dessert as elegant as this one. The good news is that it does not need much to look stunning.
Use a warm clean knife for slicing, wiping between cuts for tidy edges. Serve it on a simple cake stand or white platter so the pale filling and dark topping stand out. A few berries on the side can add color without taking attention away from the tart itself.
Delicious Variations Worth Trying
Once you have made the classic version, it is easy to imagine a few twists that still feel true to the dessert’s style.
Orange Chocolate Version: Swap the lemon zest for orange zest to bring a warmer citrus note to the filling.
Extra Dark Finish: Use a higher percentage dark chocolate for a deeper, more intense topping.
Vanilla Ricotta Twist: Add 1 teaspoon vanilla extract to the filling for a softer, sweeter aroma.
Mini Tartlets: Divide the dough and filling among smaller tart pans for individual servings that look extra charming.
Berry Garnish Style: Top each slice with fresh raspberries or strawberries right before serving for a bright, juicy contrast.
FAQ’s
Q1: Can I make this tart a day ahead?
Yes, and it actually gets even better after chilling overnight. The filling firms up nicely and the flavors settle beautifully.
Q2: Does it need to be served cold?
Yes, serving it chilled gives you the best texture. The filling feels creamier and the chocolate topping stays perfectly set. :contentReference[oaicite:1]{index=1}
Q3: Can I use low-fat ricotta?
You can, but full-fat ricotta gives a much creamier and more satisfying result. Low-fat versions may feel thinner and less rich.
Q4: What kind of chocolate works best?
Dark chocolate gives the best balance because it keeps the topping rich without making the tart overly sweet.
Q5: Can I freeze it?
Yes, slices freeze well when wrapped tightly. Thaw them in the refrigerator before serving.
Q6: Why did my filling come out too soft?
Usually that happens from watery ricotta or not enough chilling time. Draining the ricotta well makes a big difference.
Q7: Can I skip the citrus zest?
Yes, but it adds freshness that brightens the filling. Without it, the tart will taste a little richer and heavier.
Q8: What pan size should I use?
A 9-inch pan works very well for this amount of filling and pastry.
Q9: Can I make the crust in advance?
Yes, you can prepare the dough earlier and keep it chilled until you are ready to assemble the tart.
Q10: Is this more like cheesecake or tart?
It sits somewhere beautifully in between. You get the creamy feel of a ricotta cheesecake with the structure and bite of a pastry tart.
Conclusion
This tart has such a lovely rhythm to it, from the buttery crust to the soft ricotta center and that glossy chocolate finish. It feels timeless, comforting, and just a little bit fancy in the best possible way. Trust me, once you slice into it and see those layers, you will understand why this dessert is so beloved. Bake it once, chill it well, and enjoy every creamy, chocolatey bite.
Print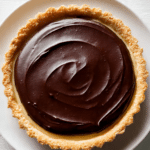
Creamy Torta Susanna
- Prep Time: 30 minutes
- Cook Time: 45 minutes
- Total Time: 1 hour 15 minutes, plus chilling time
- Yield: 8 servings 1x
- Category: Dessert
- Method: Baking
- Cuisine: Italian
- Diet: Vegetarian
Description
A classic Italian tart from Parma with a tender pastry shell, creamy ricotta filling, and a glossy dark chocolate topping. It is rich, elegant, and perfect served chilled.
Ingredients
- 2 cups (250 g) all-purpose flour
- 1 1/4 cups (250 g) granulated sugar, divided
- 10 1/2 tablespoons (150 g) unsalted butter, divided
- 1 large egg
- 5 large egg yolks, divided
- 1 3/4 teaspoons (8 g) baking powder
- 1 pinch fine salt
- 1 2/3 cups (400 g) whole milk ricotta
- 1 teaspoon lemon zest
- 5.3 ounces (150 g) dark chocolate, chopped
- 2/3 cup (150 ml) heavy cream
- 1 teaspoon honey
Instructions
- Preheat the oven to 350°F (180°C). Lightly grease a 9-inch tart or cake pan, or line the base with parchment paper.
- In a bowl, mix the flour, 150 g of the sugar, baking powder, and salt. Rub in 100 g of cold butter until the mixture is sandy. Add the whole egg and 1 egg yolk, then mix until a soft dough forms.
- In another bowl, beat the remaining 4 egg yolks with the remaining 100 g sugar until lighter in color. Mix in the ricotta, 50 g melted butter, and lemon zest until smooth.
- Press the dough into the prepared pan, covering the base and sides evenly. Prick the bottom lightly with a fork.
- Pour the ricotta filling into the pastry shell and smooth the top.
- Bake for 40 to 45 minutes, until the edges are lightly golden and the center is just set. Cool completely.
- Heat the heavy cream until just hot. Pour over the chopped dark chocolate, then add the honey and stir until smooth and glossy.
- Spread the chocolate topping evenly over the cooled tart.
- Chill for at least 4 hours before slicing and serving.
Notes
- Drain the ricotta well before mixing so the filling sets properly.
- Let the tart cool completely before adding the chocolate topping.
- Serve chilled for the cleanest slices and best texture.
- Store covered in the refrigerator for up to 4 days.
Nutrition
- Serving Size: 1 slice
- Calories: 430
- Sugar: 28 g
- Sodium: 120 mg
- Fat: 24 g
- Saturated Fat: 14 g
- Unsaturated Fat: 8 g
- Trans Fat: 0 g
- Carbohydrates: 44 g
- Fiber: 2 g
- Protein: 10 g
- Cholesterol: 165 mg
Keywords: Creamy Torta Susanna, Italian ricotta tart, chocolate ricotta tart, Parma dessert, baked ricotta tart