Easy Freezer Waffles
There’s something undeniably comforting about pulling a warm waffle from the toaster, the scent of vanilla and golden butter rising in the air. Whether it’s a busy weekday morning or a lazy weekend brunch, these easy freezer waffles bring joy to the table with their crisp edges, fluffy center, and that perfect hint of sweetness. They’re not just breakfast — they’re little squares of happiness, ready in minutes.
Behind the Recipe
This recipe was born out of a very real struggle: trying to make weekday mornings less chaotic. Between rushing out the door and attempting to feed everyone something more exciting than a granola bar, I needed a breakfast that felt homemade but could be ready in a snap. These waffles were the answer. The first time I made them in bulk and popped them into the freezer, I knew we had struck gold. Since then, they’ve been a regular in my kitchen, and a request from just about everyone who’s tried them.
Recipe Origin or Trivia
Waffles have a long and delicious history dating back to the Middle Ages. Originally made over open flames with patterned irons, they were seen as a luxurious treat. Fast forward to today, and waffles have become a staple across the globe — from Belgium’s deep-pocketed versions to the crisp and thin varieties in Scandinavia. The idea of freezing them for convenience was popularized in the 1950s, giving us all the joy of a hot waffle without the morning mess.
Why You’ll Love Easy Freezer Waffles
Let me tell you, these waffles are a total game-changer — here’s why:
Versatile: Top them with fruit, syrup, nut butter, or yogurt — they play well with everything.
Budget-Friendly: Made with pantry staples, they’re a fraction of store-bought freezer waffles.
Quick and Easy: Mix, pour, cook, freeze — that’s it.
Customizable: Add cinnamon, swap flours, mix in berries or chocolate chips.
Crowd-Pleasing: Everyone from toddlers to grandparents loves them.
Make-Ahead Friendly: Perfect for batch cooking on weekends.
Great for Leftovers: Pop ‘em in the toaster and breakfast is served.
Chef’s Pro Tips for Perfect Results
Want to take your freezer waffles from good to can’t-stop-eating amazing? Here’s how:
- Use ripe bananas: They add natural sweetness and keep the texture moist.
- Don’t overmix: A few lumps in the batter keep the waffles tender, not tough.
- Let them cool fully before freezing: Trapped steam will make them soggy if frozen warm.
- Flash freeze on a tray first: Prevents them from sticking together in storage.
- Toast straight from frozen: No need to thaw — straight into the toaster for a crisp finish.
Kitchen Tools You’ll Need
You don’t need a fancy setup — just these basics:
Waffle maker: For that classic shape and texture.
Mixing bowls: One for wet, one for dry.
Whisk: For a smooth batter.
Measuring cups and spoons: Accuracy = success.
Cooling rack: Keeps them from getting soggy before freezing.
Freezer-safe bags or containers: For storage.
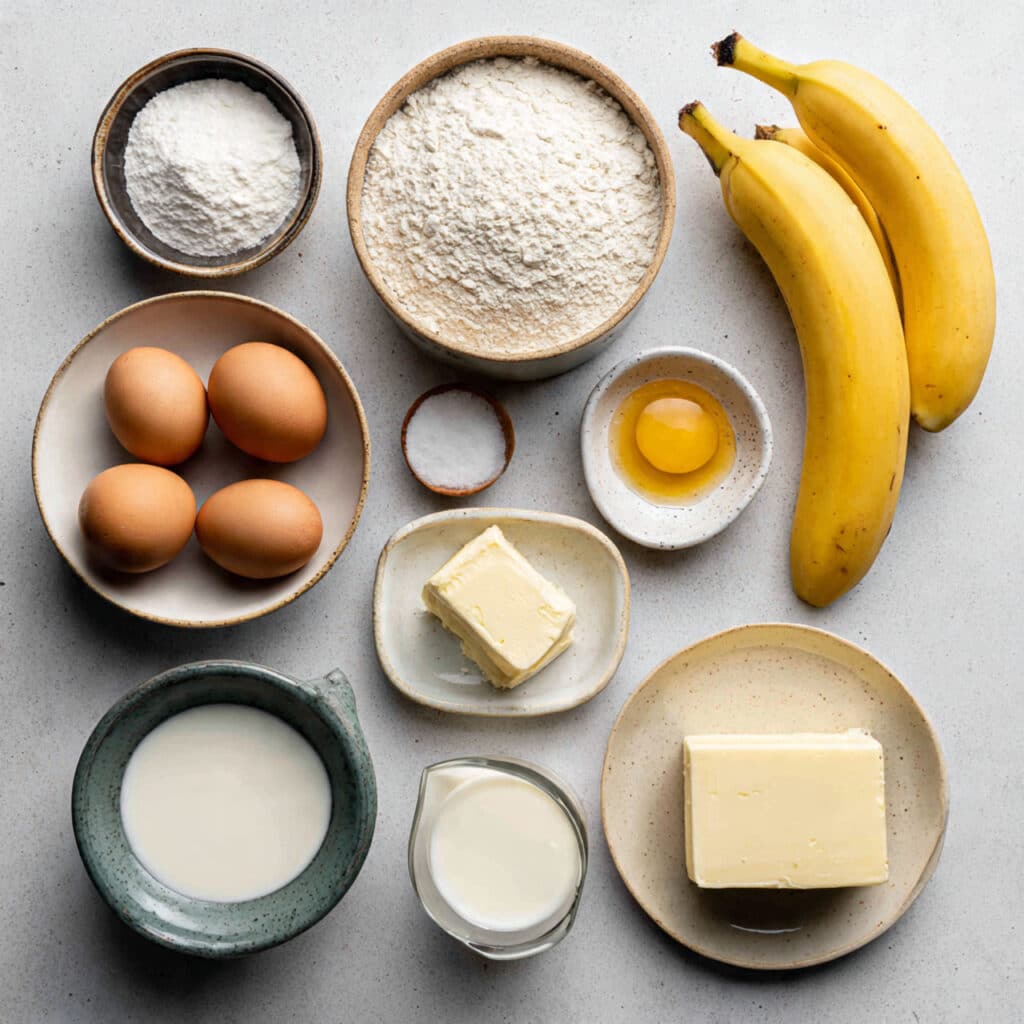
Ingredients in Easy Freezer Waffles
These waffles come together with simple ingredients that harmonize beautifully to create that golden, fluffy bite.
- All-purpose flour: 2 cups — forms the base structure for a light yet sturdy waffle.
- Baking powder: 2 teaspoons — gives the waffles that lovely rise and fluffiness.
- Salt: ½ teaspoon — enhances the flavor and balances the sweetness.
- Granulated sugar: 2 tablespoons — adds a subtle sweetness.
- Eggs: 2 large — bind the ingredients and provide richness.
- Milk: 1 ¾ cups — creates a smooth, pourable batter and adds moisture.
- Unsalted butter: 4 tablespoons (melted) — adds flavor and crisp texture.
- Vanilla extract: 1 teaspoon — for that cozy, sweet aroma.
- Ripe bananas: 2 medium, mashed — a natural sweetener and moisture booster.
Ingredient Substitutions
Feel like switching things up? No problem.
All-purpose flour: Whole wheat flour for a nuttier taste.
Granulated sugar: Maple syrup or honey for a natural sweetener.
Milk: Almond, oat, or soy milk for a dairy-free version.
Butter: Coconut oil or a vegan butter substitute.
Eggs: Use flax eggs (1 tablespoon flaxseed + 3 tablespoons water per egg) for a vegan option.
Ingredient Spotlight
Bananas: Not only do they naturally sweeten the waffles, but they also create a soft, moist texture that keeps the waffles from drying out in the freezer.
Baking Powder: The secret behind the waffles’ rise, this humble ingredient ensures a fluffy interior with every bite.
Instructions for Making Easy Freezer Waffles
We’re about to make magic happen — get ready for waffle bliss in just a few steps.
- Preheat Your Equipment:
Heat your waffle maker according to manufacturer instructions and lightly grease if needed. - Combine Ingredients:
In one bowl, whisk together the flour, baking powder, salt, and sugar. In another, whisk the eggs, milk, melted butter, vanilla, and mashed bananas. Pour the wet into the dry and mix gently until just combined. - Prepare Your Cooking Vessel:
Lightly grease the waffle iron and let it come to full heat for crispier edges. - Assemble the Dish:
Pour the batter into the center of the waffle maker, using a ladle or measuring cup. Don’t overfill. - Cook to Perfection:
Close the lid and cook until golden brown and crisp, about 3 to 4 minutes depending on your waffle maker. - Finishing Touches:
Remove carefully and let cool completely on a wire rack before freezing. - Serve and Enjoy:
Pop frozen waffles into the toaster or oven and top with your favorites — fresh fruit, syrup, nut butter, or all of the above.
Texture & Flavor Secrets
What makes these freezer waffles irresistible is the balance. The outside crisps up beautifully in the toaster, while the inside stays fluffy and moist thanks to the bananas and butter. Vanilla adds that warm, nostalgic aroma and just a touch of sweetness that pairs with any topping.
Cooking Tips & Tricks
Here’s how to make your waffle game even stronger:
- Use a measuring cup to pour equal amounts into the waffle iron for even cooking.
- Let waffles cool fully before freezing to avoid sogginess.
- Freeze in a single layer before stacking to prevent sticking.
What to Avoid
Avoid these common mistakes to keep your waffles top-notch:
- Overmixing the batter — it leads to dense, chewy waffles.
- Using cold ingredients — let eggs and milk come to room temperature first.
- Storing while warm — steam trapped in bags causes sogginess.
Nutrition Facts
Servings: 8 waffles
Calories per serving: 210
Note: These are approximate values.
Preparation Time
Prep Time: 10 minutes
Cook Time: 20 minutes
Total Time: 30 minutes
Make-Ahead and Storage Tips
Once cooled, place the waffles in a single layer on a baking sheet and freeze for 30 minutes. Then transfer to freezer bags or containers. They’ll stay fresh for up to 2 months. To reheat, just pop them in the toaster or warm them in the oven at 350°F for about 5 minutes.
How to Serve Easy Freezer Waffles
These waffles shine with classic maple syrup, but the fun doesn’t stop there:
- Add sliced strawberries, bananas, or blueberries.
- Drizzle with nut butter or chocolate sauce.
- Top with a scoop of Greek yogurt and a sprinkle of granola.
- Serve with eggs and sausage for a full breakfast spread.
Creative Leftover Transformations
Get playful with those extras:
- Make a waffle sandwich with peanut butter and banana slices.
- Break into pieces and layer in a breakfast parfait.
- Use as the base for mini fruit and yogurt pizzas.
Additional Tips
To keep things extra smooth:
- Store waffles with parchment between layers.
- Add cinnamon or nutmeg for a cozy flavor twist.
- Make a double batch and freeze half — trust me, you’ll want more.
Make It a Showstopper
Serve these golden beauties on a colorful plate with fresh fruit on the side. A little powdered sugar and a mint leaf on top makes them brunch-worthy in seconds.
Variations to Try
- Chocolate Chip Waffles: Stir in mini chocolate chips before cooking.
- Cinnamon Swirl: Add a ribbon of cinnamon-sugar into the batter.
- Berry Burst: Fold in fresh or frozen berries for pops of juicy flavor.
- Protein Boost: Add a scoop of protein powder to the dry mix.
- Pumpkin Spice: Sub mashed banana with pumpkin puree and add spice blend.
FAQ’s
Q1: Can I use whole wheat flour instead of all-purpose?
Yes, but the texture will be a bit denser. Start with a 50/50 mix to ease into it.
Q2: Can I skip the bananas?
Sure! Just replace them with ½ cup applesauce or pumpkin puree.
Q3: How do I know when my waffles are done cooking?
They should be golden brown and lift easily from the waffle maker.
Q4: Can I make the batter ahead of time?
It’s best used fresh, but you can refrigerate it for up to 12 hours.
Q5: What’s the best way to freeze them?
Cool completely, freeze flat on a tray, then transfer to bags.
Q6: How long do they keep in the freezer?
Up to 2 months for best flavor and texture.
Q7: Can I reheat them in the microwave?
You can, but the texture is better if you use a toaster or oven.
Q8: What toppings work well with these waffles?
Fruit, syrup, nut butter, yogurt, whipped cream — get creative!
Q9: Are they kid-friendly?
Absolutely! Add chocolate chips or sprinkles for extra fun.
Q10: Can I double the recipe?
Yes, it scales beautifully — perfect for weekend batch cooking.
Conclusion
Whether you’re looking to simplify your mornings or add a bit of homemade magic to your freezer stash, these easy freezer waffles are the answer. They’re the kind of recipe you’ll come back to again and again — warm, reliable, and just plain delicious. So go ahead, make a batch (or two), and savor the joy of homemade waffles anytime you want.
Print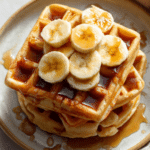
Easy Freezer Waffles
- Prep Time: 10 minutes
- Cook Time: 20 minutes
- Total Time: 30 minutes
- Yield: 8 waffles 1x
- Category: Breakfast
- Method: Waffle Iron
- Cuisine: American
- Diet: Vegetarian
Description
Crispy on the outside, fluffy on the inside, these easy freezer waffles are the perfect make-ahead breakfast for busy mornings. Made with simple pantry staples and ripe bananas, they’re packed with flavor and freeze beautifully.
Ingredients
- 2 cups all-purpose flour
- 2 teaspoons baking powder
- 1/2 teaspoon salt
- 2 tablespoons granulated sugar
- 2 large eggs
- 1 3/4 cups milk
- 4 tablespoons unsalted butter, melted
- 1 teaspoon vanilla extract
- 2 ripe bananas, mashed
Instructions
- Preheat your waffle maker according to manufacturer instructions and lightly grease if needed.
- In a bowl, whisk together flour, baking powder, salt, and sugar.
- In a separate bowl, whisk the eggs, milk, melted butter, vanilla, and mashed bananas.
- Combine the wet ingredients with the dry and mix gently until just combined.
- Lightly grease the waffle iron and let it heat fully.
- Pour the batter into the waffle maker and cook until golden brown, about 3 to 4 minutes.
- Transfer to a wire rack and let cool completely before freezing.
- Freeze flat, then transfer to a freezer bag or container.
- To serve, toast frozen waffles until hot and crisp.
Notes
- Flash freeze waffles before storing to prevent sticking.
- Use very ripe bananas for maximum sweetness and moisture.
- Customize with add-ins like chocolate chips or blueberries.
- For best texture, reheat in a toaster or oven instead of the microwave.
Nutrition
- Serving Size: 1 waffle
- Calories: 210
- Sugar: 5g
- Sodium: 180mg
- Fat: 9g
- Saturated Fat: 5g
- Unsaturated Fat: 3g
- Trans Fat: 0g
- Carbohydrates: 28g
- Fiber: 2g
- Protein: 5g
- Cholesterol: 55mg
Keywords: freezer waffles, make-ahead waffles, banana waffles, easy breakfast, homemade waffles, waffle recipe