Frozen Peas – Garlic Buttered Peas
There is something unexpectedly lovable about a bowl of buttery peas when they are done right. They come out glossy, bright, and full of sweet little pops of flavor, and once that warm garlic butter wraps around them, the whole thing turns into a side dish that feels far more special than it has any right to. Trust me, you’re going to love this, because it takes a humble freezer staple and turns it into something cozy, fragrant, and seriously satisfying.
Why This Simple Side Deserves a Spot on Your Table
Some recipes win you over with drama, and some win you over with pure comfort. This one falls into that second category. These buttery peas are fast, familiar, and incredibly easy to fit into almost any meal. They bring color to the plate, a soft sweetness to balance savory mains, and just enough garlic richness to make every bite feel finished and full.
It is the kind of recipe you pull out on a busy weeknight, then keep making because everyone at the table actually eats it happily. Let me tell you, it’s worth every bite.
A Little Kitchen Story Behind Buttered Peas
Peas with butter have been a beloved side in home kitchens for generations, and it is easy to understand why. In many Western home-cooked meals, especially in British and American kitchens, buttered peas became a dependable table staple because they were affordable, easy to prepare, and paired beautifully with roasted meats, mashed potatoes, and simple suppers.
Garlic gives this classic version a little extra depth and warmth, which makes it feel both nostalgic and fresh. It still keeps that old-fashioned comfort, but with a more flavorful twist that feels right at home in a modern kitchen.
Reasons This Recipe Always Works
Before we get into the pan and that lovely buttery aroma, let’s talk about why this little recipe earns its keep again and again.
Versatile: These peas slide easily next to chicken, fish, pasta, rice dishes, or even a simple baked potato. They are gentle in flavor, yet still bring enough richness to make the plate feel complete.
Budget-Friendly: Frozen peas are one of those smart freezer ingredients that give you a lot for very little. A few pantry basics turn them into something that tastes thoughtful and homemade.
Quick and Easy: From freezer to table, this comes together in minutes. This one’s a total game-changer when dinner needs a fast vegetable that does not taste rushed.
Customizable: You can brighten them with lemon, finish with herbs, or add a pinch more pepper depending on your mood. The base is simple, which means it plays nicely with your own style.
Crowd-Pleasing: Even people who usually ignore vegetables tend to go back for these. The buttery coating and sweet peas make them feel familiar and comforting.
Make-Ahead Friendly: You can prep the garlic and parsley ahead of time, which makes the final cooking process even faster. It is a very low-stress side dish.
Great for Leftovers: Leftover peas can be folded into rice, pasta, or even a quick soup the next day. Nothing goes to waste, and the flavor still holds up beautifully.
Smart Little Tricks for Better Peas Every Time
Now that the dish has earned your attention, here are a few insider tips that help it taste especially good.
- Use a wide skillet instead of a deep pot so the peas heat evenly and the butter coats them more smoothly.
- Cook the garlic briefly, just until fragrant, because burnt garlic can make the whole dish taste bitter.
- Add a splash of water to help the frozen peas steam gently without becoming mushy.
- Finish with parsley at the end so it stays fresh-looking and bright.
- Taste before serving, then adjust the salt and pepper right at the finish for the cleanest flavor.
Kitchen Tools That Make This Recipe Effortless
You do not need much here, which is part of the beauty of it. A few everyday tools are all it takes.
Large skillet: This gives the peas enough space to warm through quickly and evenly.
Wooden spoon or silicone spatula: Perfect for gently stirring without crushing the peas.
Small knife: Useful for mincing the garlic and chopping the parsley.
Cutting board: Keeps your prep simple and organized.
Measuring spoons: Helps you get the butter, seasoning, and lemon juice balanced just right.
What You’ll Need to Bring It All Together
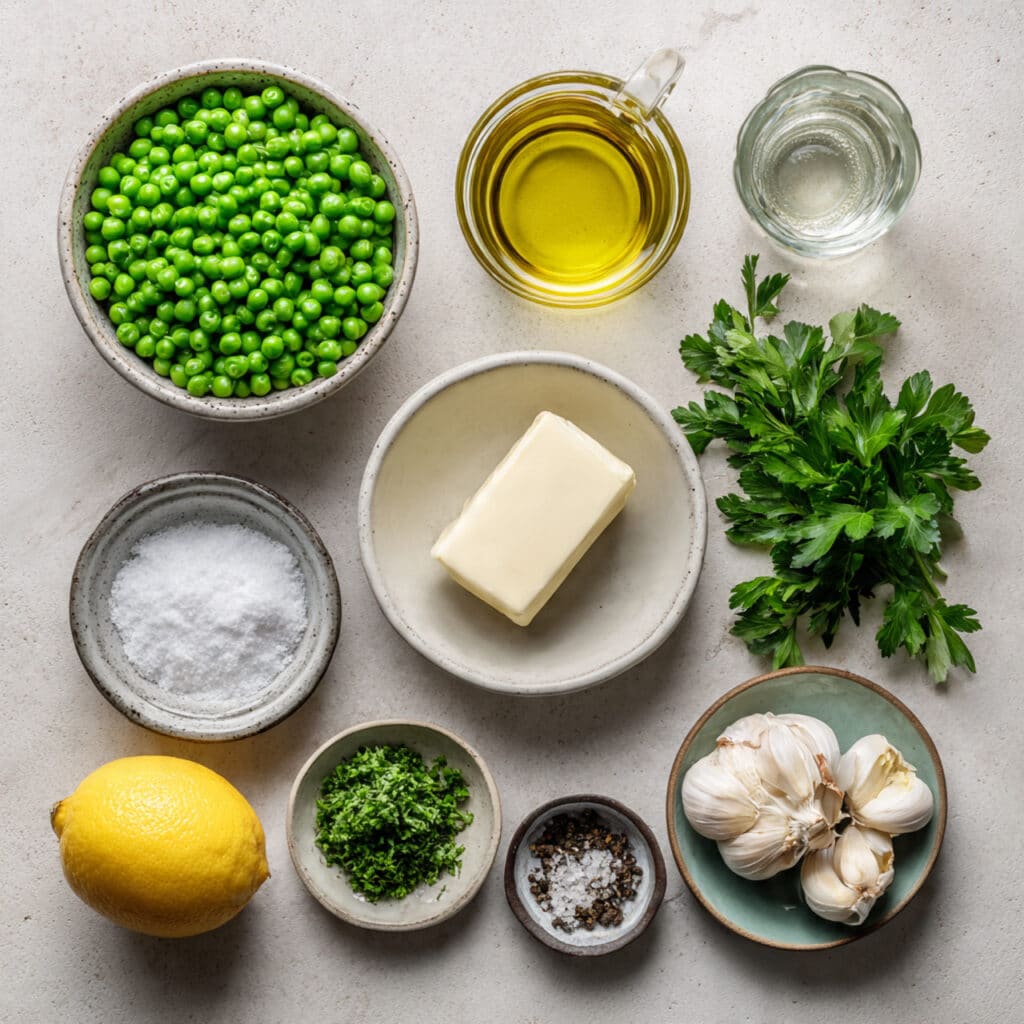
The ingredient list is short, but every item pulls its weight. Together, they create that perfect mix of sweetness, richness, and savory aroma.
- Frozen peas: 4 cups, these are the heart of the dish and bring sweetness, color, and that tender pop in every bite.
- Unsalted butter: 2 tablespoons, this creates the silky coating that makes the peas taste rich and comforting.
- Garlic: 3 cloves, minced, this adds warmth and a savory fragrance that makes the whole pan smell amazing.
- Water: 2 tablespoons, this helps the peas steam gently and heat through without drying out.
- Salt: 1/4 teaspoon, this sharpens all the flavors and keeps the butter from tasting flat.
- Black pepper: 1/8 teaspoon, this adds a light earthy kick without overwhelming the sweetness of the peas.
- Fresh parsley: 1 tablespoon, chopped, this gives the final dish a little fresh green lift.
- Lemon juice: 1 teaspoon, optional, this brightens the buttery flavor and adds a clean finish.
Easy Swaps for What You Have on Hand
Even simple recipes can be flexible, and this one is especially forgiving.
Unsalted butter: Olive oil or plant-based butter.
Fresh parsley: Chives or dill.
Lemon juice: A tiny splash of apple cider vinegar.
Black pepper: White pepper.
Frozen peas: Frozen petite peas.
The Ingredients That Truly Make It Shine
A few ingredients may be simple, but they absolutely define the final result.
Frozen peas: Good frozen peas are naturally sweet and tender, and they cook quickly without a lot of fuss. They are the reason this dish tastes fresh even when it comes straight from the freezer.
Garlic: Once it hits warm butter, the aroma instantly changes the mood of the kitchen. It gives the peas depth and turns a basic side into something that feels intentional and full of flavor.
Let’s Get These Buttery Peas on the Table
And now we get to the fun part, where the kitchen starts smelling warm and savory and dinner suddenly feels very close. Here are the steps you’re going to follow.
- Preheat Your Equipment: Place a large skillet over medium heat and let it warm for about 1 minute so the butter melts evenly once it goes in.
- Combine Ingredients: Add the unsalted butter to the skillet. Once melted, stir in the minced garlic and cook for 30 seconds, just until fragrant and soft.
- Prepare Your Cooking Vessel: Pour in the water, then add the frozen peas, salt, and black pepper. Stir gently so the peas are evenly coated in the garlic butter mixture.
- Assemble the Dish: Spread the peas into an even layer in the skillet and let them warm through for 3 to 4 minutes, stirring once or twice so they heat evenly.
- Cook to Perfection: Continue cooking for another 2 to 3 minutes, until the peas are hot, tender, and glossy but still bright green. Do not overcook them, because you want them soft, not wrinkled.
- Finishing Touches: Remove the skillet from the heat, then stir in the chopped parsley and the lemon juice, if using. Give everything one final gentle toss.
- Serve and Enjoy: Spoon the peas into a serving bowl and serve right away while they are warm, buttery, and full of that soft garlic aroma.
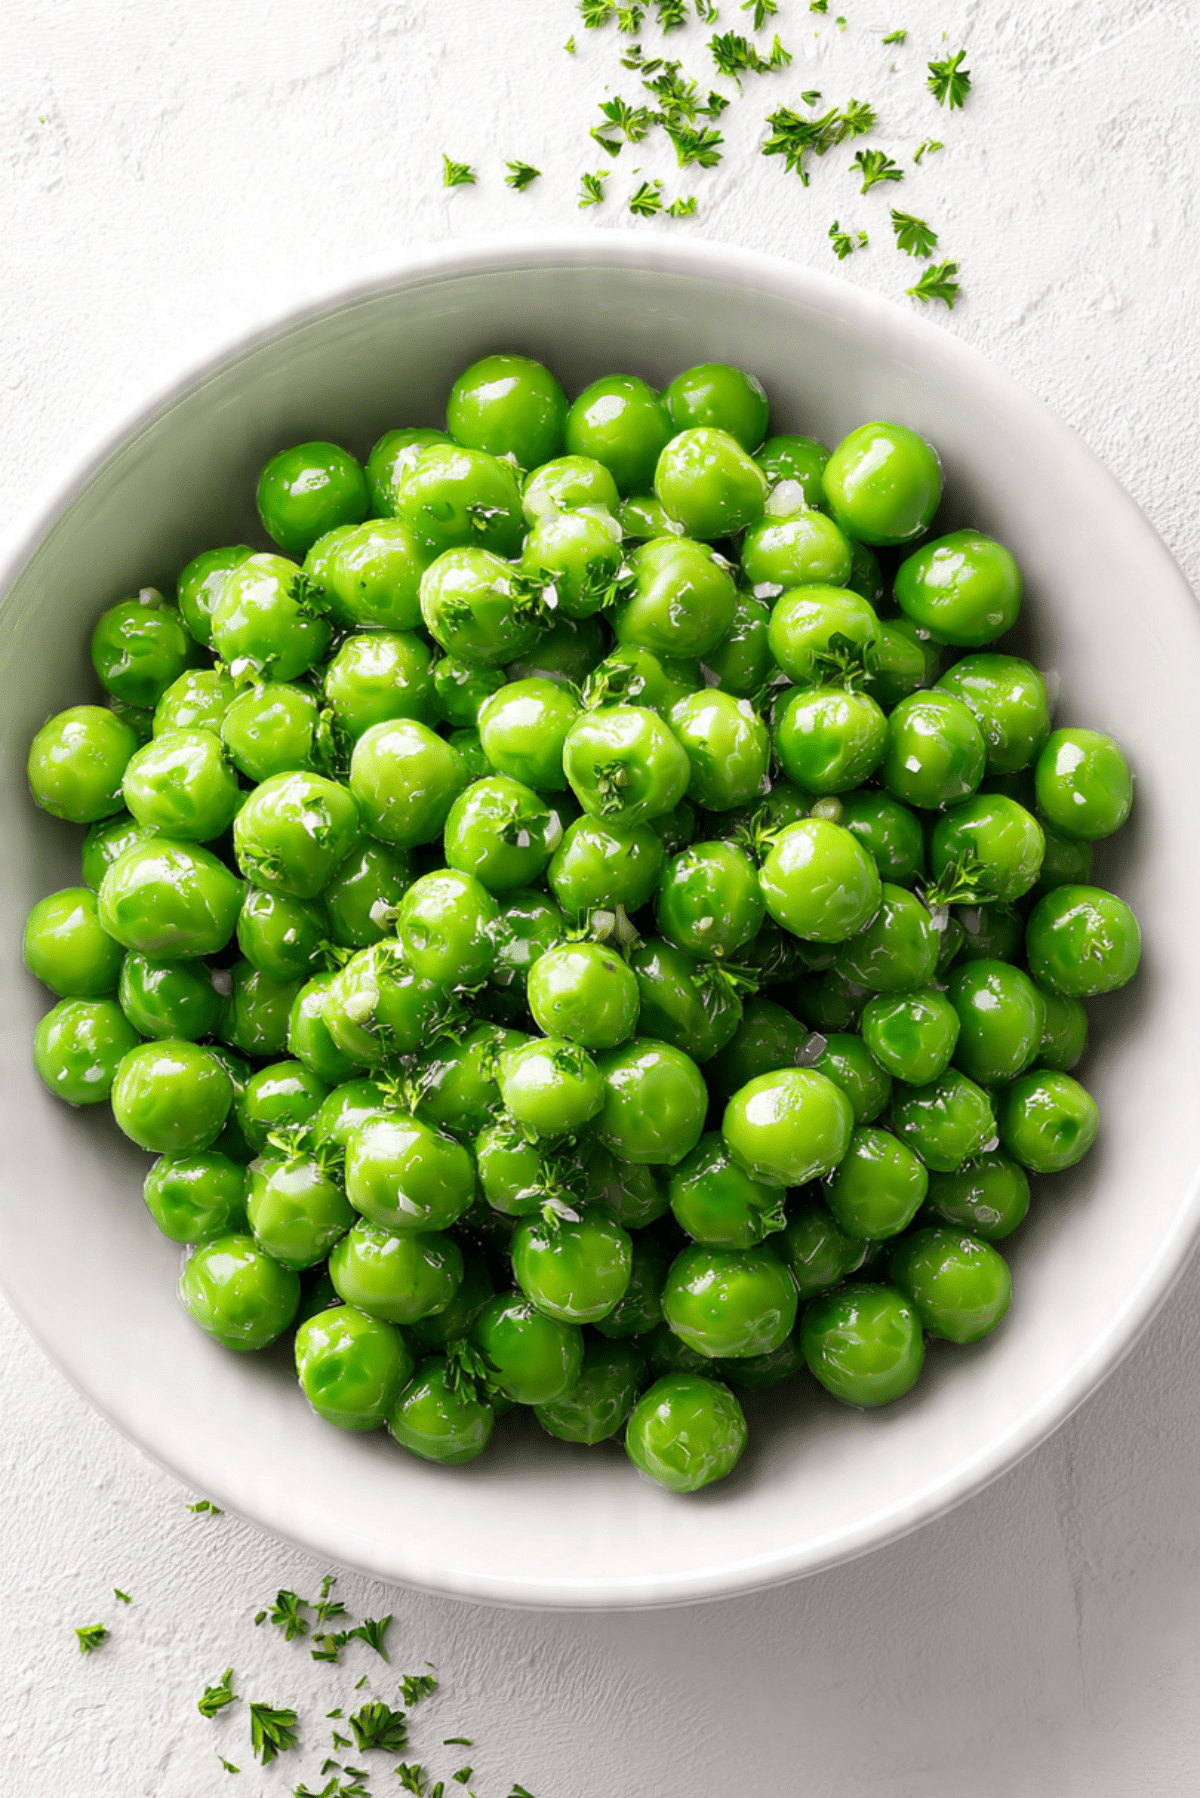
The Texture and Flavor That Make This Dish So Good
What makes this side dish stand out is the contrast between simplicity and flavor. The peas stay tender with a delicate little pop when you bite into them, while the butter gives them a smooth, silky finish that feels rich without being heavy. Then the garlic moves in with that warm savory note, and suddenly the sweetness of the peas tastes even brighter.
A little parsley at the end keeps the whole thing from feeling too rich, and the optional lemon juice adds a gentle spark that wakes everything up. It is soft, glossy, fresh, and buttery all at once, which is exactly why it disappears so quickly.
Helpful Tips for Extra Delicious Results
A few small adjustments can make a simple dish taste even better, and these are the ones worth remembering.
- Use medium heat: Too much heat can wrinkle the peas and cook off the butter too fast.
- Add garlic after the butter melts: This keeps it fragrant and sweet instead of dark and bitter.
- Finish right before serving: These peas taste best when they are freshly tossed and still glossy.
- Taste at the end: A final pinch of salt or a few drops of lemon can really wake up the flavor.
Mistakes to Skip for the Best Flavor and Texture
Even easy recipes have a few little traps, but they are very easy to avoid.
- Do not overcook the peas: If they stay on the heat too long, they lose their bright color and turn soft in the wrong way.
- Do not brown the garlic too much: Garlic cooks quickly, and once it burns, the bitterness spreads through the whole dish.
- Do not skip seasoning: Butter alone is lovely, but without salt and pepper the flavor can taste dull.
- Do not crowd the pan with extra ingredients: Keeping the recipe simple helps the peas stay the star.
A Quick Look at the Nutrition
This dish feels cozy and buttery, but it is still a simple vegetable side with a nice balance of flavor and freshness.
Servings: 4
Calories per serving: 110
Note: These are approximate values.
Time You’ll Need in the Kitchen
One of the best things about this recipe is how little time it asks from you.
Prep Time: 5 minutes
Cook Time: 7 minutes
Total Time: 12 minutes
Make-Ahead and Storage Tips That Keep Things Easy
If you are trying to stay ahead of dinner, this recipe helps. You can mince the garlic and chop the parsley earlier in the day, then keep them ready in the fridge so the final cooking comes together in a flash. That makes a fast side feel even faster.
Leftovers can be stored in an airtight container in the refrigerator for up to 3 days. Reheat them gently in a skillet over low heat with a tiny splash of water or a small pat of butter to bring back some moisture and shine. Freezing is possible, though the texture may soften a bit after thawing, so it is best when served fresh or from the fridge within a few days.
Easy Ways to Serve This Favorite Side
These peas go with just about everything, which makes them incredibly useful. Serve them beside roast chicken, baked salmon, grilled tofu, or a bowl of fluffy rice. They are also wonderful next to mashed potatoes, simple pasta, or even tucked into a holiday spread when you need one reliable green dish on the table.
For a cozier plate, spoon them over buttered rice or stir them into warm orzo. For something brighter, pair them with lemony fish or herby chicken. They have a quiet charm that fits almost anywhere.
Clever Ways to Use Leftovers the Next Day
If you happen to have leftovers, they can slide into another meal beautifully. Stir them into cooked rice with a little extra butter for an easy lunch. Fold them into pasta with grated Parmesan for a quick dinner. You can even mash them lightly and spoon them onto toast with a soft egg for something a little different.
They also work nicely in a vegetable soup or mixed into a warm grain bowl. A simple side dish suddenly becomes part of tomorrow’s plan, which is always a good feeling.
A Few More Helpful Notes Before You Cook
Little recipes like this depend on balance, and the best thing you can do is keep it gentle. Let the peas heat through without rushing them, and keep the garlic soft and fragrant. That is where the magic lives.
For extra freshness, add the parsley right at the end. For extra richness, a tiny bit more butter can be stirred in off the heat. And for a brighter finish, that teaspoon of lemon juice really does make a difference.
How to Make It Look Extra Special on the Plate
This may be a simple bowl of peas, but it can still look gorgeous. Serve them in a white bowl or shallow serving dish so the green color stands out. A little extra parsley on top gives the dish a fresh finish, and a glossy coating of butter makes it look warm and inviting right away.
If you are serving guests, spoon the peas neatly into the center of the bowl and let the buttery shine do the work. Sometimes the prettiest dishes are the ones that do not try too hard.
Tasty Variations to Keep in Your Back Pocket
Once you make the classic version, it is easy to branch out and play a little.
Cheesy version: Stir in 2 tablespoons grated Parmesan at the end for a more savory, creamy finish.
Herb-forward version: Swap the parsley for fresh dill or chives for a softer, garden-fresh flavor.
Lemony version: Add the lemon juice and a little finely grated lemon zest for a brighter, livelier side.
Creamy version: Stir in 1 tablespoon heavy cream at the end for a richer, silkier coating.
Shallot version: Cook 1 tablespoon finely chopped shallot in the butter before adding the garlic for extra sweetness and depth.
FAQ’s
1. Can I cook the peas without thawing them first?
Yes, absolutely. Frozen peas can go straight into the skillet, which is one reason this recipe is so convenient.
2. Can I use canned peas instead?
You can, but the texture will be softer and less sweet. Frozen peas give the best color and bite here.
3. How do I keep the peas bright green?
Cook them just until heated through and avoid overcooking. Too much heat for too long dulls the color.
4. Is the lemon juice necessary?
No, it is optional. It simply adds a little brightness that balances the butter nicely.
5. Can I make this dairy-free?
Yes, just use a plant-based butter or olive oil instead of regular butter.
6. What main dishes pair well with this?
They go well with roasted chicken, fish, tofu, pasta, and rice dishes.
7. Can I add onions or shallots?
Yes, a small amount of finely chopped shallot works especially well and adds a gentle sweetness.
8. How do I reheat leftovers?
Warm them in a skillet over low heat with a splash of water or a little butter until heated through.
9. Are these peas good for meal prep?
Yes, especially if you prep the garlic and parsley ahead. The cooked dish is best within 3 days.
10. Can I double the recipe?
Yes, just use a larger skillet so the peas still heat evenly and do not steam too much.
Conclusion
Some side dishes are just there to fill the plate, but this one actually makes dinner better. These buttery peas are bright, savory, cozy, and wonderfully easy, which is exactly the kind of recipe that earns a permanent place in your kitchen. The flavor is simple, the process is quick, and the result feels far more special than the effort suggests. Trust me, once you smell that garlic butter and see those glossy green peas hit the bowl, you’ll want to make them again and again.
Print
Frozen Peas – Garlic Buttered Peas
- Prep Time: 5 minutes
- Cook Time: 7 minutes
- Total Time: 12 minutes
- Yield: 4 servings 1x
- Category: Side Dish
- Method: Stovetop
- Cuisine: American
- Diet: Vegetarian
Description
Sweet frozen peas are quickly cooked in garlic butter until warm, glossy, and full of savory flavor. This easy side dish is fast, comforting, and perfect with weeknight dinners or holiday meals.
Ingredients
- 4 cups frozen peas
- 2 tablespoons unsalted butter
- 3 cloves garlic, minced
- 2 tablespoons water
- 1/4 teaspoon salt
- 1/8 teaspoon black pepper
- 1 tablespoon fresh parsley, chopped
- 1 teaspoon lemon juice (optional)
Instructions
- Place a large skillet over medium heat and warm it for about 1 minute.
- Add the unsalted butter. Once melted, stir in the minced garlic and cook for 30 seconds, just until fragrant.
- Add the water, frozen peas, salt, and black pepper. Stir gently to coat the peas in the garlic butter.
- Spread the peas into an even layer and cook for 3 to 4 minutes, stirring once or twice.
- Continue cooking for another 2 to 3 minutes, until the peas are hot, tender, and glossy but still bright green.
- Remove from the heat and stir in the chopped parsley and lemon juice, if using.
- Serve immediately while warm.
Notes
- Do not overcook the peas or they may lose their bright color and tender texture.
- Cook the garlic briefly so it stays fragrant and does not turn bitter.
- Add the parsley at the end for the freshest flavor.
- Reheat leftovers gently with a splash of water or a little butter.
Nutrition
- Serving Size: 1 serving
- Calories: 110
- Sugar: 5g
- Sodium: 180mg
- Fat: 6g
- Saturated Fat: 3.5g
- Unsaturated Fat: 2g
- Trans Fat: 0g
- Carbohydrates: 11g
- Fiber: 4g
- Protein: 4g
- Cholesterol: 15mg
Keywords: frozen peas, garlic butter peas, buttery peas, easy vegetable side dish, quick pea recipe