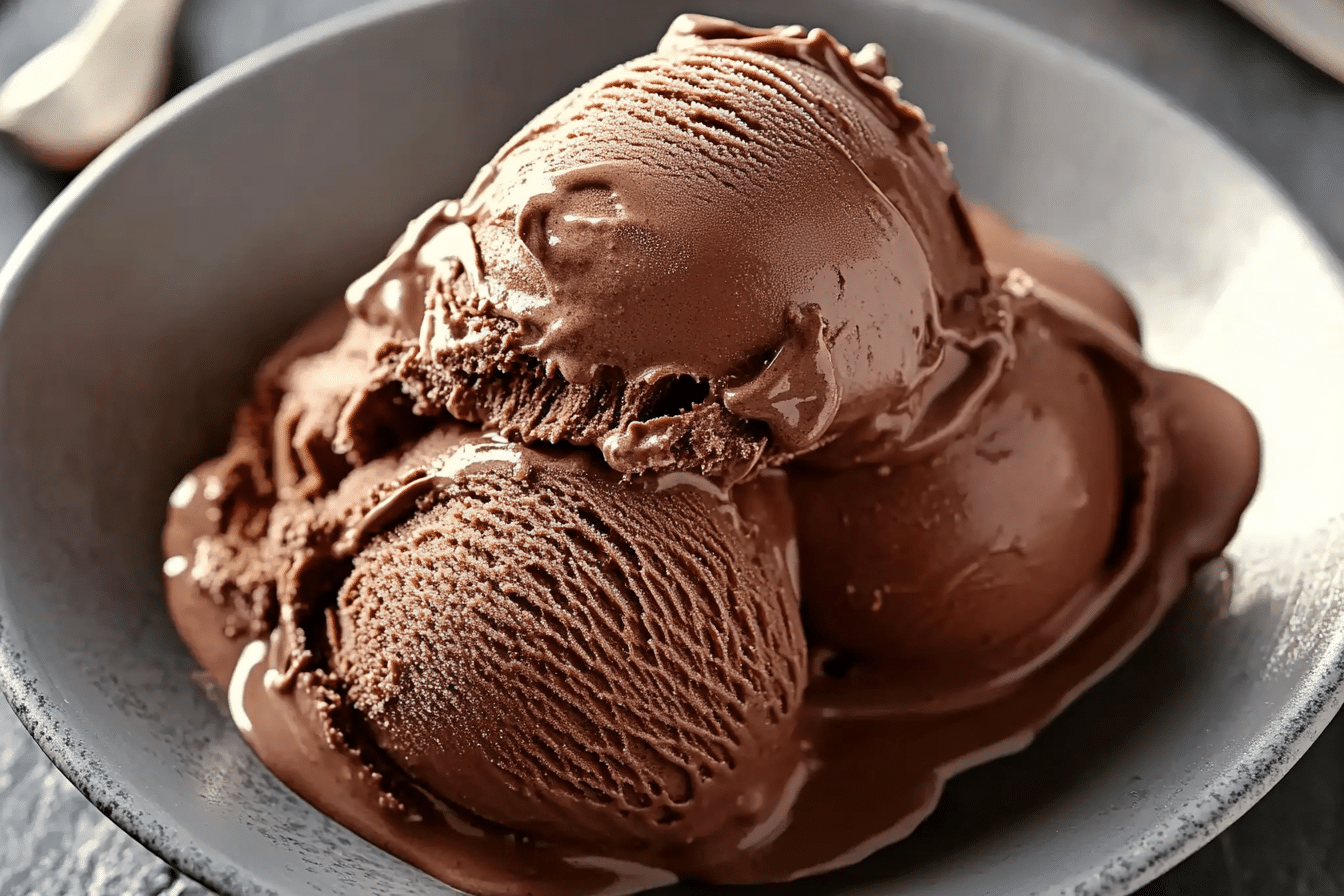
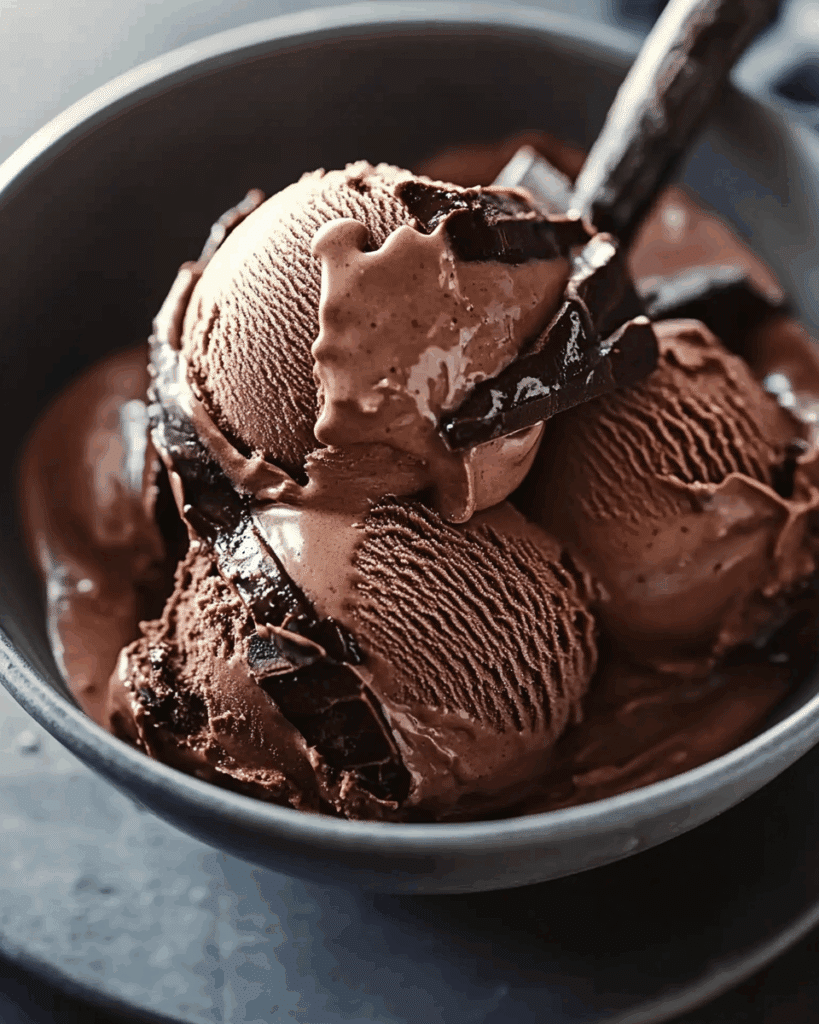
Homemade Chocolate Ice Cream
Okay, let’s talk about chocolate. Not just any chocolate Homemade Chocolate Ice Cream that’s so rich, smooth, and decadent it could make even the most devoted vanilla fan reconsider. This dreamy dessert is everything you want in a chocolate treat: deeply chocolaty, incredibly creamy, and bursting with that melt-in-your-mouth magic that only homemade ice cream can deliver. It’s the kind of scoop that makes summer sweeter, turns an ordinary night into a celebration, and lets you feel like a total kitchen rockstar. No fancy equipment or secret chef training required just a few simple ingredients and a love for all things chocolatey.
Why You’ll Love Homemade Chocolate Ice Cream
This recipe isn’t just about the ingredients it’s about creating moments. Whether you’re cooking for a casual family dinner, hosting a get-together with friends, or simply indulging in some comforting flavors for yourself, this dish is versatile enough to fit the occasion. Here’s why it’s a favorite:
Versatile: Perfect in a cone, a bowl, or sandwiched between two cookies for a DIY ice cream sandwich.
Budget-Friendly: Skip the expensive store-bought stuff this tastes gourmet without the price tag.
Quick and Easy: Minimal effort, maximum flavor. The hardest part? Waiting for it to freeze.
Customizable: Add chocolate chips, swirl in caramel, or toss in crushed cookies it’s your ice cream, your rules.
Crowd-Pleasing: A guaranteed hit with both kids and adults. It’s always a win when a single dish can satisfy everyone at the table. This recipe strikes the perfect balance of flavor and comfort, making it a universal favorite.
Ingredients
Ingredients in Homemade Chocolate Ice Cream
Let’s break down what makes this chocolate ice cream so irresistibly good:
Heavy Cream: The key to that silky-smooth texture. It gives the ice cream its luscious, rich mouthfeel.
Whole Milk: Lightens things up a bit while keeping it super creamy.
Unsweetened Cocoa Powder: Deep, dark, and full of that bold chocolate flavor we all crave.
Dark Chocolate: Melted into the base for double the decadence. Trust me it’s worth it.
Sugar: Sweetens the deal and balances out the bitterness of the cocoa.
Vanilla Extract: Adds a warm, aromatic note that rounds out the chocolate beautifully.
Salt: Just a pinch to enhance all the chocolatey goodness.
(Note: the full ingredients list, including measurements, is provided in the recipe card directly below.)
Instructions
Let’s dive into the steps to create this flavorful masterpiece:
Preheat Your Equipment: No preheating needed here, but get your mixing bowls, whisk, and saucepan ready for action. If you’re using an ice cream maker, pop the bowl in the freezer ahead of time.
Combine Ingredients: In a saucepan over medium heat, whisk together the cocoa powder, sugar, and salt. Slowly stir in the milk, making sure everything is smooth and lump-free. Add the chopped dark chocolate and stir until melted and glossy.
Prepare Your Cooking Vessel: No fancy prep here, but make sure you have a freezer-safe container ready to store the finished ice cream.
Assemble the Dish: Once the chocolate base is smooth and the chocolate is fully melted, remove from heat and stir in the cream and vanilla extract.
Cook to Perfection: Chill the mixture in the fridge for at least a few hours (or overnight). This helps it churn better and gives you a creamier result.
Finishing Touches: Pour the chilled mixture into your ice cream maker and churn according to manufacturer instructions. Once thick and creamy, transfer to a container and freeze until firm.
Serve and Enjoy: Scoop it up and savor the chocolate bliss! Serve in bowls, cones, or go wild with sundaes and toppings.
Nutrition Facts:
Servings: 6
Calories per serving: 320
(put them as notes)
Preparation Time
Prep Time: 15 minutes
Cook Time: 10 minutes
Total Time: 6 hours (including chilling and freezing time)
How to Serve Homemade Chocolate Ice Cream
This dish pairs wonderfully with various sides and accompaniments. Here are a few serving suggestions to enhance your dining experience:
Top with whipped cream and chocolate shavings for an elegant touch.
Serve over a warm brownie for the ultimate dessert duo.
Drizzle with caramel or raspberry sauce for a sweet contrast.
Add a pinch of sea salt or crushed pretzels for a salty-sweet twist.
Go classic with sprinkles, a cherry, and a sugar cone.
Additional Tips
Here are some extra tips to help you get the most out of this recipe:
Chill your mixture thoroughly before churning for best results.
Don’t skip the salt it really makes the chocolate flavor pop.
For extra chocolate richness, use a mix of cocoa powder and melted chocolate.
Store in a tightly sealed container to prevent ice crystals.
If you don’t have an ice cream maker, you can pour the mixture into a dish and stir every 30 minutes while it freezes.
Add mix-ins during the last few minutes of churning for even distribution.
A touch of espresso powder can deepen the chocolate flavor.
Freeze the storage container before adding the churned ice cream—it’ll help it firm up faster.
Label and date your batch so you know how fresh it is.
Let it sit at room temp for 5 minutes before scooping for the perfect texture.
FAQ’s
1. Do I need an ice cream maker for this recipe?
Nope! You can make it without one by stirring the mixture every 30 minutes as it freezes.
2. Can I use semi-sweet chocolate instead of dark?
Absolutely just adjust the sugar slightly if you like things less sweet.
3. How long does homemade ice cream last in the freezer?
It’s best enjoyed within 2–3 weeks for peak flavor and texture.
4. Can I make this dairy-free?
Yes, try using full-fat coconut milk and a dairy-free chocolate.
5. Why chill the base before churning?
It helps the ice cream set faster and churn more smoothly.
6. What can I add to make it more fun?
Try nuts, chocolate chips, crushed cookies, or marshmallow swirls.
7. Can I double the recipe?
Yes, just make sure your ice cream maker can handle the volume.
8. Is there a way to make it softer?
A tablespoon of alcohol (like vodka) can keep it scoopable straight from the freezer.
9. Can I use low-fat milk?
You can, but the texture won’t be as creamy and rich.
10. How do I prevent ice crystals?
Use an airtight container and press a piece of plastic wrap directly onto the surface before sealing.
Conclusion
Homemade Chocolate Ice Cream is the kind of treat that reminds you why making things from scratch is so worth it. Rich, creamy, and bursting with pure chocolate bliss, it’s a recipe that’s sure to become a staple in your dessert rotation. Whether you’re cooling off on a hot day or just need a little scoop of happiness after dinner, this ice cream delivers big time. So grab a spoon, dive in, and get ready to fall in love one velvety bite at a time.
Print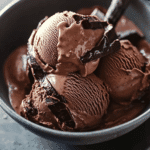
Homemade Chocolate Ice Cream
- Prep Time: 10 minutes
- Cook Time: 0 minutes
- Total Time: 6 hours 10 minutes (including chilling and freezing)
- Yield: 1 quart (about 6–8 servings) 1x
- Category: Dessert
- Method: Freezing
- Cuisine: American
- Diet: Vegetarian
Description
This Homemade Chocolate Ice Cream is rich, creamy, and full of deep chocolate flavor. Made with real cocoa and simple ingredients, it’s the perfect treat for chocolate lovers—no ice cream maker required!
Ingredients
- 2 cups heavy cream
- 1 cup whole milk
- 3/4 cup granulated sugar
- 1/2 cup unsweetened cocoa powder
- 1 teaspoon vanilla extract
- 1/4 teaspoon salt
- 3 oz semi-sweet or dark chocolate, melted (optional for extra richness)
Instructions
- In a medium bowl, whisk together cocoa powder, sugar, and salt.
- Gradually add the milk while whisking to combine the dry ingredients smoothly.
- Stir in the heavy cream and vanilla extract. If using melted chocolate, whisk it in at this stage until well combined.
- Cover the mixture and refrigerate for at least 2 hours, preferably overnight.
- If using an ice cream maker, churn according to the manufacturer’s instructions until it reaches a soft-serve consistency, then transfer to a container and freeze for at least 4 hours.
- For a no-churn version, pour the mixture into a loaf pan, cover with plastic wrap, and freeze for 6–8 hours, stirring once or twice during the first few hours if desired for smoother texture.
Notes
- Use high-quality cocoa powder and chocolate for the best flavor.
- Add chocolate chips, brownie bits, or nuts for texture.
- Let sit at room temperature for 5–10 minutes before scooping if it’s too firm from the freezer.
Nutrition
- Serving Size: 1/2 cup
- Calories: 240
- Sugar: 20g
- Sodium: 50mg
- Fat: 16g
- Saturated Fat: 10g
- Unsaturated Fat: 5g
- Trans Fat: 0g
- Carbohydrates: 22g
- Fiber: 2g
- Protein: 3g
- Cholesterol: 45mg
Keywords: homemade chocolate ice cream, no churn ice cream, easy chocolate dessert, creamy ice cream, cocoa ice cream