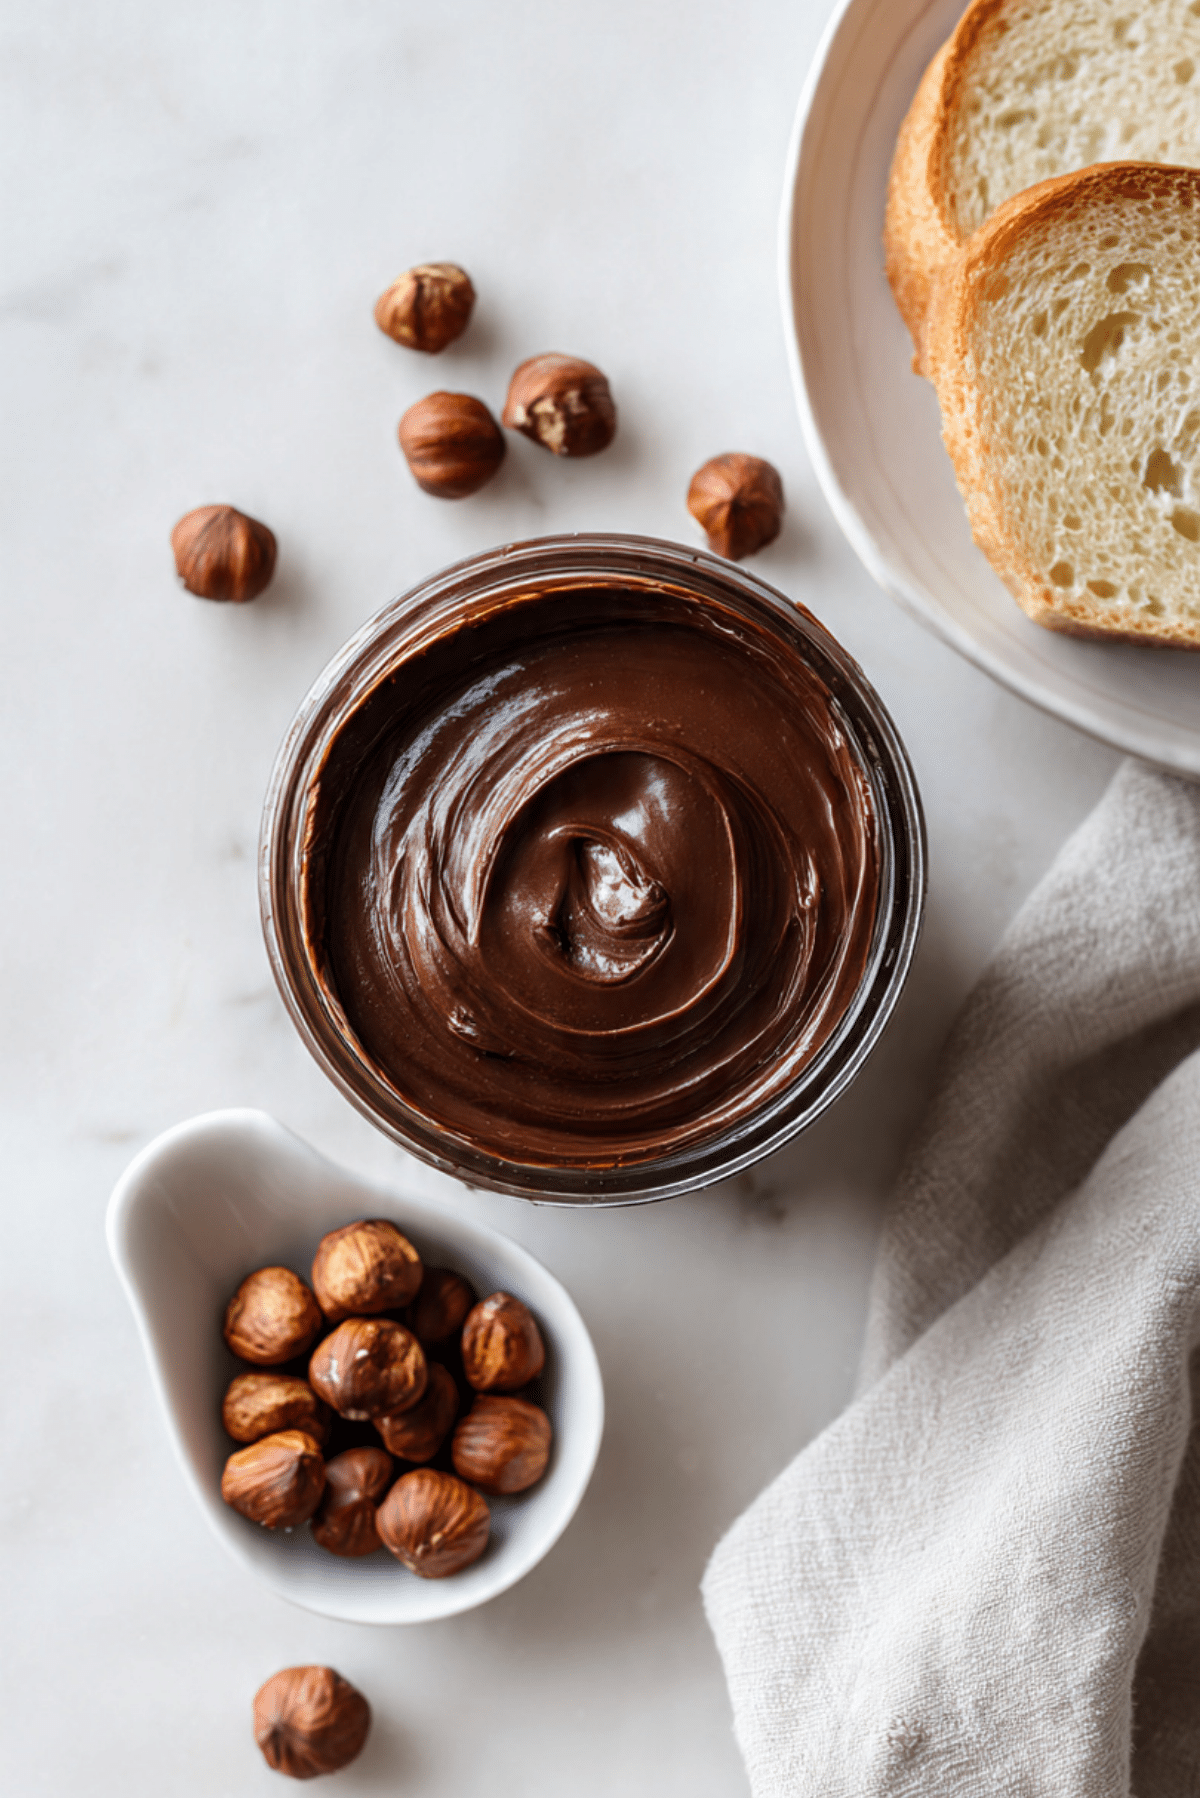
Homemade Chocolate Spread
There is something extra comforting about making your own chocolate spread at home. The moment the hazelnuts start roasting, your kitchen fills with that warm, nutty aroma, and then comes the rich scent of melted chocolate slowly blending in. By the time you spoon it into a jar, it already feels like a little homemade treasure. Trust me, you’re going to love this. It is smooth, glossy, and deeply chocolatey in a way that feels both indulgent and simple.
A Sweet Spread That Feels Like Pure Comfort
Some recipes quietly become part of your routine, and this is one of them. It is the kind of spread you reach for on slow mornings or when you need a quick sweet fix. The texture is silky and easy to spread, while the flavor balances roasted hazelnuts with deep cocoa richness. This one’s a total game-changer, especially when paired with warm toast or fresh fruit.
A Little Story Behind This Chocolate Classic
Chocolate and hazelnuts have been paired together for generations, especially in European kitchens where hazelnuts grow in abundance. Over time, this combination became beloved because it feels both rich and comforting without being too heavy. Making it at home brings everything back to basics, simple ingredients, real flavor, and that unmistakable homemade touch that store-bought versions just cannot match.
Why This Recipe Works Every Single Time
Before we jump into the process, let’s talk about why this spread quickly becomes a favorite.
Versatile: It works for breakfast, snacks, and desserts, from toast to pancakes to fruit dips.
Budget-Friendly: Making it at home gives you a premium taste without the premium price.
Quick and Easy: Once the nuts are roasted, the rest comes together smoothly in one blender.
Customizable: You can adjust sweetness, chocolate intensity, or texture to match your taste.
Crowd-Pleasing: Everyone loves a good chocolate spread, and this one never disappoints.
Make-Ahead Friendly: It stores beautifully, so you can enjoy it throughout the week.
Great for Leftovers: It transforms simple snacks into something special with just a spoonful.
Little Secrets That Make a Big Difference
Now that you are excited to make it, here are a few tips that really elevate the result.
- Roast the hazelnuts properly: This brings out a deeper, richer flavor.
- Remove most of the skins: It helps keep the texture smooth and the taste balanced.
- Blend patiently: The transformation from crumbly to creamy takes time.
- Melt chocolate gently: This keeps it silky and easy to mix.
- Taste before finishing: Adjust sweetness or salt to make it perfect for you.
Tools You Will Need for a Smooth Process
You do not need anything fancy, just a few essentials that make everything easier.
Baking Sheet: For roasting hazelnuts evenly.
Kitchen Towel: Helps remove hazelnut skins after roasting.
Food Processor or Blender: Essential for creating that creamy texture.
Heat-Safe Bowl: For melting the chocolate smoothly.
Spatula: Useful for scraping and mixing.
Glass Jar: Perfect for storing your finished spread.
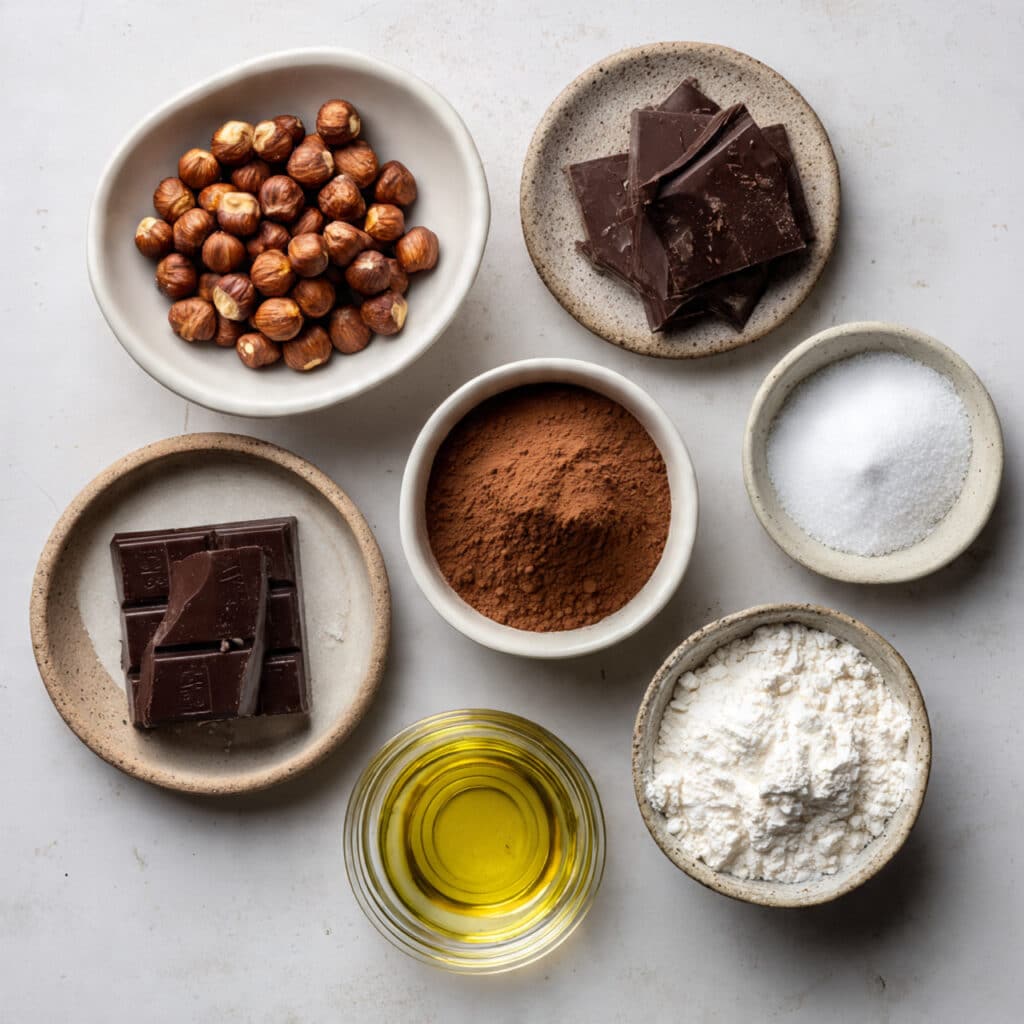
Ingredients That Come Together Beautifully
This recipe relies on a handful of ingredients that work in harmony to create something rich and irresistible.
- Hazelnuts: 2 cups, toasted and skins mostly removed, they create the creamy nut base.
- Powdered Sugar: 1 cup, adds smooth sweetness without graininess.
- Unsweetened Cocoa Powder: 1/4 cup, deepens the chocolate flavor.
- Dark Chocolate: 4 ounces, melted, adds richness and shine.
- Neutral Oil: 2 tablespoons, helps achieve a silky texture.
- Vanilla Extract: 1 teaspoon, enhances the overall flavor.
- Fine Salt: 1/4 teaspoon, balances the sweetness.
Simple Swaps If You Want to Experiment
If you feel like changing things up a bit, here are some easy substitutions.
Hazelnuts: Almonds or cashews.
Powdered Sugar: Maple sugar or powdered alternative.
Dark Chocolate: Semisweet chocolate.
Neutral Oil: Melted coconut oil.
Vanilla Extract: A touch of hazelnut extract.
The Ingredients That Truly Shine
Some ingredients really carry the recipe, and you can taste it in every bite.
Hazelnuts: They bring warmth, richness, and that signature nutty depth.
Dark Chocolate: Adds intensity, smoothness, and that glossy finish.
Let’s Make It Step by Step
Now comes the fun part where everything starts to come together.
- Preheat Your Equipment: Preheat your oven to 350°F and prepare a baking sheet.
- Combine Ingredients: Roast the hazelnuts for 10 minutes, then rub off most skins. Blend them into a smooth nut butter, then add powdered sugar, cocoa powder, melted chocolate, oil, vanilla, and salt.
- Prepare Your Cooking Vessel: Melt the chocolate gently if not already melted.
- Assemble the Dish: Blend everything until smooth and fully combined.
- Cook to Perfection: Continue blending until the texture becomes silky and creamy.
- Finishing Touches: Taste and adjust sweetness or salt if needed, then transfer to a jar.
- Serve and Enjoy: Spread it on toast, drizzle over pancakes, or enjoy with fruit.
The Texture and Flavor You Will Notice First
The first thing you notice is how smooth it is. It spreads easily and feels rich without being heavy. Then the flavor hits, nutty, chocolatey, slightly sweet, and perfectly balanced. The vanilla adds warmth, while the salt sharpens everything just enough to keep it interesting.
Helpful Tips for Even Better Results
A few extra tips can make your spread even more enjoyable.
- Use warm hazelnuts for easier blending
- Sift dry ingredients for a smoother texture
- Blend longer than you think for creaminess
- Store in a wide jar for easy use
Common Mistakes and How to Avoid Them
Even simple recipes can go wrong if rushed, so here are things to watch out for.
- Do not skip roasting the hazelnuts, it affects flavor
- Do not rush blending, it needs time to become smooth
- Do not add overly hot chocolate, let it cool slightly
- Do not overdo the salt, keep it balanced
A Quick Look at Nutrition
Servings: 16 tablespoons
Calories per serving: 120
Note: These are approximate values.
Time You Will Need
This recipe fits easily into your day.
Prep Time: 15 minutes
Cook Time: 10 minutes
Total Time: 25 minutes
Make-Ahead and Storage Tips
This spread is perfect to prepare in advance. Store it in a sealed jar in the refrigerator for up to 2 weeks. Let it sit at room temperature for a few minutes before using so it softens slightly. You can also freeze it for longer storage and thaw it when needed.
How to Serve This Delicious Spread
Spread it on toast, swirl it into oatmeal, or use it as a dip for fruits like bananas and strawberries. It also works beautifully in desserts like crepes, waffles, or even layered cakes.
Creative Ways to Use Leftovers
If you somehow have leftovers, there are plenty of ways to use them.
Add it to warm milk for a quick chocolate drink, spread it inside pastries, or use it as a filling for cookies. It even works as a topping for ice cream.
Extra Tips for the Best Experience
For smoother texture: Blend longer and scrape down often.
For richer taste: Use high-quality dark chocolate.
For easier spreading: Let it sit out briefly before serving.
Make It Look as Good as It Tastes
Serve it in a clean glass jar with a smooth swirl on top. Pair it with neatly arranged toast or fresh fruit on a simple plate. The glossy surface and deep chocolate color make it instantly inviting.
Fun Variations to Try
Cinnamon Flavor: Add a pinch of cinnamon.
Mocha Version: Add a bit of instant coffee.
Extra Dark: Use stronger chocolate.
Nut Mix: Combine hazelnuts with almonds.
Salted Finish: Add a light sprinkle of salt on top.
FAQ’s
Q1: Can I use a blender instead of a processor?
Yes, as long as it is powerful enough to create a smooth texture.
Q2: Why is my spread not smooth?
It likely needs more blending time.
Q3: Can I skip removing skins?
You can, but removing most improves texture.
Q4: Can I make it less sweet?
Yes, reduce the sugar slightly.
Q5: How long does it last?
Up to 2 weeks in the fridge.
Q6: Can I freeze it?
Yes, for up to 2 months.
Q7: Is it dairy-free?
If using dairy-free chocolate, yes.
Q8: What pairs best with it?
Toast, fruit, pancakes, and waffles.
Q9: Does it harden in the fridge?
It firms slightly but softens at room temperature.
Q10: Can I double the recipe?
Yes, just ensure your blender can handle it.
Conclusion
Making this at home feels simple but rewarding. From the rich aroma of roasted nuts to the smooth chocolate finish, every step builds something special. Once you try it, you will see just how satisfying homemade chocolate spread can be. Let me tell you, it’s worth every bite.
Print
Homemade Chocolate Spread
- Prep Time: 15 minutes
- Cook Time: 10 minutes
- Total Time: 25 minutes
- Yield: 16 tablespoons 1x
- Category: Spread
- Method: Blended
- Cuisine: European-Inspired
- Diet: Vegetarian
Description
A rich, silky homemade chocolate spread made with toasted hazelnuts, cocoa, and dark chocolate. Smooth, glossy, and perfect for toast, fruit, or desserts.
Ingredients
- 2 cups hazelnuts, toasted and skins mostly removed
- 1 cup powdered sugar
- 1/4 cup unsweetened cocoa powder
- 4 ounces dark chocolate, melted
- 2 tablespoons neutral oil
- 1 teaspoon vanilla extract
- 1/4 teaspoon fine salt
Instructions
- Preheat the oven to 350°F and prepare a baking sheet.
- Roast the hazelnuts for 10 minutes until fragrant and lightly golden.
- Transfer the hazelnuts to a kitchen towel and rub off most of the skins.
- Add the hazelnuts to a food processor and blend until smooth and creamy.
- Add powdered sugar, cocoa powder, melted dark chocolate, neutral oil, vanilla extract, and salt.
- Blend again, scraping down the sides as needed, until the mixture becomes silky and fully combined.
- Taste and adjust sweetness or salt if needed.
- Transfer to a clean jar and let it cool slightly before serving.
Notes
- Use warm hazelnuts for easier blending and smoother texture.
- Sift cocoa powder and powdered sugar to avoid lumps.
- Store in the refrigerator for up to 2 weeks in a sealed jar.
- Let sit at room temperature before serving for easier spreading.
Nutrition
- Serving Size: 1 tablespoon
- Calories: 120
- Sugar: 9g
- Sodium: 20mg
- Fat: 8g
- Saturated Fat: 2g
- Unsaturated Fat: 5g
- Trans Fat: 0g
- Carbohydrates: 12g
- Fiber: 1g
- Protein: 2g
- Cholesterol: 0mg
Keywords: homemade chocolate spread, hazelnut chocolate spread, easy chocolate spread, homemade nut spread, chocolate hazelnut recipe