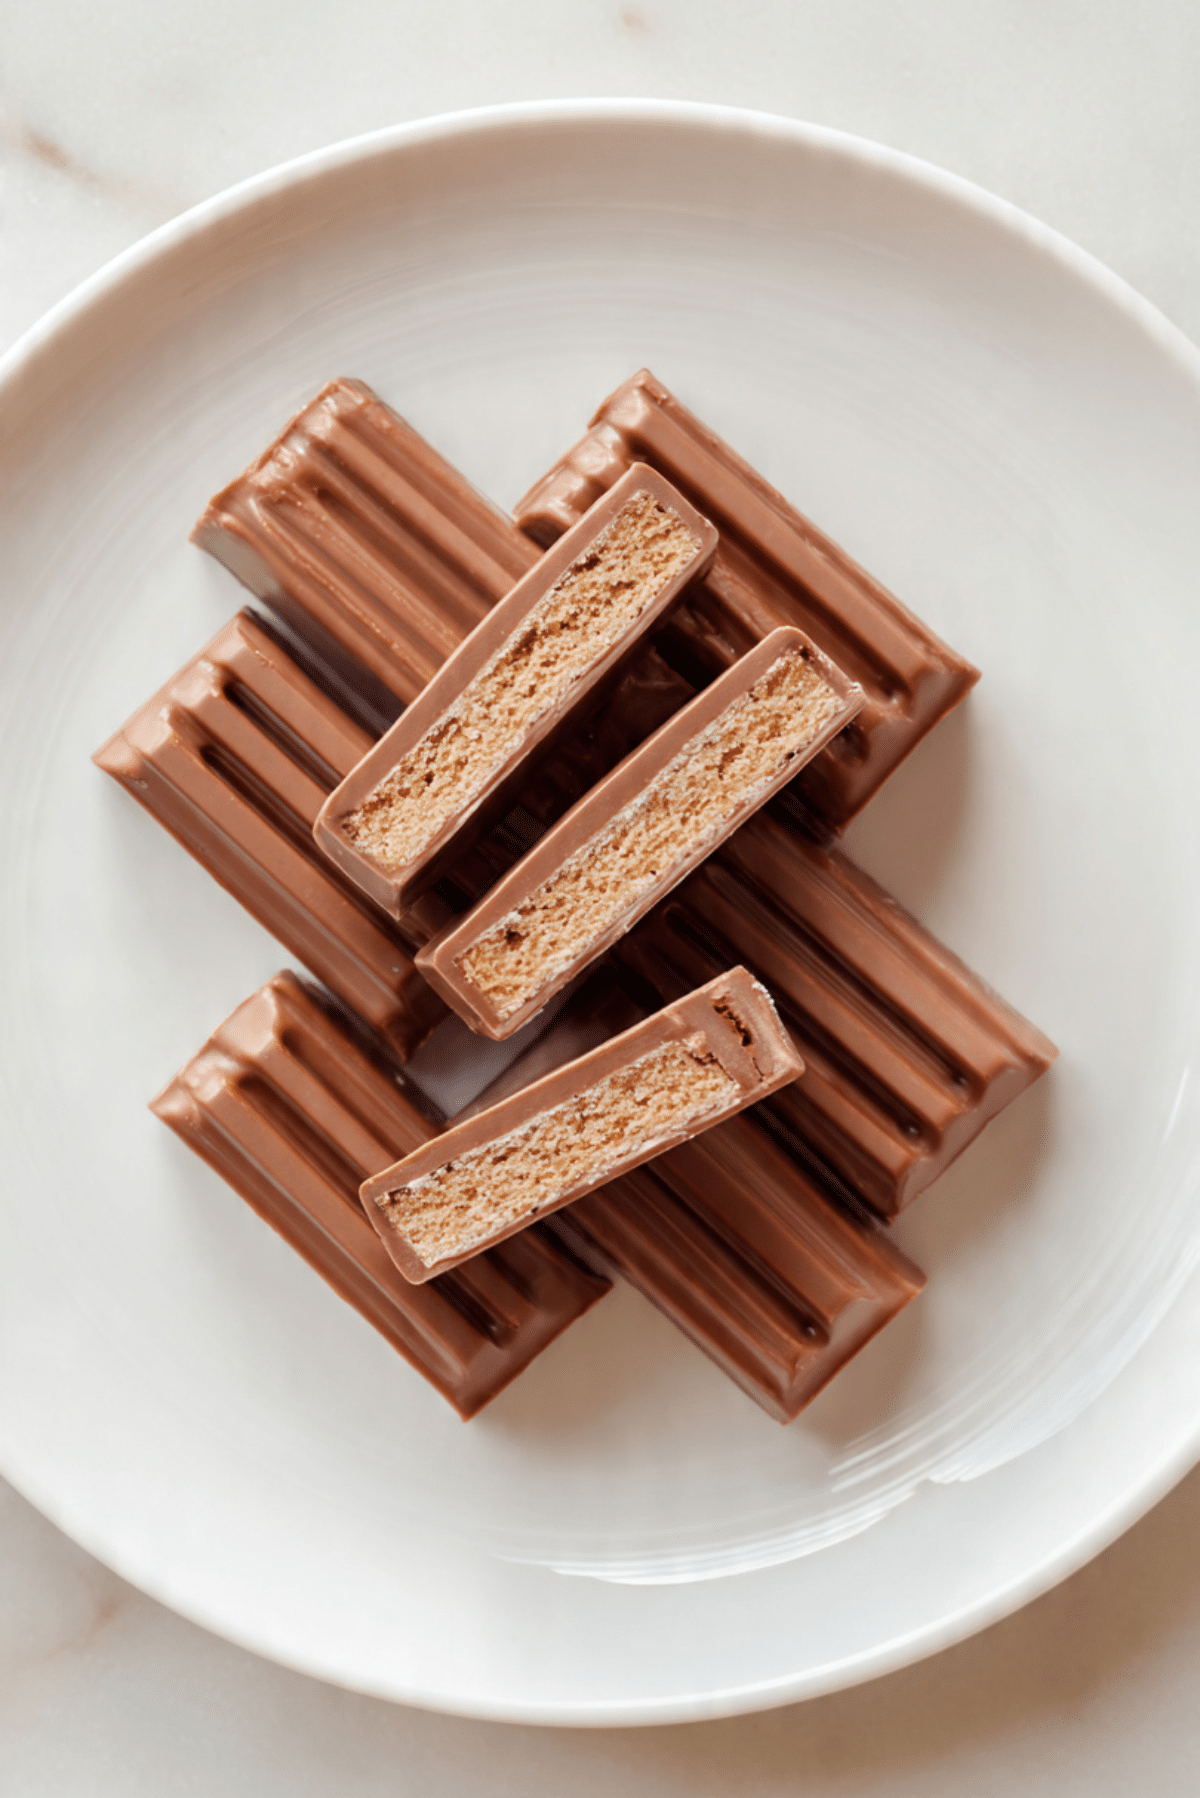
Homemade Kit Kat Bars Recipe
There’s something undeniably magical about biting into a crisp, chocolatey Kit Kat bar. That satisfying crunch, the sweet snap of the coating, and those airy, layered wafers are the stuff of candy dreams. But what if I told you that you could recreate that iconic experience right in your own kitchen, with just a handful of simple ingredients and a little love? Trust me, you’re going to love this. Making homemade Kit Kat bars is not only fun, but it lets you put your own sweet twist on a classic favorite.
Behind the Recipe
It all started one rainy afternoon when I had a serious craving for something crunchy, chocolatey, and nostalgic. With no candy in sight and a pantry full of basics, I remembered a treat my grandmother used to make — layered graham crackers soaked in a buttery, sweet filling, then coated in rich chocolate. With a few tweaks and a dash of kitchen magic, these homemade Kit Kat bars were born. They’ve since become a go-to for bake sales, after-school snacks, and late-night sweet fixes.
Recipe Origin or Trivia
The original Kit Kat bar was first created in the United Kingdom by Rowntree’s in 1935, under the name “Rowntree’s Chocolate Crisp.” It was later renamed “Kit Kat” and became a global sensation. Known for its crisp wafer layers and milk chocolate shell, Kit Kat has seen countless variations around the world. From matcha in Japan to hazelnut in Europe, it’s a candy bar with serious international flair. Our homemade version pays homage to the original, but with a comforting, homemade twist that feels just a bit more personal.
Why You’ll Love Homemade Kit Kat Bars
There’s more to this recipe than meets the eye. Let’s break down the reasons it deserves a permanent spot in your recipe box.
Versatile: You can dress them up with dark or white chocolate, or even add flavored extracts to change things up.
Budget-Friendly: Made with pantry staples, this treat won’t break the bank.
Quick and Easy: No baking required, and you only need about 20 minutes of hands-on time.
Customizable: Add peanut butter, a sprinkle of sea salt, or your favorite crushed nuts for extra flair.
Crowd-Pleasing: These bars are always the first to disappear at parties and potlucks.
Make-Ahead Friendly: You can make a big batch and store them for days.
Great for Leftovers: If you somehow have extras, they hold up beautifully in the fridge or freezer.
Chef’s Pro Tips for Perfect Results
Want your Kit Kat bars to taste just like the ones from your favorite candy aisle? Here are a few expert tips to get them just right.
- Use high-quality chocolate for the best taste and smoothest texture.
- Let each layer chill before adding the next to keep them crisp and distinct.
- Line your pan with parchment paper to make lifting and slicing a breeze.
- Don’t skip the vanilla extract — it adds a warm depth to the sweetness.
- Keep your layers thin to mimic that classic Kit Kat crunch.
Kitchen Tools You’ll Need
You don’t need much to make this treat, just a few trusty kitchen staples.
8×8 inch baking pan: Perfect for layering and chilling the bars evenly.
Mixing bowls: For melting and mixing your filling and topping.
Spatula: Helps spread each layer smoothly and evenly.
Microwave or stovetop pan: To melt the chocolate and butter mixture.
Knife: For cutting clean, uniform bars once they’ve set.
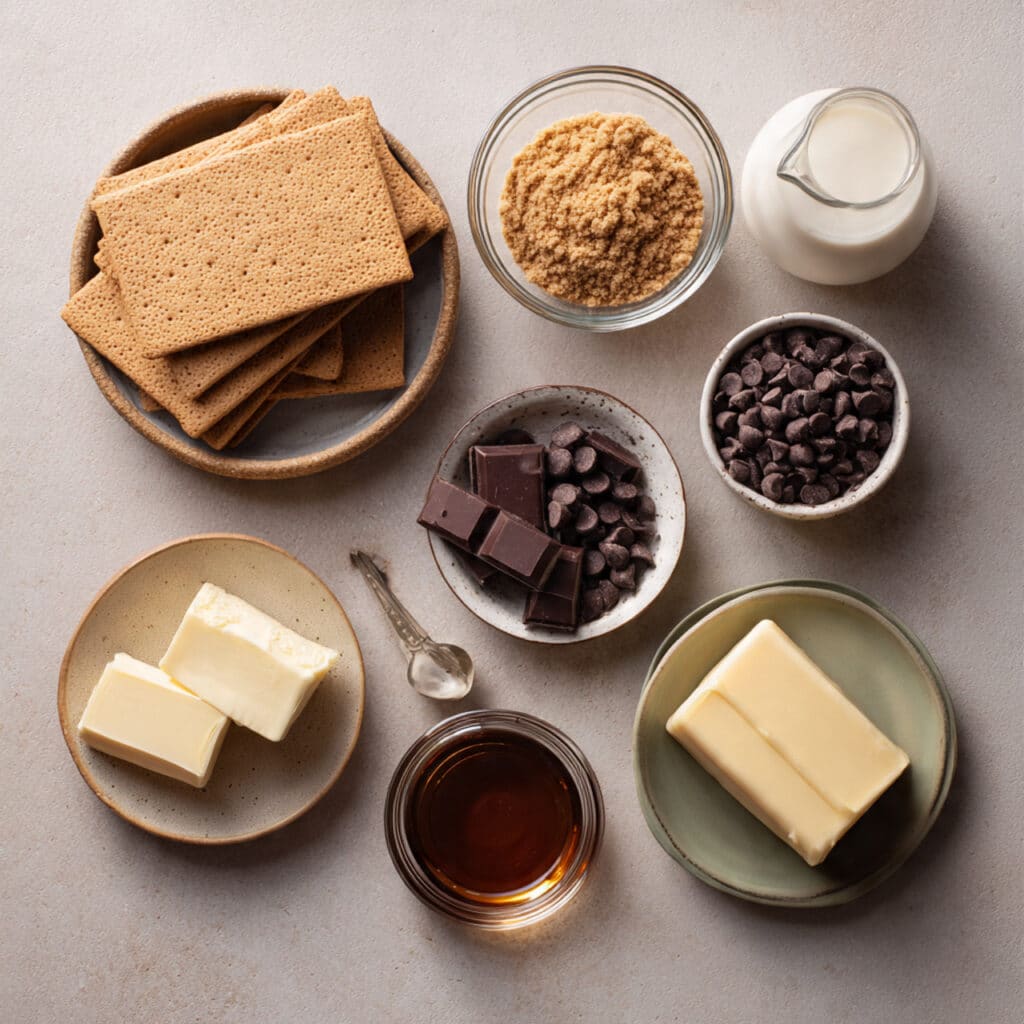
Ingredients in Homemade Kit Kat Bars
Each component brings its own magic to this recipe, combining to recreate that familiar flavor and crunch.
- Graham Cracker Sheets: 24 full sheets, whole or halved depending on your pan size. They create the signature crispy layers.
- Unsalted Butter: 1 cup (2 sticks), melted. Adds richness and helps bind the filling.
- Brown Sugar: 1 cup, packed. Sweetens the filling and adds a hint of caramel.
- Milk: ½ cup. Thins out the filling for easier spreading.
- Granulated Sugar: ½ cup. Adds an extra touch of sweetness.
- Crushed Graham Crackers: 1½ cups. Blends into the buttery filling for extra texture.
- Vanilla Extract: 1 teaspoon. Adds warmth and depth to the filling.
- Chocolate Chips: 2 cups (semisweet or milk chocolate). Melts into a smooth coating.
- Peanut Butter (optional): ¾ cup. If using, it gives a creamy, nutty flavor to the chocolate layer.
Ingredient Substitutions
Don’t worry if you’re missing something. Here are some easy swaps.
Graham Crackers: Use digestive biscuits or vanilla wafers.
Brown Sugar: Substitute with coconut sugar or more white sugar.
Milk: Almond or oat milk works well for dairy-free.
Chocolate Chips: Use chocolate bars, chopped, or white/dark chocolate.
Butter: Swap with coconut oil for a vegan twist.
Peanut Butter: Almond butter or sunflower seed butter are great alternatives.
Ingredient Spotlight
Graham Crackers: These humble pantry staples are the key to that irresistible crunch. Their mild sweetness pairs perfectly with the rich chocolate coating.
Chocolate Chips: Choose a high-quality brand. The smoother and creamier the chocolate, the more indulgent your bars will taste.
Instructions for Making Homemade Kit Kat Bars
Now let’s get to the fun part — bringing it all together in layers of crispy, sweet, chocolatey bliss.
- Preheat Your Equipment:
No oven required for this one, but line your baking pan with parchment paper to make cleanup and slicing easier. - Combine Ingredients:
In a saucepan, melt the butter over medium heat. Add brown sugar, milk, and granulated sugar. Stir until everything is dissolved and smooth. Remove from heat and stir in crushed graham crackers and vanilla extract. - Prepare Your Cooking Vessel:
Layer graham cracker sheets along the bottom of your lined pan, trimming them to fit neatly. - Assemble the Dish:
Spread half of the graham cracker filling over the bottom layer. Add another layer of graham crackers. Repeat with the remaining filling, then top with one last layer of crackers. - Cook to Perfection:
In a microwave-safe bowl or over the stovetop, melt the chocolate chips with peanut butter (if using), stirring until smooth. - Finishing Touches:
Pour the melted chocolate mixture over the final graham cracker layer. Smooth it out evenly with a spatula. - Serve and Enjoy:
Chill in the refrigerator for at least 2 hours or until fully set. Slice into bars and enjoy every crisp, chocolatey bite.
Texture & Flavor Secrets
It’s all about contrast. The crisp graham crackers provide that satisfying crunch, while the rich, buttery filling melts in your mouth. The top layer of chocolate seals it all together with creamy, slightly sweet goodness. Every bite balances smooth and crunchy, sweet and slightly salty, making it hard to stop at just one.
Cooking Tips & Tricks
Here are a few little tricks to make your homemade Kit Kat bars even better.
- Let the bars chill overnight for cleanest slicing.
- Use a serrated knife for cutting to avoid cracking the chocolate.
- Add a sprinkle of sea salt on top for a flavor punch.
- Try layering with white and milk chocolate for a two-tone effect.
What to Avoid
Don’t let these common missteps get in the way of candy bar perfection.
- Using warm filling on chocolate: This will cause it to melt unevenly.
- Overfilling layers: Keep it light to maintain that classic Kit Kat texture.
- Skipping the chill time: The bars need time to set or they’ll fall apart.
Nutrition Facts
Servings: 24
Calories per serving: 210
Note: These are approximate values.
Preparation Time
Prep Time: 20 minutes
Cook Time: 5 minutes
Total Time: 2 hours 25 minutes (including chill time)
Make-Ahead and Storage Tips
These bars are a dream for prepping ahead. You can make them a day or two before serving, and they keep well in an airtight container in the fridge for up to a week. Want to freeze them? Wrap each bar individually in plastic wrap and store in a freezer bag for up to 2 months. Let them thaw in the fridge before serving for the best texture.
How to Serve Homemade Kit Kat Bars
Serve chilled for the ultimate crunch. They’re perfect as an afternoon snack, a lunchbox treat, or a sweet bite after dinner. Pair with a glass of cold milk or a cup of hot coffee for the full experience. You can even slice them into bite-sized squares for parties or events.
Creative Leftover Transformations
Have a few extras? Lucky you! Here are fun ways to reuse them.
- Chop and sprinkle over vanilla ice cream for a candy-topped sundae.
- Crumble into yogurt or parfaits for crunch.
- Blend into milkshakes for a sweet surprise.
- Use as a filling in cookie sandwiches or cupcakes.
Additional Tips
- Let bars sit at room temperature for 5 minutes before slicing.
- Use a ruler to get perfect, uniform cuts.
- For extra flair, drizzle with melted white chocolate before chilling.
- Add crushed nuts between layers for a grown-up twist.
Make It a Showstopper
Presentation matters. For a clean, professional look, slice the bars into even rectangles and serve them on a white platter. Garnish with a light dusting of cocoa powder or a drizzle of chocolate. Add a few whole graham crackers and chocolate chips around the plate for visual appeal.
Variations to Try
- Mint Chocolate: Add a drop of peppermint extract to the filling.
- Dark Chocolate Sea Salt: Use dark chocolate and sprinkle flaked sea salt on top.
- S’mores Version: Add mini marshmallows between the layers.
- Nutty Kit Kat: Stir chopped almonds or hazelnuts into the filling.
- Spicy Kick: Add a pinch of cayenne to the chocolate layer for a sweet heat combo.
FAQ’s
Q1: Can I use white chocolate instead of milk chocolate?
Yes, white chocolate works beautifully. Just be sure to melt it slowly to avoid burning.
Q2: Do I have to use peanut butter in the topping?
Not at all. It’s optional and can be swapped for other nut butters or skipped entirely.
Q3: How long do these bars last in the fridge?
They’ll keep well for up to 7 days in an airtight container.
Q4: Can I make these gluten-free?
Absolutely. Use gluten-free graham crackers and double-check your chocolate.
Q5: Why did my layers slide apart?
The filling may have been too warm, or the layers weren’t chilled long enough.
Q6: Can I freeze these bars?
Yes, they freeze great. Wrap tightly and thaw in the fridge before serving.
Q7: What size pan should I use?
An 8×8 inch pan is ideal for even layering and easy slicing.
Q8: Can I double the recipe?
Definitely. Use a 9×13 inch pan and increase chilling time.
Q9: Can kids help make this?
Yes! It’s a fun and safe recipe for little hands with adult supervision for melting.
Q10: How do I make them extra crispy?
Use fresh graham crackers and avoid adding too much filling between layers.
Conclusion
Homemade Kit Kat Bars are one of those desserts that feel like pure joy wrapped in chocolate. They’re nostalgic, crunchy, and perfectly sweet — everything you want in a treat. Once you try making them from scratch, you might never go back to the store-bought kind. So grab your ingredients, layer up the goodness, and treat yourself. Let me tell you, it’s worth every bite.
Print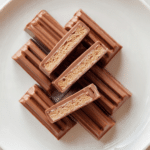
Homemade Kit Kat Bars Recipe
- Prep Time: 20 minutes
- Cook Time: 5 minutes
- Total Time: 2 hours 25 minutes
- Yield: 24 bars 1x
- Category: Dessert
- Method: No-Bake
- Cuisine: American
- Diet: Vegetarian
Description
These no-bake Homemade Kit Kat Bars are a dreamy combo of crispy graham crackers, a buttery sweet filling, and smooth chocolate. They’re perfect for snacking, gifting, or satisfying your sweet tooth anytime.
Ingredients
- 24 full graham cracker sheets
- 1 cup unsalted butter (2 sticks), melted
- 1 cup packed brown sugar
- 1/2 cup milk
- 1/2 cup granulated sugar
- 1 1/2 cups crushed graham crackers
- 1 teaspoon vanilla extract
- 2 cups chocolate chips (semisweet or milk)
- 3/4 cup peanut butter (optional)
Instructions
- Line an 8×8 inch baking pan with parchment paper.
- In a saucepan, melt the butter over medium heat. Add brown sugar, milk, and granulated sugar. Stir until dissolved and smooth. Remove from heat.
- Stir in crushed graham crackers and vanilla extract until well combined.
- Layer graham cracker sheets on the bottom of the pan.
- Spread half the graham cracker filling evenly over the crackers. Add another layer of graham crackers, then the rest of the filling. Finish with a final cracker layer.
- In a microwave-safe bowl or on the stovetop, melt chocolate chips and peanut butter (if using) until smooth.
- Pour the melted chocolate mixture over the top layer and spread evenly.
- Chill in the refrigerator for at least 2 hours until fully set.
- Cut into bars and serve chilled.
Notes
- Use high-quality chocolate for the best results.
- Chilling overnight helps with clean slicing.
- Optional: sprinkle sea salt on top for an extra flavor kick.
- Store leftovers in the fridge or freeze for up to 2 months.
Nutrition
- Serving Size: 1 bar
- Calories: 210
- Sugar: 18g
- Sodium: 90mg
- Fat: 12g
- Saturated Fat: 7g
- Unsaturated Fat: 4g
- Trans Fat: 0g
- Carbohydrates: 24g
- Fiber: 1g
- Protein: 2g
- Cholesterol: 20mg
Keywords: homemade kit kat, no bake chocolate bars, graham cracker dessert, easy chocolate snack