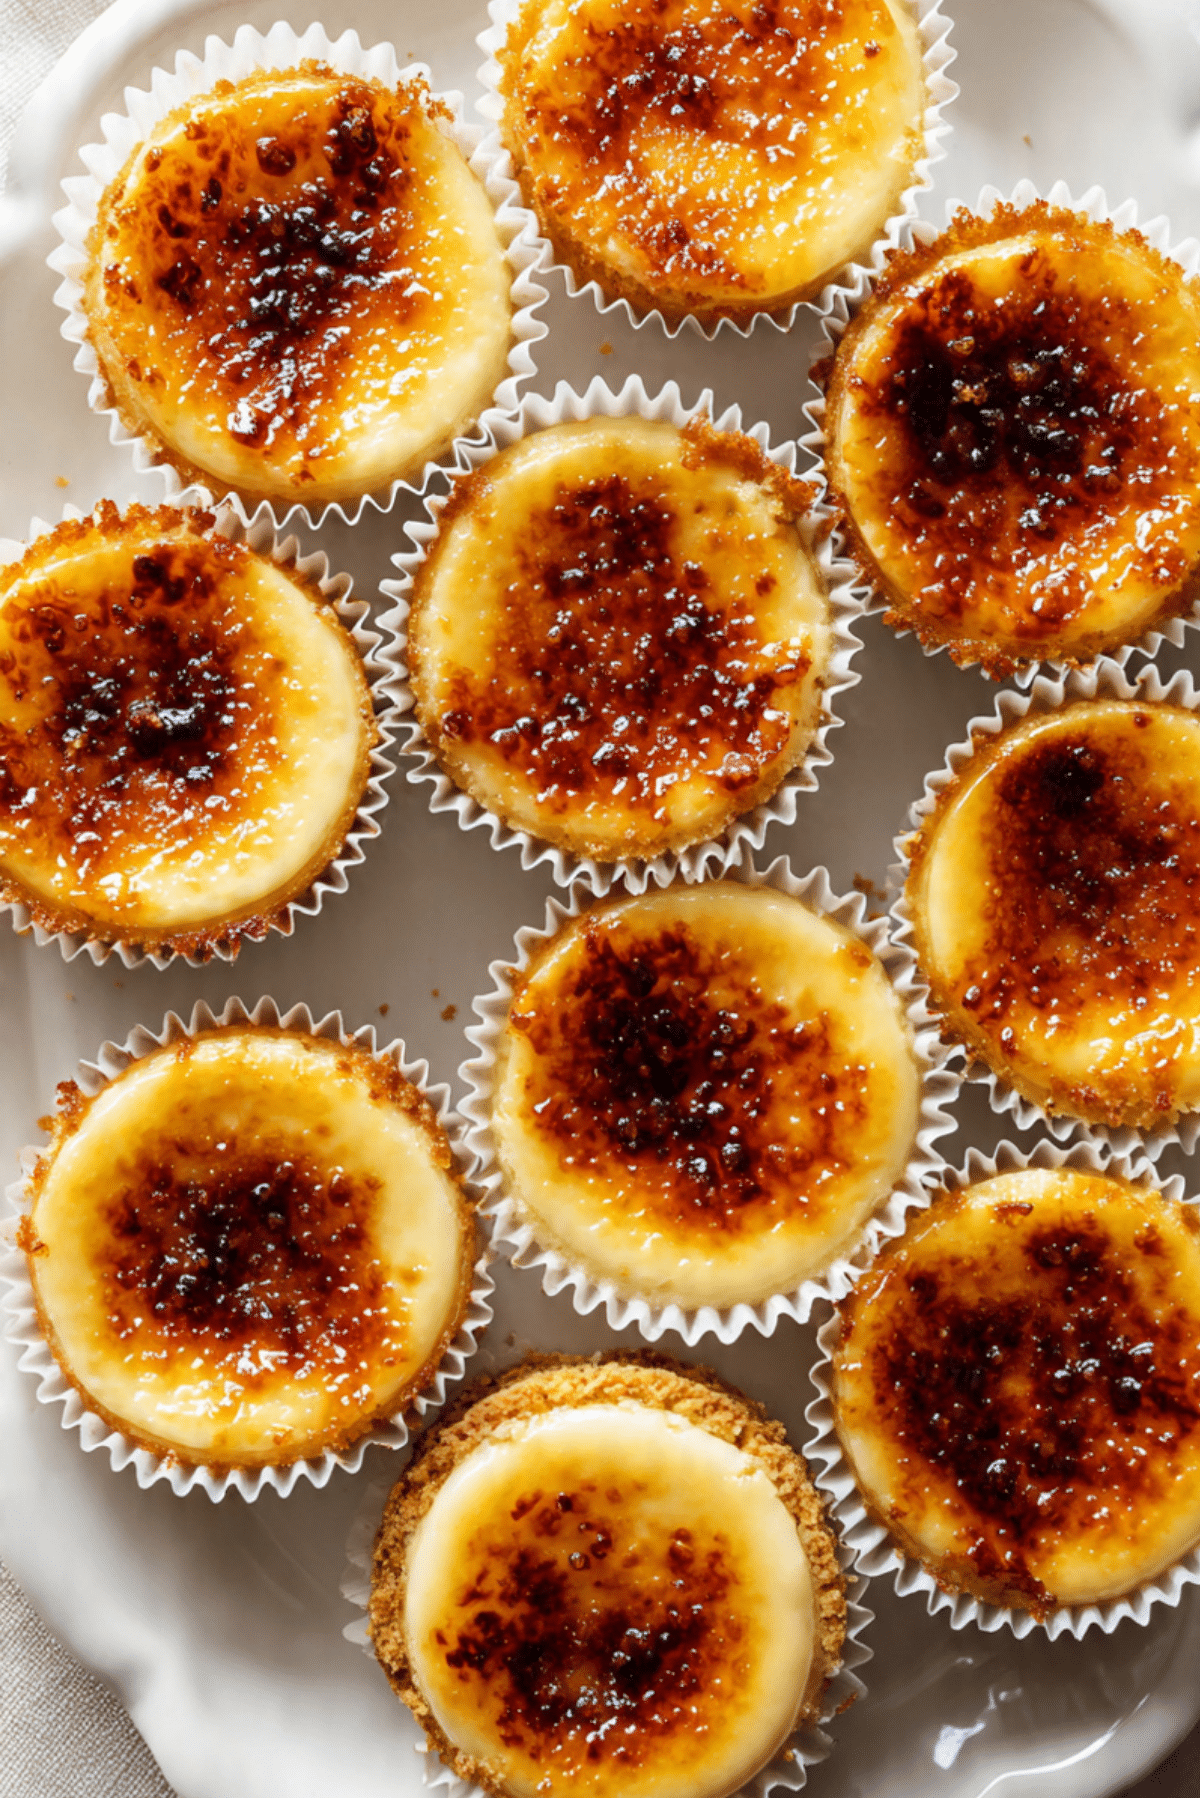
Mini Crème Brûlée Cheesecakes
There is something wildly satisfying about cracking through a thin layer of caramelized sugar and landing straight into creamy cheesecake. That contrast, crisp on top and velvety underneath, is exactly what makes these little beauties so hard to resist. They feel elegant enough for a dinner party, but they are also simple enough to make when you want a dessert that feels a little extra without turning your whole kitchen upside down. Trust me, you’re going to love this.
Why These Little Cheesecakes Always Steal the Show
Some desserts win people over with looks alone, and these definitely have that going for them. But once you taste them, that is when the magic really kicks in. You get the buttery graham cracker base, the rich and tangy vanilla filling, and then that signature brûléed sugar shell that shatters with the gentlest tap of a spoon. This one’s a total game-changer because it gives you all the drama of crème brûlée and all the comfort of cheesecake in one neat little portion.
They are also easier to serve than a full cheesecake, which honestly makes life so much nicer when guests are around. No slicing, no messy edges, no hoping each piece comes out clean. Just chill, torch, and serve.
A Sweet Little Blend of Two Classic Desserts
Crème brûlée has long been loved for its silky custard base and crisp caramelized top, while cheesecake brings that rich, tangy, creamy bite that dessert lovers never seem to get tired of. Put the two together and you get a dessert that feels both familiar and just a little special. Mini versions are a more modern twist, and they work beautifully for parties, holidays, showers, or anytime you want something polished without too much fuss.
That balance of French-inspired elegance and classic American cheesecake comfort is part of the charm here. It feels refined, but still approachable, which is exactly the kind of dessert I keep coming back to.
What Makes This Recipe So Worth Keeping
This recipe is one of those dependable favorites that earns a permanent spot in the dessert rotation. And now that we’ve talked about why it tastes so memorable, let’s dive into what makes it such a smart one to keep on hand.
Versatile: These work for holidays, birthdays, brunch spreads, or even a random weekend when you want something pretty in the fridge.
Budget-Friendly: The ingredient list is simple and familiar, which means no expensive specialty items or complicated shopping trip.
Quick and Easy: The batter comes together fast, and the individual portions bake more quickly than a full cheesecake.
Customizable: You can lean more vanilla, add citrus, or switch the crust if you want to play around a bit.
Crowd-Pleasing: Nearly everyone loves cheesecake, and that crisp sugar top gives it an irresistible finish.
Make-Ahead Friendly: You can bake and chill them ahead, then torch the tops right before serving for the best texture.
Great for Leftovers: They keep well in the fridge, which makes them perfect for sneaking a little treat the next day.
Smart Baking Secrets for the Best Texture
Before we get to the tools and ingredients, here are a few little tricks that make a big difference. Let me tell you, it’s worth every bite when the texture comes out just right.
- Use room temperature cream cheese: It blends much more smoothly, which helps you avoid lumps in the filling.
- Mix just until combined: Overmixing can whip too much air into the batter, and that can lead to cracks or puffing.
- Bake until just set: The centers should still have a slight jiggle. They will finish setting as they cool.
- Cool gradually: Let them cool at room temperature before chilling so the texture stays creamy and smooth.
- Torch right before serving: That keeps the sugar topping crisp instead of softening in the fridge.
The Kitchen Essentials That Make It Easy
By this point, you can probably already picture them, creamy, glossy, and waiting for that final sugar topping. And to make the whole process feel smooth from start to finish, a few simple tools really help.
Muffin pan: This gives the cheesecakes their tidy individual shape and helps them bake evenly.
Paper liners: These make removal easy and keep serving nice and neat.
Mixing bowls: You will want one for the crust and one for the filling.
Hand mixer or stand mixer: This helps create a smooth, creamy filling without too much effort.
Measuring cups and spoons: Accurate measuring keeps the texture balanced and dependable.
Kitchen torch: This is the key to that signature crackly sugar topping.
Spoon or small scoop: Useful for portioning the crust and filling evenly into each cup.
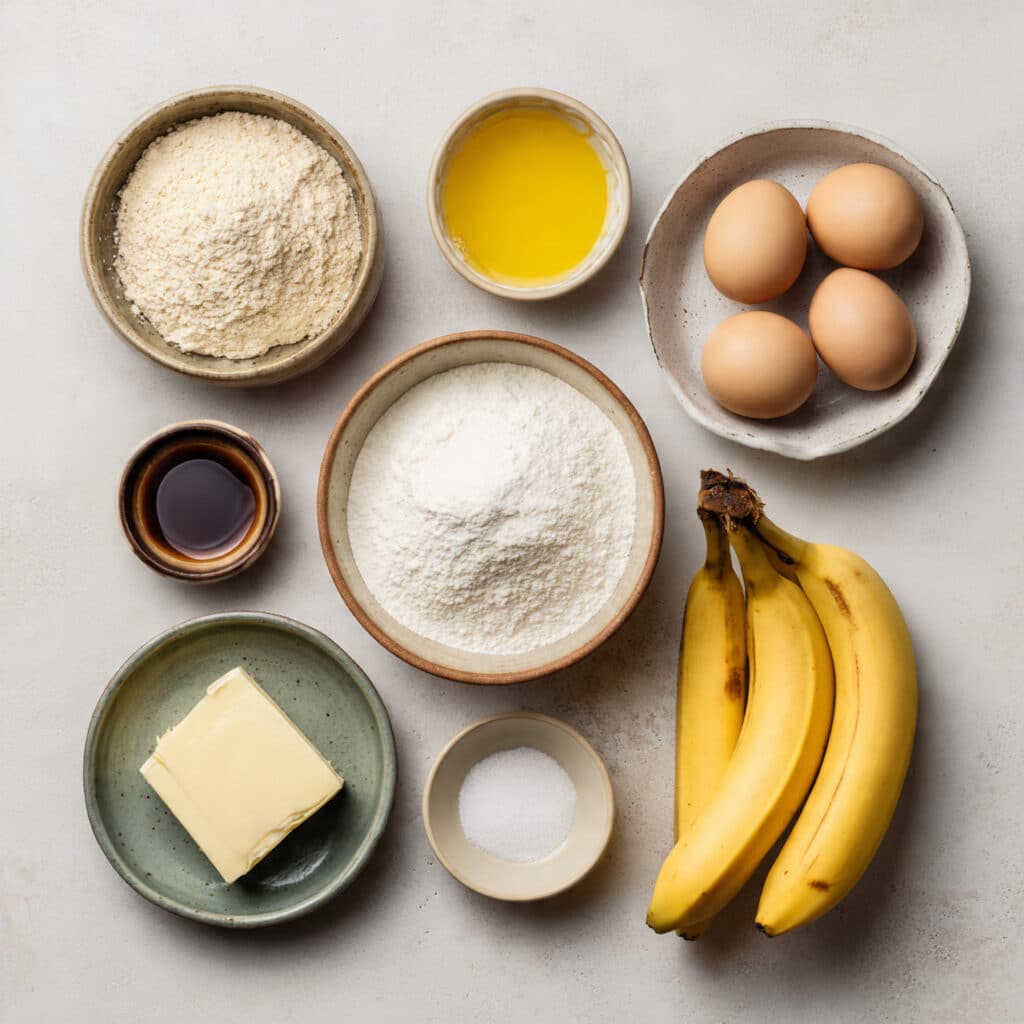
Ingredients That Bring It All Together
And now let’s get into the heart of the recipe, the ingredients. Each one has a clear job here, and together they create that rich, creamy, caramelized finish that makes these mini cheesecakes feel so special.
- Graham cracker crumbs: 1 cup, this creates the buttery base and adds a lightly sweet crunch that anchors the creamy filling.
- Granulated sugar: 2 tablespoons for the crust, this sweetens the crumbs just enough and helps the base hold together.
- Unsalted butter, melted: 3 tablespoons, this binds the crust and gives it that warm, toasty richness.
- Cream cheese, softened: 16 ounces, this is the backbone of the filling and gives the cheesecakes their signature creamy body.
- Granulated sugar: 1/2 cup for the filling, this sweetens the cheesecake without making it overly sugary.
- Sour cream: 1/3 cup, this adds a gentle tang and softens the richness for a smoother bite.
- Large eggs: 2, these help the filling set while keeping it soft and custardy.
- Vanilla bean paste or vanilla extract: 1 teaspoon, this brings the warm, classic flavor that ties the crème brûlée side of the dessert together.
- Fine sea salt: 1/8 teaspoon, this sharpens the flavor and balances the sweetness.
- Granulated sugar: 1/4 cup for the topping, this melts and caramelizes into that thin crisp shell everyone loves.
Easy Swaps When You Need Them
Sometimes you have everything lined up, and sometimes you need to make a few small adjustments. The good news is that this dessert is flexible enough to handle a few smart substitutions.
Graham cracker crumbs: Vanilla wafer crumbs or digestive biscuit crumbs.
Sour cream: Plain full-fat Greek yogurt.
Vanilla bean paste or vanilla extract: Vanilla extract or the seeds from half a vanilla bean.
Granulated sugar topping: Superfine sugar, if you want a slightly more even caramelized finish.
The Ingredients That Really Make the Magic Happen
At this stage, it is easy to see that every ingredient matters, but there are a couple that truly define the whole dessert.
Cream cheese: This gives the filling its lush, smooth structure and that rich tang that keeps every bite from feeling too sweet.
Vanilla bean paste or vanilla extract: This brings the soft, warm aroma that links the cheesecake to the classic flavor of crème brûlée.
Let’s Bake These Step by Step
Now comes the fun part, and honestly, it is easier than it looks. Here are the steps you’re going to follow, and each one moves you a little closer to that crisp-topped creamy finish.
- Preheat Your Equipment: Preheat your oven to 325°F and line a 12 cup muffin pan with paper liners so everything is ready to go.
- Combine Ingredients: In one bowl, stir together the graham cracker crumbs, 2 tablespoons of sugar, and melted butter until the mixture looks like damp sand. In a separate bowl, beat the softened cream cheese and 1/2 cup sugar until smooth. Mix in the sour cream, then add the eggs one at a time. Stir in the vanilla and salt, mixing just until the filling is creamy and combined.
- Prepare Your Cooking Vessel: Spoon the crust mixture evenly into the lined muffin cups and press it down firmly with the back of a spoon or a small glass.
- Assemble the Dish: Divide the cheesecake filling evenly over the crusts, filling each cup almost to the top. Smooth the tops gently so they bake up nice and even.
- Cook to Perfection: Bake for 18 to 20 minutes, until the edges look set and the centers still have a slight wobble. Remove the pan from the oven and let the cheesecakes cool in the pan for about 30 minutes.
- Finishing Touches: Transfer the cheesecakes to the refrigerator and chill until fully cold. Right before serving, sprinkle about 1 teaspoon of sugar over each cheesecake and use a kitchen torch to caramelize the tops until deeply golden and crisp.
- Serve and Enjoy: Let the sugar topping settle for a minute or two, then serve while the tops are still crackly and the centers are cool and creamy.
The Texture and Flavor Are What Make Them Unforgettable
Once they are finished, the best part is that first bite. The top has that delicate brittle snap, and underneath it the filling is smooth, rich, and just slightly tangy. Then the graham crust adds a soft buttery crunch that keeps the whole thing balanced.
Flavor-wise, it is a beautiful mix of toasted sugar, mellow vanilla, creamy cheese, and just enough tang from the sour cream to keep everything lively. Nothing feels too heavy or too sweet. It all lands in that sweet spot where one bite immediately turns into another.
Helpful Tips for Even Better Results
A few extra pointers can make the process feel even easier, especially the first time around.
- Chill thoroughly: Cold cheesecakes hold their shape better and give you a cleaner texture before torching.
- Wipe the torch path lightly: Move the flame steadily so the sugar melts evenly instead of burning in one spot.
- Press the crust firmly: A compact base holds together much better after chilling.
- Use full-fat dairy: It gives the filling the richest flavor and the smoothest finish.
What Can Go Wrong, and How to Avoid It
Even simple desserts have a few little traps, but thankfully they are easy to sidestep once you know what to watch for.
- Using cold cream cheese: This can leave lumps in the filling, so let it soften first.
- Overbaking the centers: They should still jiggle slightly when you pull them out.
- Adding too much sugar on top: A thin, even layer brûlées better and gives a prettier crack.
- Torching too early: If you caramelize the tops and then chill them again, the crisp shell can soften.
A Quick Look at the Nutrition
Before you make room in the dessert lineup, here’s a simple snapshot of what to expect per serving.
Servings: 12
Calories per serving: 230
Note: These are approximate values.
Time You’ll Want to Plan For
And now that you know how manageable they are, here’s the timing so you can fit them into your day a little more easily.
Prep Time: 30 minutes
Cook Time: 20 minutes
Total Time: 50 minutes
Make-Ahead and Storage Tips
One of the nicest things about this dessert is how well it fits into a busy schedule. You can bake the cheesecakes a day ahead and let them chill overnight, which honestly makes them even better. The texture settles, the flavor deepens a bit, and all you need to do before serving is add the sugar and torch the tops.
Store them covered in the refrigerator for up to 4 days. For the best texture, keep the caramelized topping for the last minute instead of brûléeing all of them ahead. You can also freeze the cheesecakes without the sugar topping for up to 1 month. Thaw them overnight in the fridge, then add the sugar and torch just before serving.
Serving Ideas That Make Them Feel Extra Special
These little cheesecakes already feel elegant on their own, but a thoughtful presentation makes them even more inviting. Serve them on a simple platter so the glossy tops catch the light. Fresh berries on the side work beautifully, especially raspberries or sliced strawberries, because they bring a bright contrast to the rich filling.
They also pair wonderfully with coffee, espresso, or hot tea. For a dessert table, they sit beautifully alongside fruit, shortbread cookies, or chocolate-dipped strawberries.
Clever Ways to Use Leftovers
If by some miracle you have leftovers, there are a few fun ways to enjoy them. Crumble one over a bowl of berries for a quick layered dessert. Mash one gently and spoon it into a small glass with whipped cream for an easy cheesecake parfait. You can even tuck pieces into a brunch spread where they double as a sweet little finishing bite with coffee.
It is one of those desserts that somehow still feels exciting the next day, which is saying a lot.
A Few More Tips to Keep in Your Back Pocket
There are always those tiny details that make a recipe feel smoother the next time around, and this one has a few worth remembering.
Use a spoon or cookie scoop to divide the filling evenly so they all bake at the same pace. Let the cheesecakes cool fully before chilling so condensation does not collect on top. And when it is time to brûlée, keep the sugar layer thin and even for that gorgeous glass-like finish.
How to Make Them Look Bakery Beautiful
Presentation goes a long way with a dessert like this because the caramelized tops are naturally dramatic. Torch the sugar until it turns deep amber in spots, but do not take it too far. That slight variation in color makes them look extra tempting. Keep the paper liners neat, or peel them away before serving if you want a cleaner, more polished look.
A white platter, soft lighting, and a few fresh berries off to the side are really all you need. These do not need much dressing up.
Variations That Are Fun to Try
Once you fall in love with the base version, there are a few easy twists worth exploring.
Citrus version: Add 1 teaspoon of finely grated lemon or orange zest to the filling for a bright fresh note.
Cookie crust version: Swap the graham crumbs for crushed vanilla wafers for a slightly sweeter base.
Espresso version: Stir 1 teaspoon instant espresso powder into the filling for a subtle coffee flavor.
Berry version: Spoon a tiny bit of raspberry sauce over the chilled cheesecake before serving, but keep the brûléed top visible.
Extra vanilla version: Use vanilla bean paste for a deeper, more fragrant finish with those pretty flecks throughout.
FAQ’s
Q1: Can I make these without a kitchen torch?
Yes, but the torch gives the best control. A broiler can work in a pinch, though the cheesecakes must be watched very closely.
Q2: How do I know when the cheesecakes are done baking?
The edges should look set and the centers should still wobble slightly. They firm up more as they cool and chill.
Q3: Can I use low-fat cream cheese?
You can, but the texture will not be quite as rich or creamy. Full-fat works best here.
Q4: Do I need a water bath for these?
No, not for this mini version. That is one reason they are so convenient.
Q5: Can I make them a day ahead?
Absolutely. In fact, they are ideal for making ahead. Just brûlée the tops right before serving.
Q6: What kind of sugar should I use on top?
Granulated sugar works well, and superfine sugar can melt even more evenly if you have it.
Q7: Can I freeze them after baking?
Yes, freeze them before adding the sugar topping. Thaw in the refrigerator, then brûlée before serving.
Q8: Why did my filling crack?
That usually happens from overmixing or overbaking. Mix gently and pull them from the oven while the centers still jiggle slightly.
Q9: Can I make these in a mini muffin pan?
Yes, though they will be smaller and will bake faster, so start checking them earlier.
Q10: How long does the sugar topping stay crisp?
It is best within the first hour after torching. After longer chilling, the top can begin to soften.
Conclusion
These Mini Crème Brûlée Cheesecakes bring together everything that makes dessert feel exciting, creamy filling, buttery crust, and that gorgeous crackly sugar top that never gets old. They look impressive, taste even better, and somehow manage to feel both elegant and comforting at the same time. Trust me, once you hear that first crisp tap on top, you’ll know this recipe is one to keep.
Print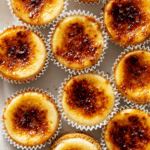
Mini Crème Brûlée Cheesecakes
- Prep Time: 30 minutes
- Cook Time: 20 minutes
- Total Time: 50 minutes
- Yield: 12 mini cheesecakes 1x
- Category: Dessert
- Method: Baking
- Cuisine: American
- Diet: Vegetarian
Description
Creamy mini cheesecakes with a buttery graham cracker crust and a crisp caramelized sugar topping that gives every bite a crème brûlée finish.
Ingredients
- 1 cup graham cracker crumbs
- 2 tablespoons granulated sugar
- 3 tablespoons unsalted butter, melted
- 16 ounces cream cheese, softened
- 1/2 cup granulated sugar
- 1/3 cup sour cream
- 2 large eggs
- 1 teaspoon vanilla bean paste or vanilla extract
- 1/8 teaspoon fine sea salt
- 1/4 cup granulated sugar, for topping
Instructions
- Preheat the oven to 325°F and line a 12 cup muffin pan with paper liners.
- In a bowl, combine the graham cracker crumbs, 2 tablespoons granulated sugar, and melted butter until evenly moistened.
- Divide the crust mixture among the muffin cups and press firmly into the bottoms.
- In a separate bowl, beat the softened cream cheese and 1/2 cup granulated sugar until smooth.
- Mix in the sour cream, then add the eggs one at a time, mixing just until combined.
- Stir in the vanilla bean paste or vanilla extract and the salt.
- Divide the filling evenly over the crusts, filling each cup almost to the top.
- Bake for 18 to 20 minutes, until the edges are set and the centers still jiggle slightly.
- Cool in the pan for 30 minutes, then refrigerate until fully chilled.
- Right before serving, sprinkle the tops evenly with the remaining 1/4 cup granulated sugar and caramelize with a kitchen torch until golden and crisp.
Notes
- Use room temperature cream cheese for the smoothest filling.
- Do not overmix the batter, which can create too much air and lead to cracks.
- For the best texture, torch the sugar just before serving.
- These cheesecakes can be made a day ahead and chilled before adding the brûlée topping.
Nutrition
- Serving Size: 1 mini cheesecake
- Calories: 230
- Sugar: 15g
- Sodium: 170mg
- Fat: 16g
- Saturated Fat: 9g
- Unsaturated Fat: 5g
- Trans Fat: 0g
- Carbohydrates: 18g
- Fiber: 0g
- Protein: 4g
- Cholesterol: 70mg
Keywords: mini crème brûlée cheesecakes, mini cheesecake dessert, crème brûlée topping, vanilla cheesecake, party dessert