No-Churn Chocolate Ice Cream
There’s something magical about making ice cream at home, especially when no machine is required. Imagine dipping your spoon into a creamy scoop of chocolate bliss, rich with cocoa and lusciously smooth, all made with just a few simple ingredients. This no-churn chocolate ice cream is a true kitchen delight, delivering a decadent treat without the fuss of traditional methods.
Behind the Recipe
The beauty of no-churn ice cream lies in its simplicity. This recipe comes from the idea that indulgence doesn’t always need complicated equipment or fancy steps. I still remember the first time I tried it, whisk in hand, surprised at how easily a velvety chocolate ice cream came together. It quickly became a go-to for summer evenings, family gatherings, or simply when the craving for something sweet struck.
Recipe Origin or Trivia
While traditional ice cream has roots tracing back to ancient China and Italy, no-churn ice cream became popular thanks to its modern twist using whipped cream and condensed milk. The technique spread widely in home kitchens because it offers an approachable way to enjoy homemade ice cream without investing in an ice cream maker. Chocolate, of course, has always been a universal favorite, making this recipe a crowd-pleaser through and through.
Why You’ll Love No-Churn Chocolate Ice Cream
There are so many reasons this dessert will earn a permanent spot in your freezer.
Versatile: Perfect on its own, but also amazing with brownies, cookies, or fruit.
Budget-Friendly: Uses common pantry ingredients you probably already have.
Quick and Easy: Only a few minutes of prep before the freezer does the rest.
Customizable: Add chocolate chips, nuts, or a swirl of caramel for extra flair.
Crowd-Pleasing: Everyone, from kids to adults, will love its indulgent flavor.
Make-Ahead Friendly: Whip it up a day before a party for stress-free entertaining.
Great for Leftovers: Stays creamy in the freezer for days, making it an anytime treat.
Print
No-Churn Chocolate Ice Cream
- Prep Time: 15 minutes
- Cook Time: 0 minutes
- Total Time: 6 hours 15 minutes
- Yield: 8 servings
- Category: Dessert
- Method: No-churn freezing
- Cuisine: American
- Diet: Vegetarian
Description
Creamy, lush, and deeply chocolatey no-churn ice cream you can make in minutes, then let the freezer do the rest. No machine, no eggs, just pure velvet in every bite.
Ingredients
- Heavy whipping cream: 2 cups, cold
- Sweetened condensed milk: 1 can, 14 ounces
- Unsweetened cocoa powder: 1/2 cup, sifted
- Semi-sweet chocolate (melted and cooled): 4 ounces
- Vanilla extract: 1 teaspoon
- Fine salt: 1/4 teaspoon
Instructions
- Chill the tools: Place the mixing bowl and whisk or mixer beaters in the refrigerator for 15 minutes so the cream whips quickly and stays stable.
- Make the chocolate base: In a large bowl whisk the sweetened condensed milk, cocoa powder, melted and cooled semi-sweet chocolate, vanilla extract, and salt until fully smooth and glossy.
- Whip the cream: In the chilled bowl beat the heavy whipping cream to stiff peaks, taking care not to overwhip.
- Fold together: Using a rubber spatula gently fold one third of the whipped cream into the chocolate base to lighten it, then fold in the remaining cream just until no streaks remain.
- Pan prep: Line a 9×5 inch loaf pan or freezer safe container with parchment paper, leaving overhang for easy lifting.
- Fill and level: Scrape the mixture into the pan and smooth the top with a spatula for even freezing.
- Seal: Press plastic wrap directly onto the surface, then cover the pan to prevent ice crystals.
- Freeze: Freeze until firm, at least 6 hours or overnight for best scoopable texture.
- Serve: Let the ice cream sit at room temperature for 3 to 5 minutes, then scoop and enjoy.
Notes
- For extra depth add 1 teaspoon instant espresso powder to the chocolate base.
- Use high quality cocoa and chocolate for the richest flavor.
- Run your scoop under hot water for clean, round scoops.
Nutrition
- Serving Size: 1/2 cup
- Calories: 310
- Sugar: 24 g
- Sodium: 60 mg
- Fat: 20 g
- Saturated Fat: 12 g
- Unsaturated Fat: 6 g
- Trans Fat: 0 g
- Carbohydrates: 30 g
- Fiber: 3 g
- Protein: 4 g
- Cholesterol: 70 mg
Keywords: no-churn chocolate ice cream, homemade ice cream, easy dessert, egg-free ice cream, creamy chocolate ice cream, summer dessert, freezer dessert
Chef’s Pro Tips for Perfect Results
When making no-churn ice cream, a few insider secrets can take it from good to unforgettable.
- Always use cold heavy cream, straight from the fridge, for the best whip.
- Fold the whipped cream gently into the chocolate mixture to keep the texture light.
- Cover tightly with plastic wrap to avoid ice crystals forming on the surface.
- For extra chocolate richness, use both cocoa powder and melted chocolate.
Kitchen Tools You’ll Need
This recipe keeps things wonderfully simple, but a few tools will help you get the job done with ease.
Mixing Bowls: For whipping cream and blending ingredients.
Electric Mixer or Whisk: Helps achieve fluffy, stable whipped cream.
Rubber Spatula: Essential for gentle folding.
Loaf Pan or Freezer-Safe Container: Perfect for storing and shaping the ice cream.
Plastic Wrap or Lid: Keeps your ice cream fresh and prevents freezer burn.
Ingredients in No-Churn Chocolate Ice Cream
The beauty of this recipe is how just a handful of ingredients come together to create pure indulgence.
- Heavy Whipping Cream: 2 cups. Provides the creamy, airy base.
- Sweetened Condensed Milk: 1 can (14 ounces). Adds sweetness and smoothness.
- Unsweetened Cocoa Powder: 1/2 cup. Infuses deep chocolate flavor.
- Semi-Sweet Chocolate (melted): 4 ounces. Enriches the ice cream with velvety texture.
- Vanilla Extract: 1 teaspoon. Enhances the chocolate with warm undertones.
- Salt: 1/4 teaspoon. Balances the sweetness and sharpens flavor.
Ingredient Substitutions
Making adjustments is easy and fun with this recipe.
Heavy Cream: Coconut cream for a dairy-free option.
Sweetened Condensed Milk: Dairy-free condensed coconut milk.
Semi-Sweet Chocolate: Dark chocolate for a more intense flavor.
Cocoa Powder: Dutch-process cocoa for a richer taste.
Ingredient Spotlight
Sweetened Condensed Milk: This is the secret hero of no-churn ice cream. It brings sweetness while keeping the mixture soft and scoopable.
Cocoa Powder: The soul of this recipe, delivering that deep, satisfying chocolate flavor that makes each bite irresistible.
Instructions for Making No-Churn Chocolate Ice Cream
Making this ice cream is both fun and surprisingly quick. Here’s the step-by-step journey from ingredients to indulgence.
- Preheat Your Equipment: Chill your mixing bowl and whisk in the fridge for 15 minutes to ensure the cream whips well.
- Combine Ingredients: In one bowl, whisk condensed milk, cocoa powder, melted chocolate, vanilla, and salt until smooth.
- Prepare Your Cooking Vessel: Line a loaf pan or container with parchment paper.
- Assemble the Dish: Whip the heavy cream until stiff peaks form. Gently fold the cream into the chocolate mixture until fully blended.
- Cook to Perfection: Transfer the mixture into your prepared pan. Smooth the top with a spatula.
- Finishing Touches: Cover with plastic wrap, pressing it directly onto the surface.
- Serve and Enjoy: Freeze for at least 6 hours or overnight, then scoop and savor every bite.
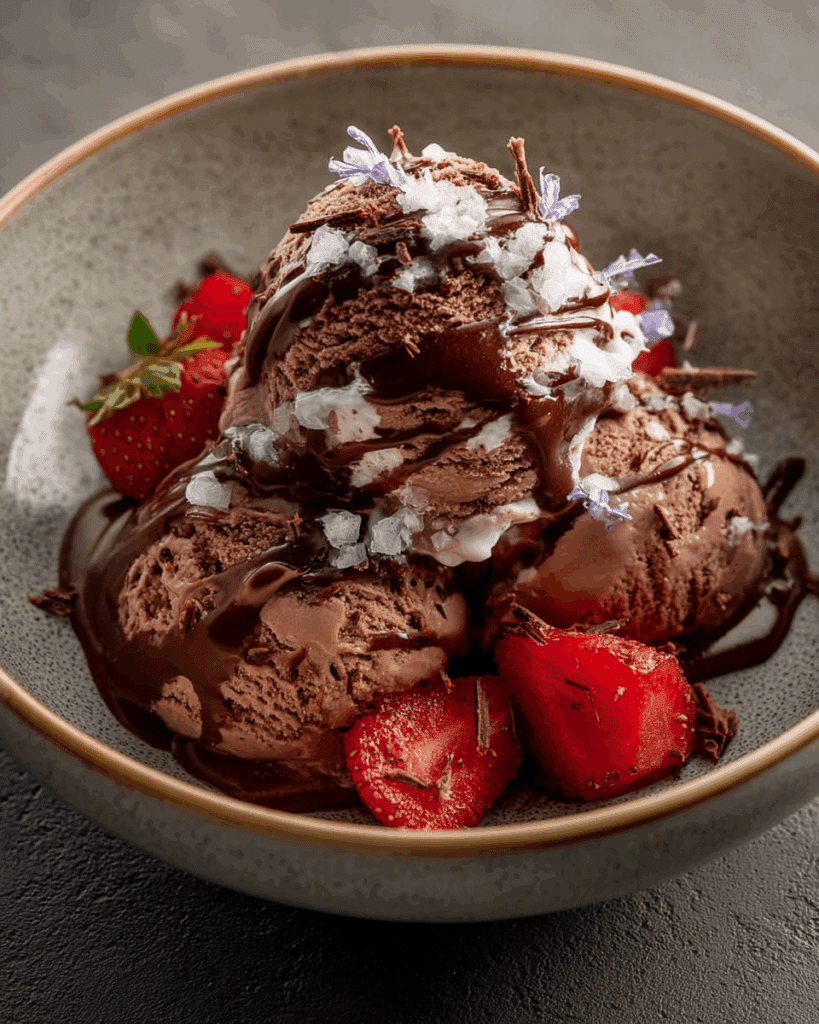
Texture & Flavor Secrets
The texture is what sets this dessert apart. The whipped cream ensures a light, fluffy base, while the melted chocolate adds a luxurious silkiness. The cocoa deepens the flavor, and the pinch of salt creates balance, turning each spoonful into a dance of sweet, bitter, and creamy sensations.
Cooking Tips & Tricks
Here are some simple yet powerful tricks to keep in mind.
- Freeze overnight for the best scoopable consistency.
- Use high-quality chocolate for richer depth of flavor.
- If you prefer softer ice cream, let it sit at room temperature for 5 minutes before serving.
What to Avoid
Even a simple recipe like this has a few pitfalls to steer clear of.
- Overwhipping the cream, which makes it grainy instead of smooth.
- Skipping the salt, as it’s vital to balance sweetness.
- Leaving it uncovered in the freezer, which causes ice crystals.
Nutrition Facts
Servings: 8
Calories per serving: 310
Note: These are approximate values.
Preparation Time
Prep Time: 15 minutes
Cook Time: 0 minutes
Total Time: 6 hours 15 minutes (including freezing)
Make-Ahead and Storage Tips
One of the best things about no-churn ice cream is how easily it can be made ahead. Prepare the mixture a day in advance, freeze, and enjoy whenever the craving hits. Stored properly, it lasts up to 2 weeks in the freezer. For longer storage, wrap the container in foil to prevent freezer burn.
How to Serve No-Churn Chocolate Ice Cream
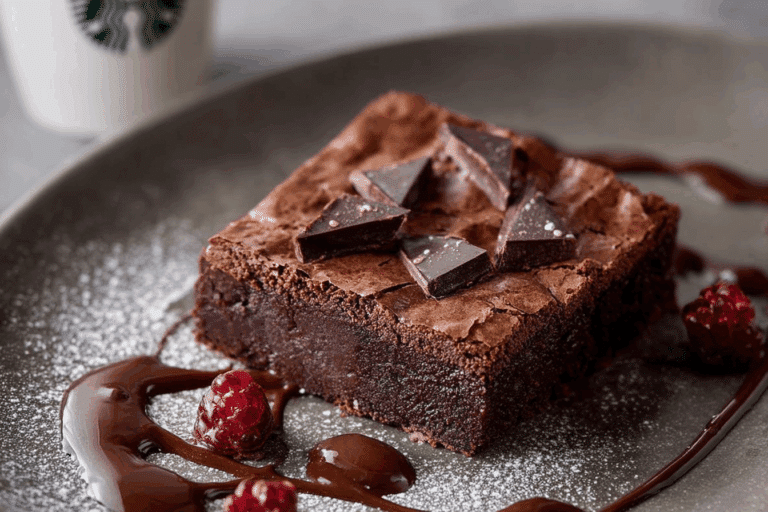
This ice cream shines in a bowl all by itself, but it’s also wonderful when scooped over a warm brownie, nestled between cookies for an ice cream sandwich, or topped with fresh berries and a drizzle of caramel.
Creative Leftover Transformations
Don’t let leftovers just sit there—turn them into something new! Try blending scoops into a chocolate milkshake, layering with cake for an ice cream trifle, or sandwiching between graham crackers for frozen treats.
Additional Tips
Add a teaspoon of instant espresso powder to intensify the chocolate flavor. For a nutty twist, swirl in peanut butter or almond butter before freezing.
Make It a Showstopper
Presentation matters! Scoop with a hot spoon for perfect rounds, drizzle with chocolate syrup, sprinkle with shaved chocolate or nuts, and serve in chilled glass bowls for that wow factor.
Variations to Try
- Chocolate Chip: Fold in mini chocolate chips for texture.
- Rocky Road: Add marshmallows and chopped almonds.
- Mint Chocolate: Stir in peppermint extract and crushed mint candies.
- Mocha: Mix in instant coffee powder for a coffee-chocolate blend.
- Cookies and Cream: Swirl in crushed chocolate cookies.
FAQ’s
Q1: Can I make this recipe dairy-free?
Yes, substitute coconut cream and dairy-free condensed milk.
Q2: How long does it last in the freezer?
It keeps well for up to 2 weeks if properly sealed.
Q3: Can I add mix-ins before freezing?
Absolutely, fold in nuts, chocolate chips, or cookie chunks before freezing.
Q4: Does it get icy?
Not if sealed properly and mixed well, the condensed milk prevents iciness.
Q5: Do I need to stir it while freezing?
No, just freeze it undisturbed until firm.
Q6: Can I use dark chocolate instead?
Yes, dark chocolate adds an even deeper flavor.
Q7: How do I get clean scoops?
Run your scoop under hot water for perfect, round servings.
Q8: Can I double the recipe?
Yes, simply use a larger container and the same ratios.
Q9: Is this safe for kids?
Definitely, it’s a family-friendly dessert with no raw eggs.
Q10: Can I use flavored cocoa powder?
Yes, experiment with flavored cocoa like mocha or cinnamon-infused.
Conclusion
There you have it, a luscious, silky-smooth no-churn chocolate ice cream that’s as easy to make as it is to love. With just a few ingredients and a bit of patience, you’ll have a dessert that feels luxurious yet comforting. Trust me, you’re going to love this, and once you try it, you’ll find yourself making it again and again.