Roasted Marshmallows Oven-Baked
There is something almost magical about warm marshmallows. The moment they start to puff up and turn lightly golden, that sweet aroma fills the kitchen and suddenly the whole place feels cozy. Normally we think about roasting them over a campfire, but let me tell you something, making them in the oven is just as satisfying.
The outside becomes slightly crisp while the inside melts into that soft, cloudlike sweetness everyone loves. Trust me, you’re going to love this. It is simple, nostalgic, and honestly one of those treats that feels special even though it takes almost no effort.
Why This Sweet Little Treat Wins Every Time
Sometimes the best recipes are the ones that keep things beautifully simple. Oven roasted marshmallows bring that classic toasted flavor indoors, and they do it in a way that feels fun and foolproof.
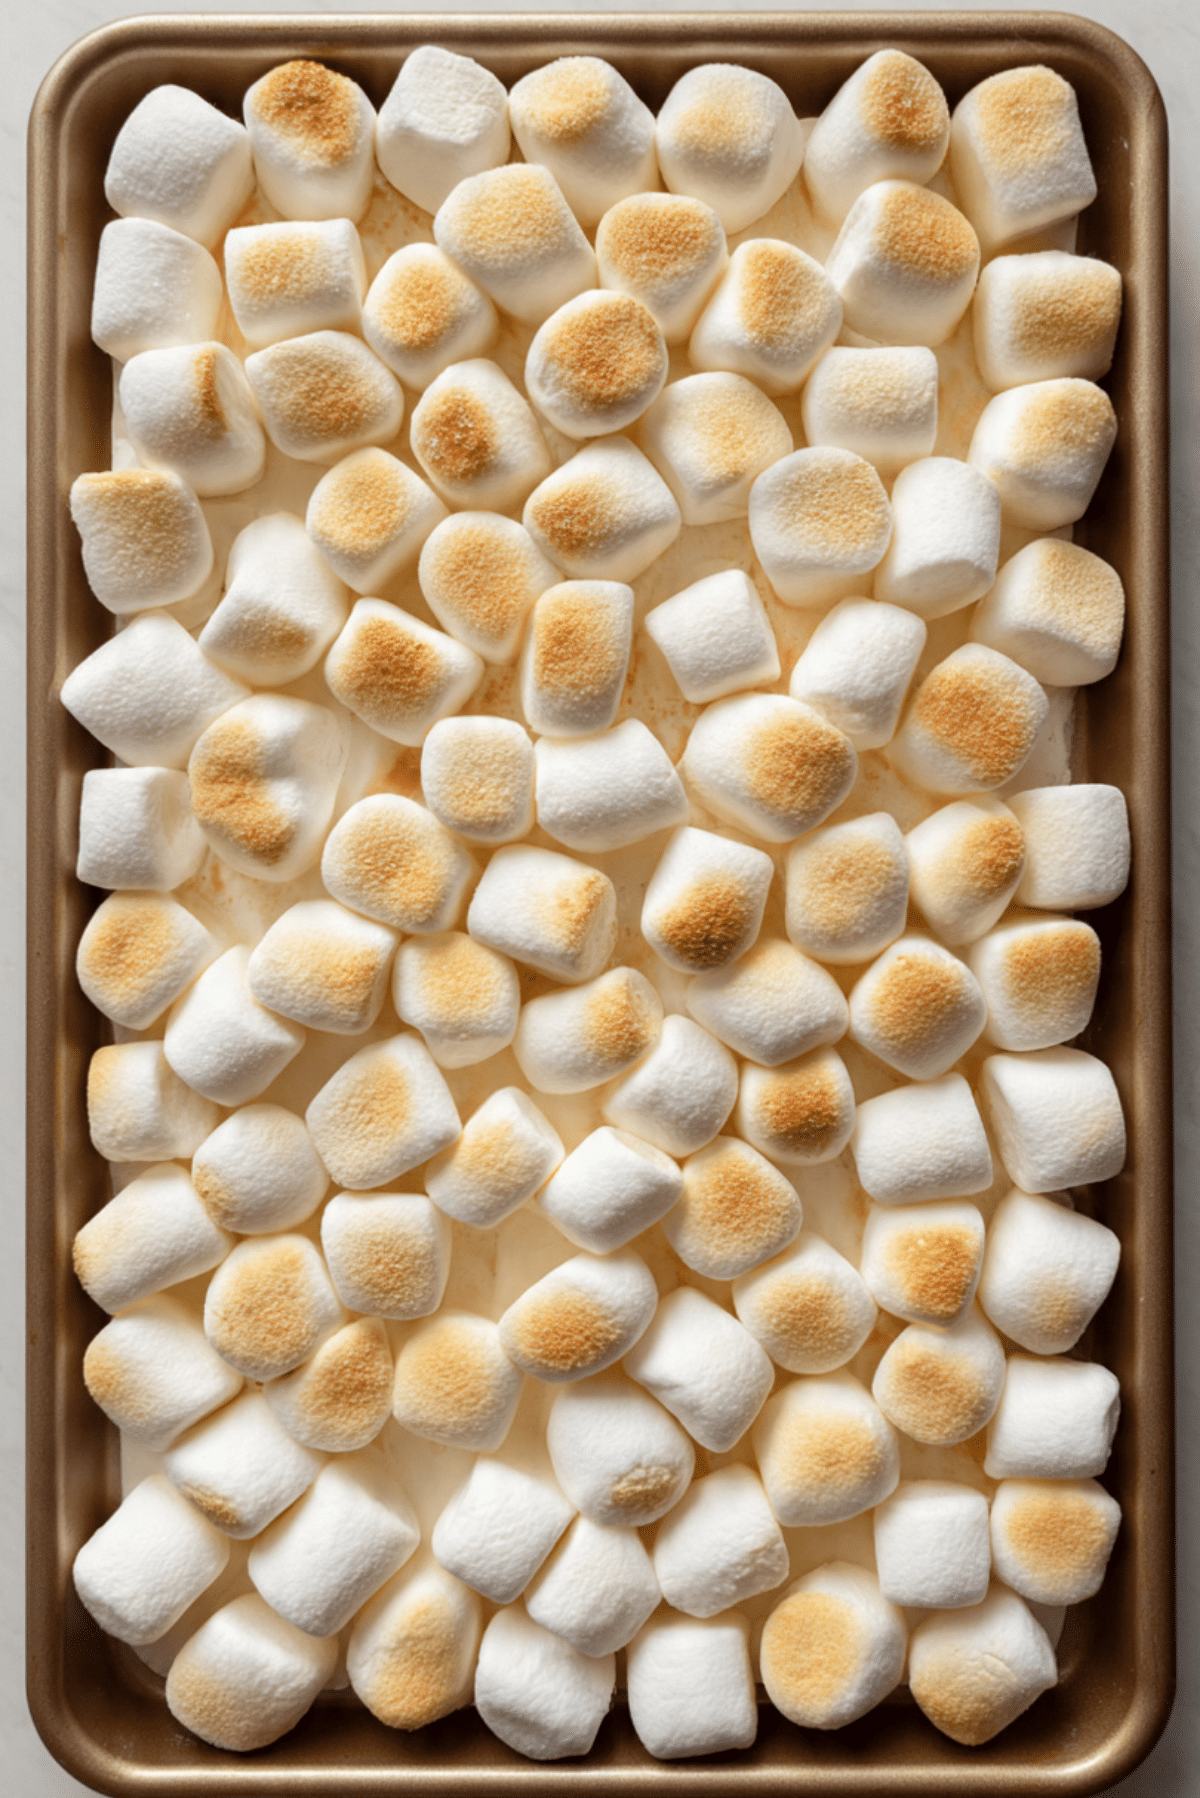
Imagine a tray of golden marshmallows, gently puffed, warm and soft. Each bite gives you a delicate contrast between lightly caramelized edges and a fluffy center. This one’s a total game changer when you want a quick dessert or a playful snack.
A Little Story Behind Toasted Marshmallows
Marshmallows have been loved for centuries, though the modern version we know today became popular in the United States during the late 1800s. Originally inspired by a sweet treat made from the root of the marshmallow plant, the fluffy candy eventually evolved into the soft confection we enjoy today.
Campfire roasting became iconic in North American outdoor culture, especially with the rise of s’mores. But as home ovens became more common, people discovered they could recreate that golden toasted effect indoors. And now, oven roasting has become a favorite shortcut for enjoying that same nostalgic flavor without leaving the kitchen.
Why This Recipe Always Works
This recipe is incredibly reliable and easy to love. Let me break down exactly why it works so well.
Versatile: You can enjoy these on their own, add them to desserts, or even use them for quick s’mores at home.
Budget-Friendly: The ingredients are simple and inexpensive, which makes this an easy treat anytime.
Quick and Easy: From start to finish, the whole process takes only a few minutes.
Customizable: You can add toppings, chocolate drizzle, or sandwich them between cookies.
Crowd-Pleasing: Kids and adults both love the warm, gooey texture.
Make-Ahead Friendly: You can prepare a tray quickly whenever guests arrive.
Great for Leftovers: Any extras can be used in hot cocoa, desserts, or snack mixes.
Pro Tips for Perfectly Golden Marshmallows
Getting that beautiful golden top is easier than you might think, but a few small tips make all the difference.
- Watch closely: Marshmallows toast quickly in the oven, so keep an eye on them to avoid burning.
- Use parchment paper: This helps prevent sticking and makes cleanup easy.
- Leave space between pieces: Marshmallows expand as they heat, so spacing helps them keep their shape.
- Serve immediately: They taste best when warm and soft.
Kitchen Tools That Make This Even Easier
Before we jump into the ingredients, let’s talk about a few simple tools that help everything go smoothly.
Baking Sheet: A flat baking sheet allows the marshmallows to heat evenly.
Parchment Paper: Prevents sticking and keeps the tray clean.
Oven: Provides even heat for that lightly toasted finish.
Spatula: Helpful for gently lifting marshmallows off the tray once they are done.
Ingredients That Bring This Treat to Life
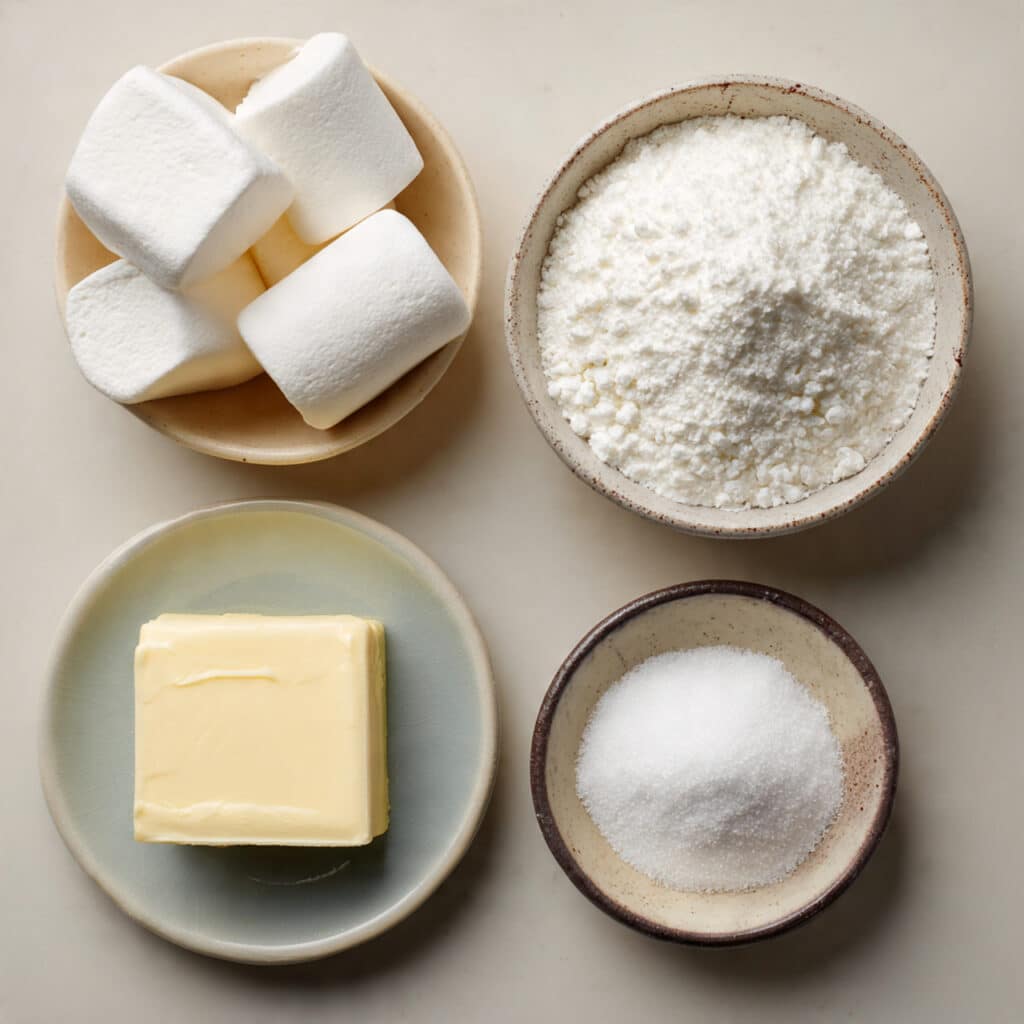
The beauty of this recipe is that it keeps things simple. Just a few ingredients create that classic toasted flavor.
- Large Marshmallows: 20 large marshmallows. These puff beautifully in the oven and develop a golden surface while staying soft inside.
- Unsalted Butter: 1 tablespoon. Lightly greasing the baking surface helps prevent sticking and adds a subtle richness.
- Granulated Sugar: 1 teaspoon. A tiny sprinkle helps enhance caramelization and sweetness.
Easy Ingredient Swaps If Needed
Sometimes you might want to tweak the ingredients slightly, and that works perfectly here.
Marshmallows: Mini marshmallows can be used instead of large ones.
Butter: Coconut oil works well as a dairy free alternative.
Granulated Sugar: Light brown sugar can add a slightly deeper caramel flavor.
Spotlight on the Star Ingredient
Marshmallows: The real star here. When heated, the sugar inside begins to caramelize while the gelatin structure softens. This creates that classic contrast between a lightly toasted exterior and a soft, fluffy interior.
Let’s Start Cooking
Now comes the fun part. Here are the steps you’re going to follow.
- Preheat Your Equipment: Preheat the oven to 400°F (200°C). Line a baking sheet with parchment paper and lightly grease it with the butter.
- Combine Ingredients: Place the marshmallows in a bowl and sprinkle the granulated sugar over them so they are lightly coated.
- Prepare Your Cooking Vessel: Arrange the marshmallows on the prepared baking sheet, leaving small spaces between each one.
- Assemble the Dish: Make sure the marshmallows sit upright so they toast evenly on top.
- Cook to Perfection: Place the tray in the oven and bake for about 3 to 5 minutes, until the tops become lightly golden.
- Finishing Touches: Remove the tray carefully once the tops are toasted and slightly puffed.
- Serve and Enjoy: Serve immediately while they are warm, soft, and beautifully gooey.
The Texture and Flavor Magic
As the marshmallows heat, their sugar begins to caramelize and create a delicate toasted flavor. The outer surface becomes slightly crisp while the inside softens into a warm, airy sweetness.
That contrast between light caramel notes and fluffy texture is exactly what makes them so irresistible.
Helpful Cooking Tips
Making them is easy, but these little tips make them even better.
- Place marshmallows evenly on the tray so they toast at the same speed.
- Use the middle rack of the oven for more balanced browning.
- Serve them warm for the best gooey texture.
Common Mistakes to Avoid
Even simple recipes can go wrong if you rush them.
- Overbaking: Marshmallows toast very quickly, so keep a close eye on them.
- Crowding the tray: When marshmallows expand they can stick together if placed too close.
- Skipping parchment paper: This can make them difficult to remove after baking.
Nutritional Snapshot
Servings: 4
Calories per serving: 90
Note: These are approximate values.
Time Needed From Start to Finish
Prep Time: 5 minutes
Cook Time: 5 minutes
Total Time: 10 minutes
Make Ahead and Storage Tips
If you want to prepare them ahead, simply place the marshmallows on the tray and keep the tray ready until baking time. When you are ready to serve, pop them into the oven for a quick toast.
If you have leftovers, store them in an airtight container at room temperature for up to one day. Reheat briefly in the oven for the best texture.
Freezing is not recommended because marshmallows lose their soft structure after thawing.
Serving Ideas That Make Them Even Better
These warm treats are delicious on their own, but they also pair wonderfully with other desserts.
You can sandwich them between graham crackers and chocolate for quick homemade s’mores. They are also amazing on top of brownies, hot cocoa, or ice cream.
Creative Ways to Use Leftovers
If you happen to have extra, there are fun ways to reuse them.
Chop them and stir them into rice cereal treats. Add them to hot chocolate for extra sweetness. Or crumble them into dessert parfaits for a playful topping.
Extra Tips for Best Results
Sometimes the smallest details make the biggest difference.
Try using a silicone baking mat for extra easy removal. Sprinkle a little cinnamon sugar for added warmth. Or drizzle melted chocolate over the finished marshmallows.
Turn This Into a Showstopping Dessert
If you want to impress guests, place the toasted marshmallows over a tray of chocolate chunks and cookies. The warmth melts the chocolate slightly and creates a quick dessert platter everyone will love.
It looks beautiful and tastes even better.
Fun Variations to Try
Here are a few creative twists that take this treat to the next level.
- Chocolate Drizzle Version with melted chocolate poured over warm marshmallows.
- Cinnamon Sugar Version with a light sprinkle of cinnamon and sugar before baking.
- S’mores Tray Version baked with chocolate pieces and graham cracker crumbs.
- Nutty Crunch Version topped with crushed toasted nuts after baking.
FAQ’s
1. Can I use mini marshmallows instead of large ones?
Yes, mini marshmallows work well. Just reduce the baking time slightly because they toast faster.
2. Why did my marshmallows melt too much?
If the oven temperature is too high or the tray stays in too long, marshmallows can collapse instead of puff.
3. Can I make these in a toaster oven?
Yes, a toaster oven works perfectly. Just monitor closely because small ovens toast faster.
4. Can I add chocolate before baking?
It is better to add chocolate after baking so it melts gently without burning.
5. Do I need parchment paper?
It is recommended because marshmallows become sticky when heated.
6. Can I make this recipe dairy free?
Yes, simply replace butter with coconut oil.
7. How do I keep marshmallows from sticking together?
Leave space between them on the baking sheet.
8. Can I broil them instead of baking?
Yes, but broiling requires close attention since browning happens very quickly.
9. Are these good for parties?
Absolutely. They are quick, fun, and always popular with guests.
10. Can kids help make this recipe?
Yes, this is a great beginner recipe for kids with adult supervision for the oven.
Conclusion
Sometimes the simplest treats bring the biggest smiles. Oven roasted marshmallows capture that cozy toasted flavor we all love, but in a way that is easy, quick, and perfect for any day.
Warm, soft, and lightly golden, they deliver that nostalgic sweetness in every bite. Trust me, once you try making them this way, you might start keeping marshmallows in your pantry just for this.
Print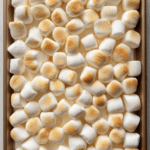
Roasted Marshmallows Oven-Baked
- Prep Time: 5 minutes
- Cook Time: 5 minutes
- Total Time: 10 minutes
- Yield: 4 servings 1x
- Category: Dessert
- Method: Baked
- Cuisine: American
- Diet: Vegetarian
Description
Warm, golden oven-baked marshmallows with lightly toasted tops and soft, gooey centers. This quick sweet treat brings cozy campfire flavor indoors with just a few simple ingredients.
Ingredients
- 20 large marshmallows
- 1 tablespoon unsalted butter
- 1 teaspoon granulated sugar
Instructions
- Preheat the oven to 400°F (200°C). Line a baking sheet with parchment paper and lightly grease it with the unsalted butter.
- Place the marshmallows in a bowl and sprinkle the granulated sugar over them so they are lightly coated.
- Arrange the marshmallows upright on the prepared baking sheet, leaving a little space between each one.
- Bake for 3 to 5 minutes, until the tops are lightly golden and the marshmallows are slightly puffed.
- Remove the baking sheet from the oven carefully.
- Serve immediately while warm, soft, and gooey.
Notes
- Watch closely during baking because marshmallows brown very quickly.
- Parchment paper helps prevent sticking and makes cleanup easier.
- Serve right away for the best texture.
- Mini marshmallows can be used, but they will need less baking time.
Nutrition
- Serving Size: 5 marshmallows
- Calories: 90
- Sugar: 14g
- Sodium: 20mg
- Fat: 3g
- Saturated Fat: 2g
- Unsaturated Fat: 1g
- Trans Fat: 0g
- Carbohydrates: 16g
- Fiber: 0g
- Protein: 0g
- Cholesterol: 8mg
Keywords: oven baked marshmallows, roasted marshmallows, easy dessert, toasted marshmallows, quick sweet treat