Chocolate Ice Cream Cone
There’s something undeniably joyful about a cold, creamy chocolate ice cream cone on a warm day. That first lick, rich with cocoa and just the right hint of sweetness, brings back a flood of summer memories. It’s nostalgic, comforting, and irresistibly delicious. The crunchy cone paired with velvety chocolate ice cream is a classic combination that never goes out of style.
Behind the Recipe
Growing up, chocolate ice cream cones were the highlight of every sunny afternoon. Whether it was from the neighborhood truck or homemade in our kitchen, that moment of holding a cone dripping with chocolate felt like pure magic. This recipe recreates that charm in every scoop. It’s made with real cocoa, just enough sugar to bring out the chocolate’s depth, and a creaminess that melts perfectly into the crisp cone.
Recipe Origin or Trivia
Did you know that ice cream cones have been around since the early 1900s? Legend has it, they were popularized at the 1904 World’s Fair in St. Louis. Since then, pairing frozen treats with edible cones has become a beloved tradition worldwide. Chocolate, being one of the most universally adored flavors, naturally found its way into the cone — and now, it’s a timeless favorite across ages and cultures.
Why You’ll Love Chocolate Ice Cream Cone
This chocolate ice cream cone is not just a treat, it’s an experience — cool, creamy, and completely satisfying.
Versatile: Serve it in cones, bowls, or even between cookies for sandwiches.
Budget-Friendly: Uses simple pantry staples that won’t break the bank.
Quick and Easy: No complicated techniques, just mix, chill, churn, and enjoy.
Customizable: Add chocolate chips, swirl in caramel, or go dairy-free.
Crowd-Pleasing: Loved by kids and adults alike — perfect for parties.
Make-Ahead Friendly: Can be made in advance and stored in the freezer.
Great for Leftovers: Any extra can be scooped onto desserts or blended into milkshakes.
Chef’s Pro Tips for Perfect Results
A few little tricks will turn your homemade chocolate ice cream from good to unforgettable.
- Use high-quality cocoa powder for a richer, deeper flavor.
- Chill the mixture thoroughly before churning for smoother texture.
- Don’t skimp on the fat — whole milk and heavy cream give that luscious mouthfeel.
- If using an ice cream maker, freeze the bowl overnight for best results.
- Store in an airtight container with parchment paper on top to prevent ice crystals.
Kitchen Tools You’ll Need
Making this cone-worthy treat is easy when you’ve got the right tools at hand.
Mixing Bowls: For blending your ice cream base.
Whisk: To thoroughly combine cocoa, sugar, and cream.
Saucepan: To gently heat the mixture and dissolve ingredients.
Ice Cream Maker: For that ultra-smooth churned texture.
Ice Cream Scoop: For perfect, round scoops every time.
Cones: Classic sugar or waffle cones for serving.
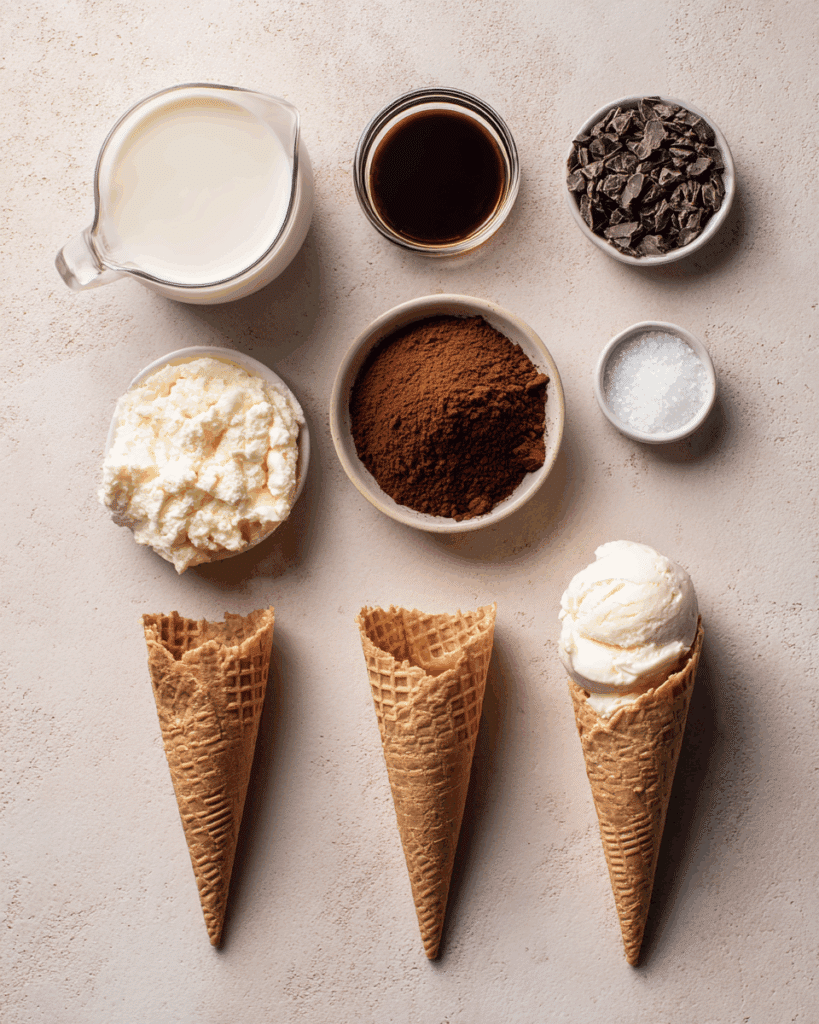
Ingredients in Chocolate Ice Cream Cone
These ingredients come together in harmony to create something beautifully simple yet indulgent.
- Whole Milk: 1 cup — Helps keep the ice cream creamy and light.
- Heavy Cream: 2 cups — Provides richness and that smooth, scoopable texture.
- Unsweetened Cocoa Powder: ¾ cup — Delivers intense, deep chocolate flavor.
- Granulated Sugar: ¾ cup — Balances the bitterness of cocoa and adds sweetness.
- Vanilla Extract: 1 teaspoon — Enhances the chocolate with a warm, aromatic note.
- Salt: ¼ teaspoon — A pinch to amplify all the flavors.
- Ice Cream Cones: 6 cones — The crunchy, nostalgic vessels for serving.
Ingredient Substitutions
Life happens — and sometimes ingredients need a swap. Here’s what you can use instead.
Whole Milk: Almond or oat milk for a dairy-free option.
Heavy Cream: Full-fat coconut cream for a vegan twist.
Granulated Sugar: Maple syrup or honey, just reduce the milk slightly.
Cocoa Powder: Melted dark chocolate if you prefer a richer taste.
Vanilla Extract: Vanilla bean paste or omit if unavailable.
Ingredient Spotlight
Unsweetened Cocoa Powder: This is the heart of the flavor, giving the ice cream its bold, chocolatey soul. Choose a good-quality brand for best results.
Heavy Cream: It’s what makes each bite luxuriously smooth and keeps the ice cream from becoming icy when frozen.
Instructions for Making Chocolate Ice Cream Cone
Alright, let’s get to the good part — making the magic happen in your own kitchen.
- Preheat Your Equipment:
Place your ice cream maker bowl in the freezer the night before you plan to churn. - Combine Ingredients:
In a saucepan, whisk together cocoa powder, sugar, and salt. Slowly add the milk, whisking until smooth. Heat over medium, stirring often, just until warm and the sugar dissolves. - Prepare Your Cooking Vessel:
Remove from heat. Stir in heavy cream and vanilla extract. Transfer the mixture to a bowl, cover, and refrigerate until completely chilled (about 4 hours or overnight). - Assemble the Dish:
Pour the chilled mixture into your ice cream maker and churn according to the manufacturer’s instructions, usually 20 to 25 minutes. - Cook to Perfection:
Once the mixture reaches soft-serve consistency, transfer to an airtight container and freeze for at least 2 hours for firmer scoops. - Finishing Touches:
Scoop generous balls of chocolate ice cream and place them into cones. Add sprinkles, chocolate drizzle, or chopped nuts if desired. - Serve and Enjoy:
Serve immediately for the ultimate chocolatey indulgence.
Texture & Flavor Secrets
The beauty of this ice cream is in its texture — it’s silky, dense, and melts on the tongue. The cocoa brings a dark, deep richness, while the sugar and cream soften it into something utterly smooth and dreamy. The cone adds the perfect crunch to contrast the creamy scoop.
Cooking Tips & Tricks
Little tweaks can make a big difference. Keep these in mind:
- Chill everything before churning for faster, smoother results.
- Avoid over-churning or it will become too dense.
- Store in a shallow container for quicker freezing.
What to Avoid
Even the sweetest recipes can go sour without a few precautions.
- Don’t skip chilling the base — it will affect texture.
- Avoid low-fat milk — the result will be icy, not creamy.
- Don’t overheat the mixture — just warm enough to dissolve sugar.
Nutrition Facts
Servings: 6
Calories per serving: 290
Note: These are approximate values.
Preparation Time
Prep Time: 10 minutes
Cook Time: 10 minutes
Total Time: 4 hours 20 minutes (including chilling)
Make-Ahead and Storage Tips
This chocolate ice cream is perfect to prepare ahead. You can make the base the night before, churn it the next morning, and have it ready for afternoon cravings. Store it in a freezer-safe container for up to 2 weeks. For best texture, let it sit at room temp for a few minutes before scooping.
How to Serve Chocolate Ice Cream Cone
Classic never fails — just a scoop in a cone. But why stop there? Pair it with fresh strawberries, a drizzle of hot fudge, or sandwich it between two cookies. Or go nostalgic and dip the cone in melted chocolate before adding the ice cream.
Creative Leftover Transformations
If you manage to have any leftovers, turn them into:
- Chocolate milkshakes
- Ice cream sandwiches
- Ice cream-topped brownies
- Homemade ice cream bars with wooden sticks
Additional Tips
To keep your ice cream rich and soft:
- Add a splash of corn syrup or a tablespoon of alcohol-free vanilla to reduce iciness.
- For an extra-chocolatey version, swirl in mini chocolate chips before freezing.
- Always use airtight containers to avoid freezer burn.
Make It a Showstopper
Presentation makes the difference. Dip cones in melted chocolate and roll in crushed nuts or sprinkles. Serve in a cone holder or wrap the cones in cute paper. A drizzle of syrup and a cherry on top adds that old-school charm.
Variations to Try
- Mocha Ice Cream: Add 1 teaspoon of instant espresso to the base.
- Double Chocolate Chip: Stir in dark chocolate chunks before freezing.
- Vegan Delight: Use coconut milk and agave for a dairy-free version.
- Spicy Chocolate: Add a pinch of cinnamon and cayenne for a kick.
- Nutty Crunch: Swirl in crushed almonds or hazelnuts.
FAQ’s
Q1: Can I make this without an ice cream maker?
A1: Yes, you can freeze the mixture and stir every 30 minutes until set, but texture may be slightly different.
Q2: How long will homemade ice cream last in the freezer?
A2: It’s best within 2 weeks but can last up to a month if stored properly.
Q3: Can I use Dutch-processed cocoa?
A3: Absolutely, it will give a smoother, darker flavor.
Q4: What kind of cones work best?
A4: Sugar cones and waffle cones hold up best to the creamy texture.
Q5: Can I use low-fat milk?
A5: It’s not recommended as it makes the texture icy rather than creamy.
Q6: Is this recipe gluten-free?
A6: The ice cream itself is gluten-free. Just check the cones or use gluten-free versions.
Q7: How can I reduce sugar?
A7: Try using a sugar substitute like stevia or monk fruit in appropriate ratios.
Q8: Can I make it without vanilla?
A8: Yes, but the flavor won’t be as round and full.
Q9: Why is my ice cream too hard?
A9: It may be over-churned or stored at too low a temperature. Let it sit out before scooping.
Q10: Can I add mix-ins like candy or cookies?
A10: Of course! Just fold them in before the final freeze.
Conclusion
There you have it — a timeless treat brought to life right in your kitchen. This chocolate ice cream cone isn’t just dessert, it’s a bite of happiness in every scoop. Trust me, it’s worth every bite. Whether for a summer bash or a cozy night in, it’s sure to bring smiles all around.
Print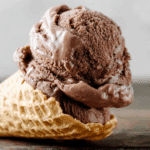
Chocolate Ice Cream Cone
- Prep Time: 10 minutes
- Cook Time: 10 minutes
- Total Time: 4 hours 20 minutes
- Yield: 6 servings 1x
- Category: Dessert
- Method: Churned
- Cuisine: American
- Diet: Vegetarian
Description
A creamy, dreamy homemade chocolate ice cream served in crisp cones, rich in cocoa and easy to churn at home — the perfect nostalgic treat for any day.
Ingredients
- 1 cup Whole Milk
- 2 cups Heavy Cream
- ¾ cup Unsweetened Cocoa Powder
- ¾ cup Granulated Sugar
- 1 teaspoon Vanilla Extract
- ¼ teaspoon Salt
- 6 Ice Cream Cones
Instructions
- Preheat Your Equipment: Place your ice cream maker bowl in the freezer the night before you plan to churn.
- Combine Ingredients: In a saucepan, whisk together cocoa powder, sugar, and salt. Slowly add the milk, whisking until smooth. Heat over medium, stirring often, just until warm and the sugar dissolves.
- Prepare Your Cooking Vessel: Remove from heat. Stir in heavy cream and vanilla extract. Transfer the mixture to a bowl, cover, and refrigerate until completely chilled (about 4 hours or overnight).
- Assemble the Dish: Pour the chilled mixture into your ice cream maker and churn according to the manufacturer’s instructions, usually 20 to 25 minutes.
- Cook to Perfection: Once the mixture reaches soft-serve consistency, transfer to an airtight container and freeze for at least 2 hours for firmer scoops.
- Finishing Touches: Scoop generous balls of chocolate ice cream and place them into cones. Add sprinkles, chocolate drizzle, or chopped nuts if desired.
- Serve and Enjoy: Serve immediately for the ultimate chocolatey indulgence.
Notes
- Use high-quality cocoa powder for richer flavor.
- Chill your base thoroughly before churning for the best texture.
- Store with parchment paper on top to prevent ice crystals.
Nutrition
- Serving Size: 1 cone
- Calories: 290
- Sugar: 22g
- Sodium: 70mg
- Fat: 20g
- Saturated Fat: 13g
- Unsaturated Fat: 5g
- Trans Fat: 0g
- Carbohydrates: 26g
- Fiber: 3g
- Protein: 4g
- Cholesterol: 55mg
Keywords: chocolate ice cream cone, homemade chocolate ice cream, ice cream cone recipe, summer dessert, easy chocolate ice cream