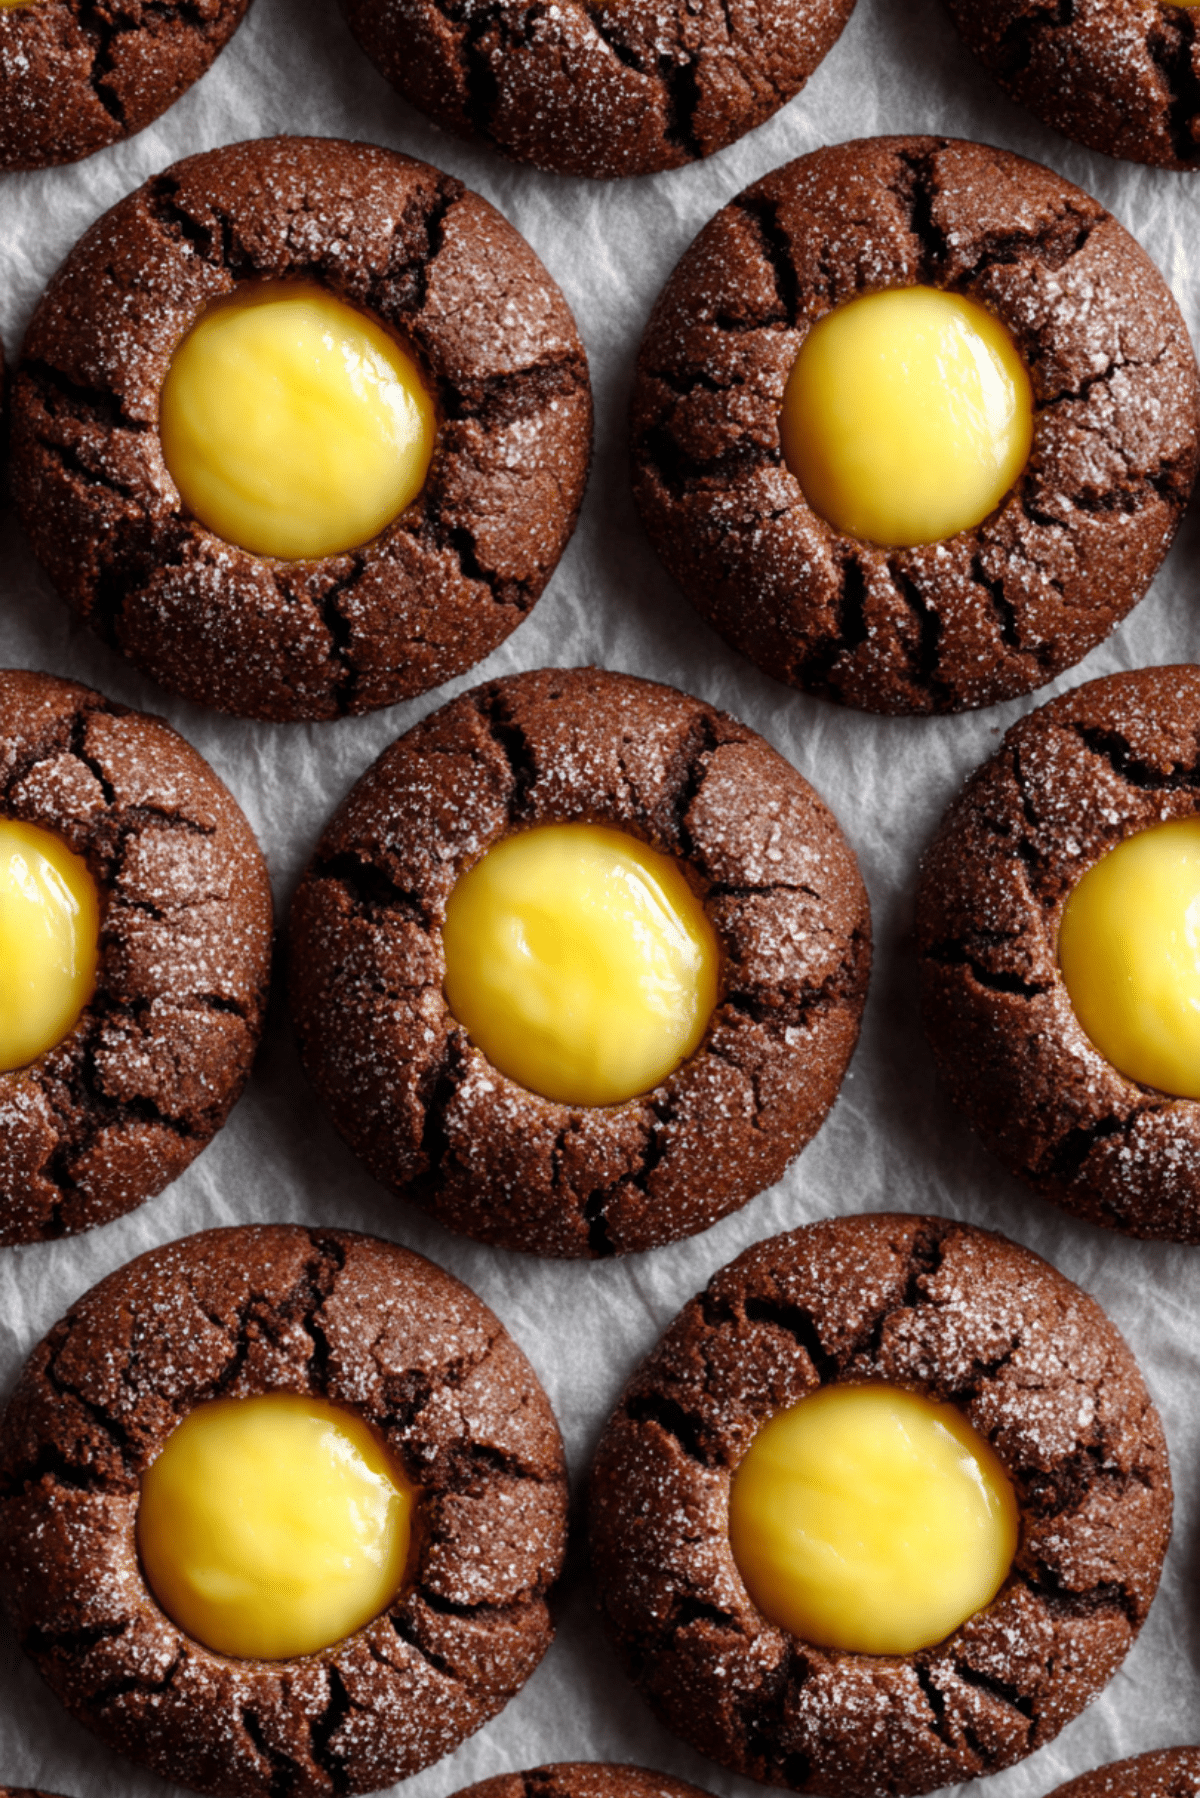
Chocolate Thumbprint Cookies with Custard Filling
There’s something irresistibly nostalgic about biting into a soft chocolate cookie only to find a smooth, velvety custard surprise nestled in the center. These chocolate thumbprint cookies with custard filling are like little edible hugs — rich, tender, and packed with a creamy burst that takes you right back to your favorite childhood treats. Trust me, you’re going to love this.
The Perfect Balance of Fudgy and Creamy Delight
What makes these cookies truly stand out is the contrast. You start with a chewy, deeply chocolatey base that melts in your mouth, then comes the creamy custard, silky and sweet with just the right hint of vanilla. It’s like your favorite dessert duo tucked into a perfect bite-sized treat.
A Sweet Treat with a Touch of History
Thumbprint cookies, often associated with Scandinavian and Eastern European traditions, have been a holiday staple for generations. While jam is the classic center, this custard twist adds a modern spin that elevates the cookie to a new level of decadence. This variation brings together the best of buttery European-style cookies and creamy custard traditions often found in British desserts.
Why These Cookies Deserve a Spot in Your Baking Repertoire
Baking should be joyful, and this cookie makes it exactly that. Here’s why they’re such a win in the kitchen:
Versatile: You can swap the filling, drizzle with chocolate, or dust with powdered sugar. The base cookie is a dream to customize.
Budget-Friendly: Made with pantry staples like flour, cocoa, and sugar — no fancy ingredients required.
Quick and Easy: Simple steps, minimal fuss. The dough comes together fast, and the filling is a basic custard.
Customizable: Try lemon curd, raspberry jam, or Nutella in place of the custard if you’re feeling adventurous.
Crowd-Pleasing: These cookies disappear fast at parties and potlucks. They’re as beautiful as they are tasty.
Make-Ahead Friendly: The dough and custard can both be made in advance and assembled when you’re ready.
Great for Leftovers: If you somehow don’t finish them all, they hold up beautifully for days.
Pro Tips for Chocolate Thumbprint Cookie Success
Before you dive into baking, keep these handy tips in mind:
- Chill the Dough: A quick chill helps the cookies hold their shape and creates a more tender bite.
- Use a Measuring Spoon or Thumb: Press gently to form an even well in the center without cracking the dough.
- Don’t Overfill: A little custard goes a long way — you don’t want it spilling over during baking.
- Let Them Cool: Custard firms up beautifully as it cools, making for a cleaner bite.
- Dust Lightly: A light sprinkle of powdered sugar adds a lovely contrast and visual charm.
Must-Have Tools for This Recipe
Gather these kitchen essentials to make your baking smooth and satisfying:
Mixing Bowls: For combining dry and wet ingredients separately.
Electric Mixer: Makes creaming the butter and sugar a breeze.
Baking Sheet: A standard cookie sheet lined with parchment works perfectly.
Measuring Cups and Spoons: For accurate ingredient portions.
Saucepan: Needed for making the creamy custard filling.
Whisk: Helps you get that custard silky smooth.
Cooling Rack: Crucial for setting the cookies and letting the custard settle.
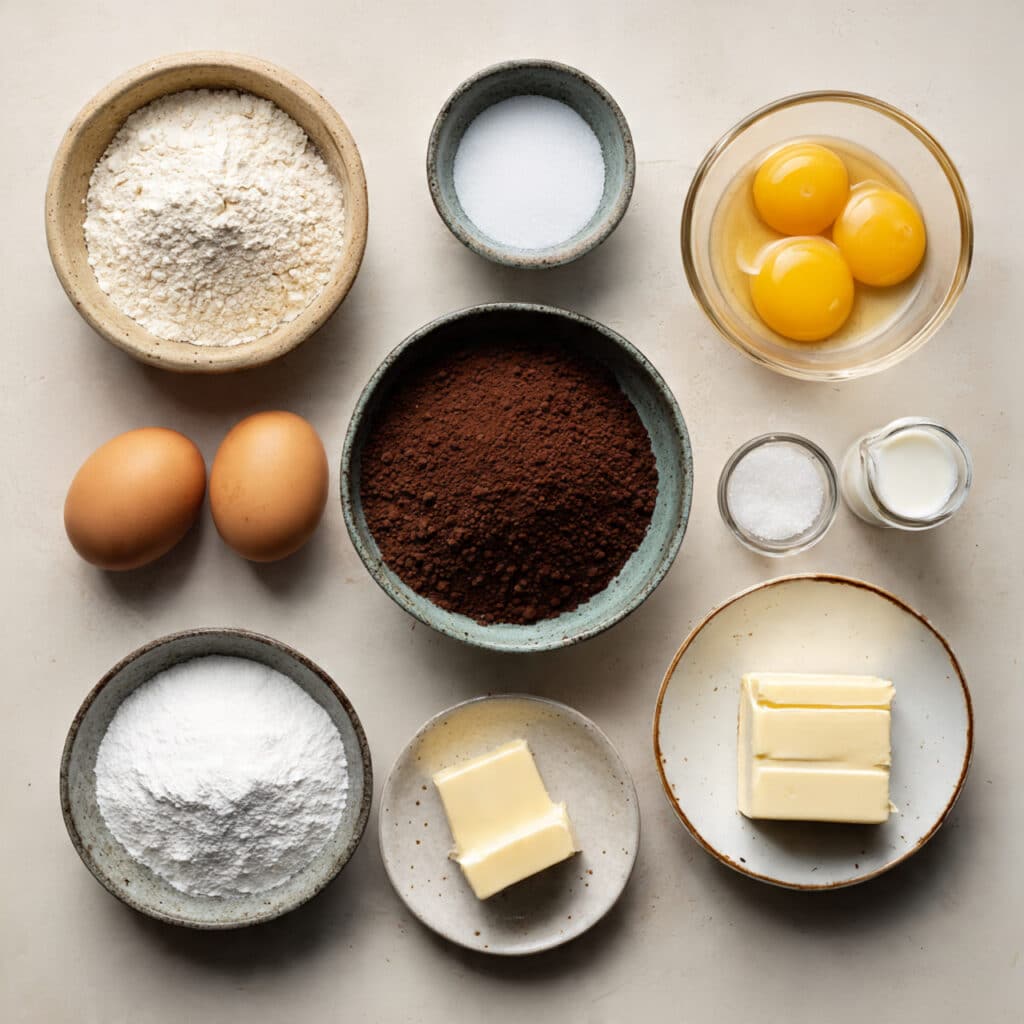
Ingredients You Will Need For This Chocolate-Custard Magic
These ingredients work together to create cookies that are chewy, chocolatey, and filled with silky vanilla custard.
- All-purpose flour: 1 1/4 cups — provides structure and softness to the cookie base
- Unsweetened cocoa powder: 1/3 cup — gives that deep, chocolatey richness
- Cornstarch: 1 tablespoon — adds tenderness and keeps the texture light
- Granulated sugar: 1/2 cup — sweetens the dough just right
- Salt: 1/4 teaspoon — balances out the sweetness and enhances the chocolate
- Unsalted butter: 1/2 cup (softened) — adds richness and a melt-in-your-mouth texture
- Egg yolks: 2 large (separated from whites) — for the custard filling and richness in the dough
- Vanilla extract: 1 teaspoon — warm and aromatic, it brings the custard to life
- Milk: 1 cup — the base of the custard, making it silky and creamy
- Powdered sugar: 2 tablespoons — optional dusting for a finished look
Ingredient Swaps You Can Use
Baking is forgiving when you know how to pivot. Here are some smart swaps:
Butter: Plant-based butter substitute for a dairy-free option.
Milk: Almond or oat milk can be used in the custard.
Sugar: Coconut sugar gives a slight caramel flavor twist.
Flour: A 1:1 gluten-free flour blend works well here.
Spotlight Ingredients That Steal the Show
Cocoa Powder: The unsweetened kind gives deep, robust chocolate notes that don’t overwhelm the custard.
Egg Yolks: These creamy golden gems create the lush texture in the custard and add richness to the cookie dough.
Let’s Get Baking Step by Step
Ready to make something sweet and unforgettable? Follow along as we break it down:
1. Preheat Your Equipment:
Set your oven to 350°F (175°C). Line your baking sheet with parchment paper so you’re ready to roll.
2. Combine Ingredients:
In one bowl, whisk together flour, cocoa powder, cornstarch, and salt. In another bowl, cream softened butter and granulated sugar until light and fluffy. Add one egg yolk and mix until well combined. Gradually add in the dry ingredients until a soft dough forms.
3. Prepare Your Cooking Vessel:
Scoop tablespoon-sized amounts of dough and roll into balls. Place them on the baking sheet with space in between. Use your thumb or the back of a measuring spoon to press a small indentation in the center of each.
4. Assemble the Dish:
Bake the cookies for about 10 minutes. While they bake, prepare the custard: in a small saucepan, whisk together milk, the remaining egg yolk, sugar, cornstarch, and vanilla. Cook over medium heat, stirring constantly until thickened. Remove from heat and let cool slightly.
5. Cook to Perfection:
Once cookies are out of the oven and slightly cooled, fill each center with a spoonful of custard. Let set completely before serving.
6. Finishing Touches:
Optional but delightful — a light dusting of powdered sugar on top adds charm and sweetness.
7. Serve and Enjoy:
Arrange on a plate and watch them disappear. These cookies are best enjoyed with coffee, tea, or a glass of cold milk.
Texture and Flavor – What to Expect
Imagine a crisp edge that gives way to a soft, chewy middle with just a hint of chocolate bitterness. Then your teeth sink into that creamy, cool custard — smooth, mellow, and just sweet enough to balance the cocoa. It’s a two-texture experience in one perfect bite.
Extra Tips for Even Better Cookies
Little tweaks can make big magic. Here’s how to level up:
- Use high-quality cocoa powder for deeper flavor
- Let the custard cool a bit before filling so it thickens properly
- Add a pinch of espresso powder to the dough for more chocolate depth
- Store cookies with wax paper in between layers to avoid sticking
Common Mistakes and How to Dodge Them
Baking doesn’t have to be intimidating. Avoid these slips:
- Overbaking: Pull them when the edges are set, not hard.
- Too much filling: It may overflow and lose shape. Use a small spoon.
- Skipping the chill: Dough needs a quick chill to bake evenly.
- Hot filling: Let that custard cool slightly to avoid soggy centers.
Nutrition At A Glance
Servings: 16 cookies
Calories per serving: 145
Note: These are approximate values.
How Long Does It Take?
Prep Time: 20 minutes
Cook Time: 10 minutes
Total Time: 30 minutes
How to Prep Ahead and Store Like a Pro
Make life easier by planning ahead. The cookie dough can be made up to 2 days in advance and kept refrigerated. The custard can be prepared and chilled separately. Store finished cookies in an airtight container in the fridge for up to 4 days. You can also freeze the unfilled cookie dough balls for future baking.
Serving Suggestions Worth Trying
These cookies look adorable stacked on a platter or nestled in cupcake liners for a dessert tray. Serve with hot cocoa or a dessert wine alternative like warm spiced tea for a cozy finish. They’re also a beautiful addition to holiday cookie boxes.
Leftovers? Transform Them Into Something New
- Crumble over ice cream for a decadent topping
- Sandwich two cookies with extra custard or whipped cream
- Chop and mix into homemade frozen yogurt
Extra Advice That Makes a Big Difference
- Dust lightly with cocoa powder for visual depth
- For extra shine, brush custard centers with a tiny bit of warmed apricot jam
- If you’re gifting these, pack in parchment-lined tins to keep them fresh and lovely
How to Make Them a Dessert Table Star
Presentation is everything. Stack cookies in a tiered dessert tray or display them on a rustic wooden board with fresh berries and mint sprigs. A simple ribbon around each stack turns them into sweet edible gifts.
Variations to Try Next Time
- Lemon Custard: Swap vanilla for lemon zest and juice in the custard.
- Jam Center: Use raspberry or strawberry jam instead of custard.
- Nutella Love: Fill with hazelnut spread for a richer bite.
- Salted Caramel: Spoon in a buttery caramel and top with sea salt.
- Mocha Cream: Add espresso to the custard for a coffee-chocolate twist.
FAQ’s
Q1: Can I make these cookies without the custard?
Yes, you can fill the centers with jam, Nutella, or leave them plain.
Q2: Can I freeze the baked cookies?
Yes, but fill them with custard after thawing to keep the texture right.
Q3: What if I don’t have cornstarch?
You can use an equal amount of flour, though the texture might be slightly different.
Q4: Can I double the recipe?
Absolutely, just be sure to chill the dough between batches.
Q5: Do I need a mixer?
It helps, but you can mix by hand with a little elbow grease.
Q6: Can I use store-bought custard?
Yes, though homemade offers the best flavor and consistency.
Q7: How long do they stay fresh?
About 4 days in the fridge, but they’re best in the first two.
Q8: Can I use whole eggs instead of yolks?
Not for the custard — yolks are what make it thick and rich.
Q9: Are these cookies very sweet?
They’re balanced — the cocoa keeps the sweetness in check.
Q10: Can I add chocolate chips?
Sure, fold a few into the dough for extra chocolate bursts.
Conclusion
These chocolate thumbprint cookies with custard filling bring the comfort of old-fashioned baking into your kitchen with a little twist of elegance. They’re soft, rich, creamy, and oh-so-satisfying. Whether you’re gifting, hosting, or treating yourself, let me tell you, it’s worth every bite.
Print
Chocolate Thumbprint Cookies with Custard Filling
- Prep Time: 20 minutes
- Cook Time: 10 minutes
- Total Time: 30 minutes
- Yield: 16 cookies 1x
- Category: Dessert
- Method: Baking
- Cuisine: European
- Diet: Vegetarian
Description
Rich, chewy chocolate thumbprint cookies filled with smooth vanilla custard, perfect for special occasions or cozy nights in.
Ingredients
- 1 1/4 cups all-purpose flour
- 1/3 cup unsweetened cocoa powder
- 1 tablespoon cornstarch
- 1/2 cup granulated sugar
- 1/4 teaspoon salt
- 1/2 cup unsalted butter, softened
- 2 large egg yolks
- 1 teaspoon vanilla extract
- 1 cup milk
- 2 tablespoons powdered sugar (optional, for dusting)
Instructions
- Preheat oven to 350°F (175°C) and line a baking sheet with parchment paper.
- In a bowl, whisk together flour, cocoa powder, cornstarch, and salt.
- In a separate bowl, cream together butter and sugar until light and fluffy. Add one egg yolk and mix well.
- Gradually mix dry ingredients into the butter mixture to form a soft dough.
- Roll tablespoon-sized portions of dough into balls and place on the baking sheet. Create an indentation in the center of each with your thumb or a spoon.
- Bake for 10 minutes. Let cool slightly on the tray.
- Meanwhile, prepare the custard by whisking milk, the remaining egg yolk, vanilla, sugar, and cornstarch in a saucepan over medium heat until thickened. Let cool.
- Fill the cooled cookie centers with custard and optionally dust with powdered sugar.
- Let the custard set fully before serving.
Notes
- Chill the dough before shaping for better structure.
- Don’t overfill cookies to prevent spillover.
- You can use a piping bag for neat custard filling.
Nutrition
- Serving Size: 1 cookie
- Calories: 145
- Sugar: 10g
- Sodium: 45mg
- Fat: 7g
- Saturated Fat: 4g
- Unsaturated Fat: 2g
- Trans Fat: 0g
- Carbohydrates: 18g
- Fiber: 1g
- Protein: 2g
- Cholesterol: 35mg
Keywords: chocolate thumbprint cookies, custard cookies, thumbprint dessert, easy cookie recipe