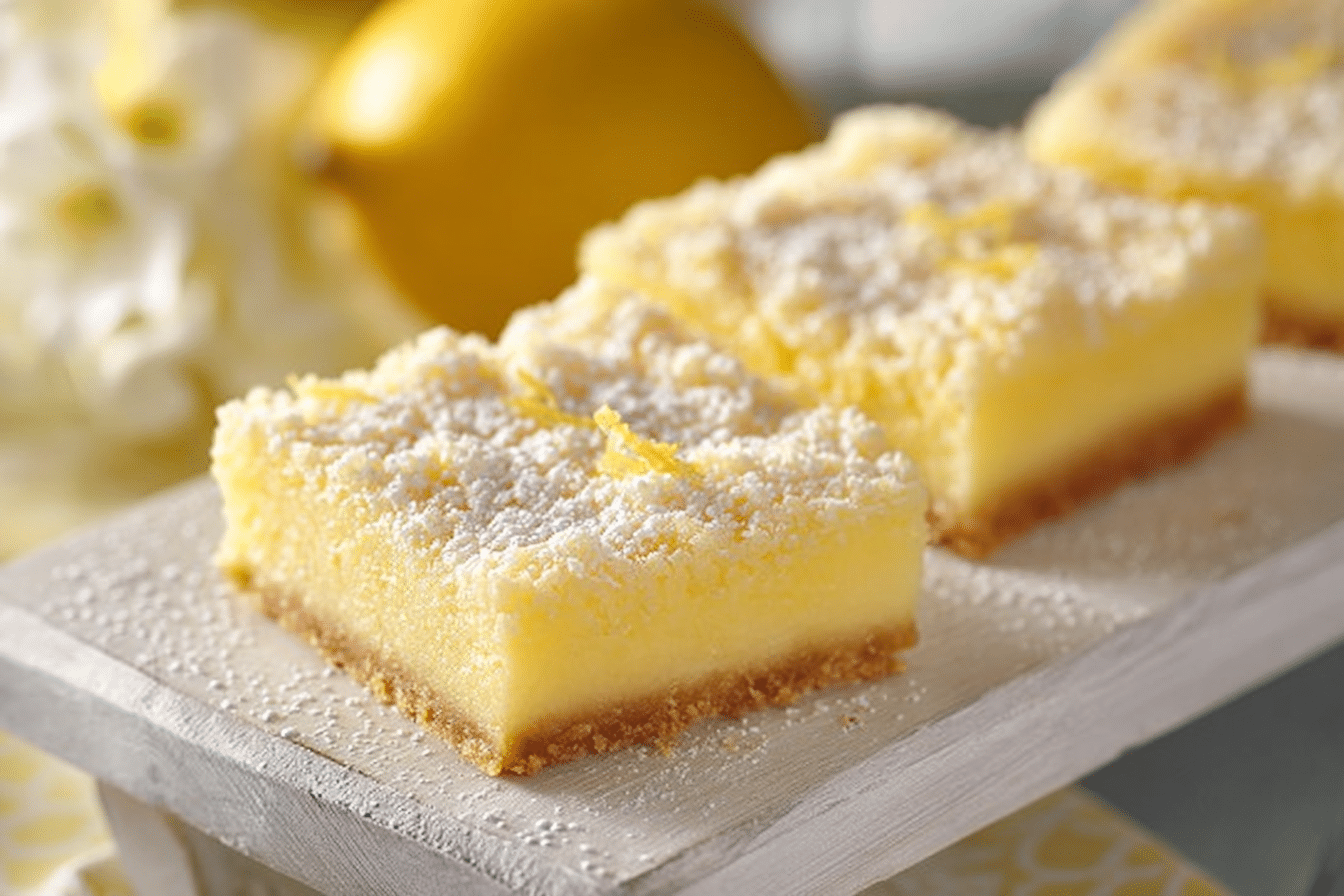
Frozen Lemon Bars
There’s something magical about the moment you take a bite of a frozen lemon bar. That burst of zesty lemon, the creamy coolness on your tongue, and the buttery crumble that melts away—it’s like summer in a single square. These treats are bright, refreshing, and just the right amount of sweet, making them a go-to dessert for warm days or whenever you need a little citrusy pick-me-up.
Behind the Recipe
I still remember the first time I made frozen lemon bars. It was a sweltering afternoon, and I craved something that felt like an ice-cold lemonade but with the indulgence of dessert. That day, with lemon zest on my fingers and flour dusted across the counter, these bars were born. They’ve since become a beloved staple, especially when shared with friends over iced tea or tucked into a picnic basket.
Recipe Origin or Trivia
Lemon bars have long roots in American baking, likely stemming from early 20th-century cookbooks that embraced citrus for its brightness and shelf stability. While traditional lemon bars are baked and served chilled, frozen lemon bars are a playful twist that gained popularity in the 1970s as freezers became common in household kitchens. Freezing them not only intensifies the tart flavor but also creates an irresistible creamy texture that’s somewhere between sorbet and cheesecake.
Why You’ll Love Frozen Lemon Bars
This isn’t just a pretty slice of citrus heaven—it’s packed with reasons to make again and again.
Versatile: Perfect for summer parties, holiday trays, or just an afternoon treat.
Budget-Friendly: Made from simple pantry staples and seasonal lemons.
Quick and Easy: Minimal baking required and just a few simple steps.
Customizable: Add berries, coconut, or herbs for a fresh spin.
Crowd-Pleasing: A guaranteed hit with both adults and kids.
Make-Ahead Friendly: Can be prepared in advance and stored in the freezer.
Great for Leftovers: Keep well in the freezer and taste even better the next day.
Chef’s Pro Tips for Perfect Results
The difference between good and unforgettable lemon bars is all in the details.
- Always zest the lemons before juicing—they’re easier to handle that way.
- Use parchment paper in your pan for easy removal and clean slicing.
- Let the base cool completely before pouring the lemon mixture to avoid sogginess.
- Freeze overnight for a firmer, creamier texture.
- Run your knife under hot water for clean, precise cuts every time.
Kitchen Tools You’ll Need
Before we dive in, here’s what you’ll need for a smooth lemony journey.
Mixing Bowls: For combining crust and filling ingredients.
Whisk: Essential for a smooth lemon mixture.
Zester or Microplane: To capture all that fragrant lemon zest.
8×8 Baking Pan: The perfect size for thick, satisfying bars.
Parchment Paper: Helps lift the bars out cleanly after freezing.
Measuring Cups and Spoons: For accuracy and consistency.
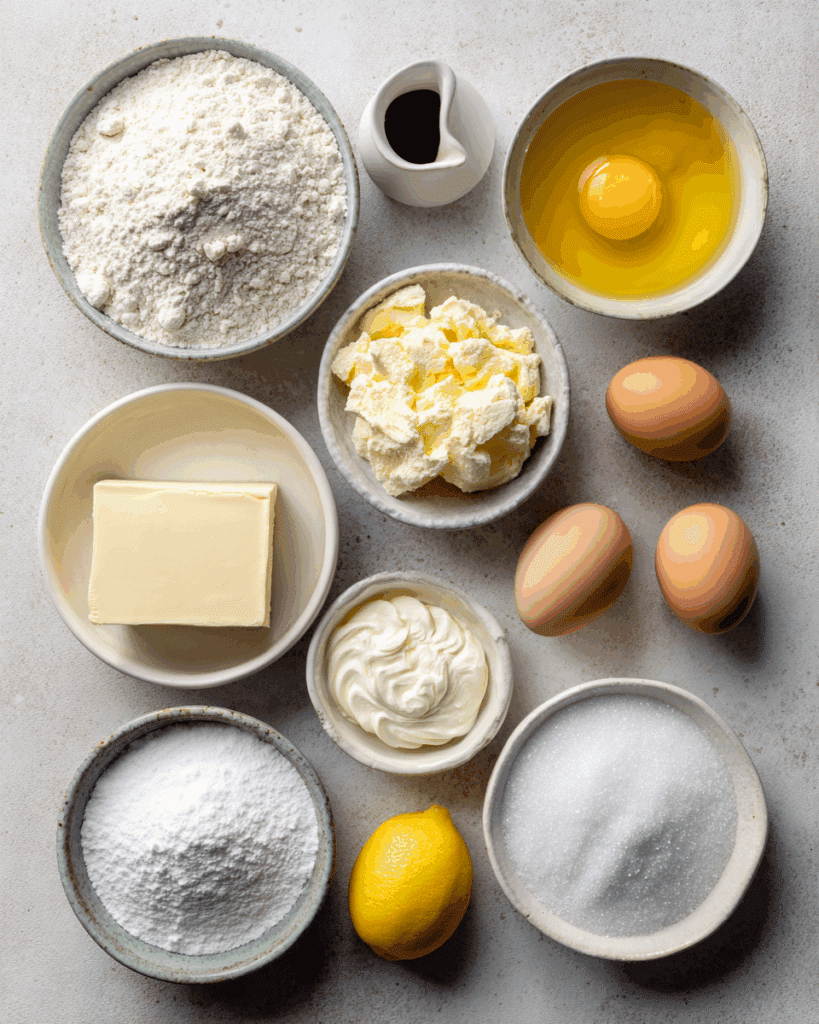
Ingredients in Frozen Lemon Bars
The beauty of these bars is in how a few simple ingredients can create such depth of flavor.
- All-Purpose Flour: 1 cup – Creates the structure for the buttery crust.
- Powdered Sugar: 1/3 cup – Adds sweetness and soft texture to the crust.
- Unsalted Butter: 1/2 cup, cold and cubed – Makes the crust rich and crumbly.
- Granulated Sugar: 3/4 cup – Sweetens the lemon filling just right.
- Large Eggs: 2 – Give the filling structure and creaminess.
- Fresh Lemon Juice: 1/2 cup – The star flavor, bright and tangy.
- Lemon Zest: 1 tablespoon – Intensifies the citrus aroma.
- Heavy Cream: 1/4 cup – Adds a luscious creamy finish.
- Vanilla Extract: 1 teaspoon – Rounds out the tartness with subtle warmth.
- Salt: 1/4 teaspoon – Enhances all the flavors and balances sweetness.
Ingredient Substitutions
Need to swap a few things? No problem.
Butter: Use vegan butter for a dairy-free version.
Heavy Cream: Coconut cream works beautifully here.
Granulated Sugar: Substitute with honey or maple syrup, but reduce the amount slightly.
All-Purpose Flour: Almond flour can be used for a gluten-free crust.
Ingredient Spotlight
Lemon Juice: Freshly squeezed juice brings unmatched brightness and acidity that bottled versions just can’t replicate.
Heavy Cream: Adds richness and helps create a custard-like texture when frozen.
Instructions for Making Frozen Lemon Bars
Ready to make some magic? Here are the steps you’ll follow.
1. Preheat Your Equipment:
Set your oven to 350°F. Line an 8×8 baking pan with parchment paper, leaving some overhang for easy removal.
2. Combine Ingredients:
In a bowl, mix flour and powdered sugar. Cut in the cold butter using a pastry cutter or fork until the mixture resembles coarse crumbs.
3. Prepare Your Cooking Vessel:
Press the crust mixture evenly into the bottom of the prepared pan. Bake for 15 minutes or until lightly golden. Let cool completely.
4. Assemble the Dish:
Whisk together granulated sugar, eggs, lemon juice, zest, heavy cream, vanilla, and salt until smooth and pale yellow.
5. Cook to Perfection:
Pour the filling over the cooled crust. Return to the oven and bake for 20 to 25 minutes or until just set. It should still jiggle slightly in the center.
6. Finishing Touches:
Let bars cool at room temperature, then freeze for at least 4 hours or overnight.
7. Serve and Enjoy:
Remove from the pan, slice with a hot knife, and serve chilled straight from the freezer.
Texture & Flavor Secrets
These bars deliver a divine balance: creamy lemon custard with a cool, firm bite against a delicate shortbread base. The sharp citrus zing is mellowed by the richness of cream and the buttery crust, creating a refreshing and luxurious mouthfeel.
Cooking Tips & Tricks
- Always chill the crust before baking to prevent shrinking.
- For extra lemony flavor, double the zest.
- Don’t overbake—the filling should still have a slight wobble.
- Garnish with powdered sugar or fresh berries for a stunning finish.
What to Avoid
Even the best bakers have off days. Here’s what to steer clear of.
- Overmixing the filling which can introduce air and cause cracks.
- Using bottled lemon juice which dulls the flavor.
- Cutting before fully frozen, leading to a gooey mess.
- Skipping the parchment paper which makes removal tricky.
Nutrition Facts
Servings: 9
Calories per serving: 240
Note: These are approximate values.
Preparation Time
Prep Time: 15 minutes
Cook Time: 40 minutes
Total Time: 4 hours 55 minutes (includes freezing)
Make-Ahead and Storage Tips
These bars are a freezer’s best friend. Make them up to 3 days in advance and keep tightly wrapped in an airtight container. They store well for up to 2 months and can be served straight from the freezer or thawed slightly for a softer bite. For leftovers, rewrap tightly to avoid freezer burn.
How to Serve Frozen Lemon Bars
Dust with powdered sugar, top with fresh raspberries or mint sprigs, and serve on a chilled plate. Pair with iced green tea, sparkling lemonade, or even a creamy vanilla latte for contrast.
Creative Leftover Transformations
Turn leftover bars into:
- Lemon Bar Milkshake: Blend with vanilla ice cream and a splash of milk.
- Lemon Bar Trifle: Layer with whipped cream and berries in a jar.
- Crumbled Dessert Topping: Use as a topping for yogurt or pancakes.
Additional Tips
- Always zest your lemons before juicing.
- Freeze overnight for best texture.
- A serrated knife works best for cleaner cuts.
- Let bars sit at room temp for 5 minutes before slicing.
Make It a Showstopper
Serve on a marble or slate tray with delicate powdered sugar stenciling. Garnish with lemon twists or edible flowers to elevate their visual appeal.
Variations to Try
- Berry Swirl: Add raspberry puree to the filling before baking.
- Lavender Lemon: Infuse cream with culinary lavender for floral notes.
- Graham Cracker Crust: Swap traditional crust for graham crackers and butter.
- Coconut Bliss: Add shredded coconut to the crust and top with toasted flakes.
- Lime Bars: Replace lemons with limes for a tangy twist.
FAQ’s
Q1: Can I use bottled lemon juice?
A1: You can, but fresh lemon juice gives a much brighter and fresher flavor.
Q2: Can these be made gluten-free?
A2: Yes, just use a gluten-free flour blend in the crust.
Q3: How long do they last in the freezer?
A3: Up to 2 months when properly stored in an airtight container.
Q4: Can I skip the cream?
A4: You can substitute it with coconut cream or leave it out for a more traditional filling.
Q5: Are these too tart for kids?
A5: Not at all! The cream balances out the tartness, making them very kid-friendly.
Q6: Can I double the recipe?
A6: Yes, use a 9×13 pan and adjust baking time slightly.
Q7: Do they need to be thawed before serving?
A7: No, they’re best served frozen or slightly thawed.
Q8: What if I don’t have parchment paper?
A8: Grease the pan well and chill before removing, though parchment is highly recommended.
Q9: Can I add berries?
A9: Absolutely! Blueberries or raspberries pair beautifully with lemon.
Q10: Why did my filling crack?
A10: Overbaking or mixing too vigorously can cause cracks. Aim for a just-set center and gentle whisking.
Conclusion
Frozen lemon bars are the kind of dessert that surprise and delight with every cool, citrusy bite. They’re simple to make yet feel like a treat from a boutique bakery. Whether you’re cooling off on a summer afternoon or just need a moment of lemon bliss, trust me, this recipe is worth every bite.
Print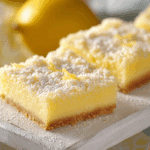
Frozen Lemon Bars
- Prep Time: 15 minutes
- Cook Time: 40 minutes
- Total Time: 4 hours 55 minutes
- Yield: 9 bars 1x
- Category: Dessert
- Method: Bake and Freeze
- Cuisine: American
- Diet: Vegetarian
Description
Frozen lemon bars are the ultimate summertime dessert—zesty, creamy, and perfectly chilled with a buttery shortbread crust. These bars are a refreshing treat that’s easy to make and even easier to love.
Ingredients
- 1 cup all-purpose flour
- 1/3 cup powdered sugar
- 1/2 cup unsalted butter, cold and cubed
- 3/4 cup granulated sugar
- 2 large eggs
- 1/2 cup fresh lemon juice
- 1 tablespoon lemon zest
- 1/4 cup heavy cream
- 1 teaspoon vanilla extract
- 1/4 teaspoon salt
Instructions
- Preheat oven to 350°F and line an 8×8 baking pan with parchment paper.
- In a bowl, mix flour and powdered sugar. Cut in cold butter until mixture resembles coarse crumbs.
- Press crust mixture into the pan and bake for 15 minutes or until lightly golden. Let cool completely.
- Whisk together sugar, eggs, lemon juice, zest, cream, vanilla, and salt until smooth.
- Pour filling over cooled crust and bake for 20 to 25 minutes until just set.
- Cool at room temperature, then freeze for at least 4 hours or overnight.
- Slice with a hot knife and serve straight from the freezer.
Notes
- Use fresh lemon juice for the best flavor.
- Freeze overnight for firm, creamy texture.
- Run your knife under hot water before slicing for clean edges.
Nutrition
- Serving Size: 1 bar
- Calories: 240
- Sugar: 19g
- Sodium: 85mg
- Fat: 12g
- Saturated Fat: 7g
- Unsaturated Fat: 4g
- Trans Fat: 0g
- Carbohydrates: 30g
- Fiber: 1g
- Protein: 3g
- Cholesterol: 65mg
Keywords: frozen lemon bars, summer dessert, lemon squares, citrus dessert, easy lemon bars