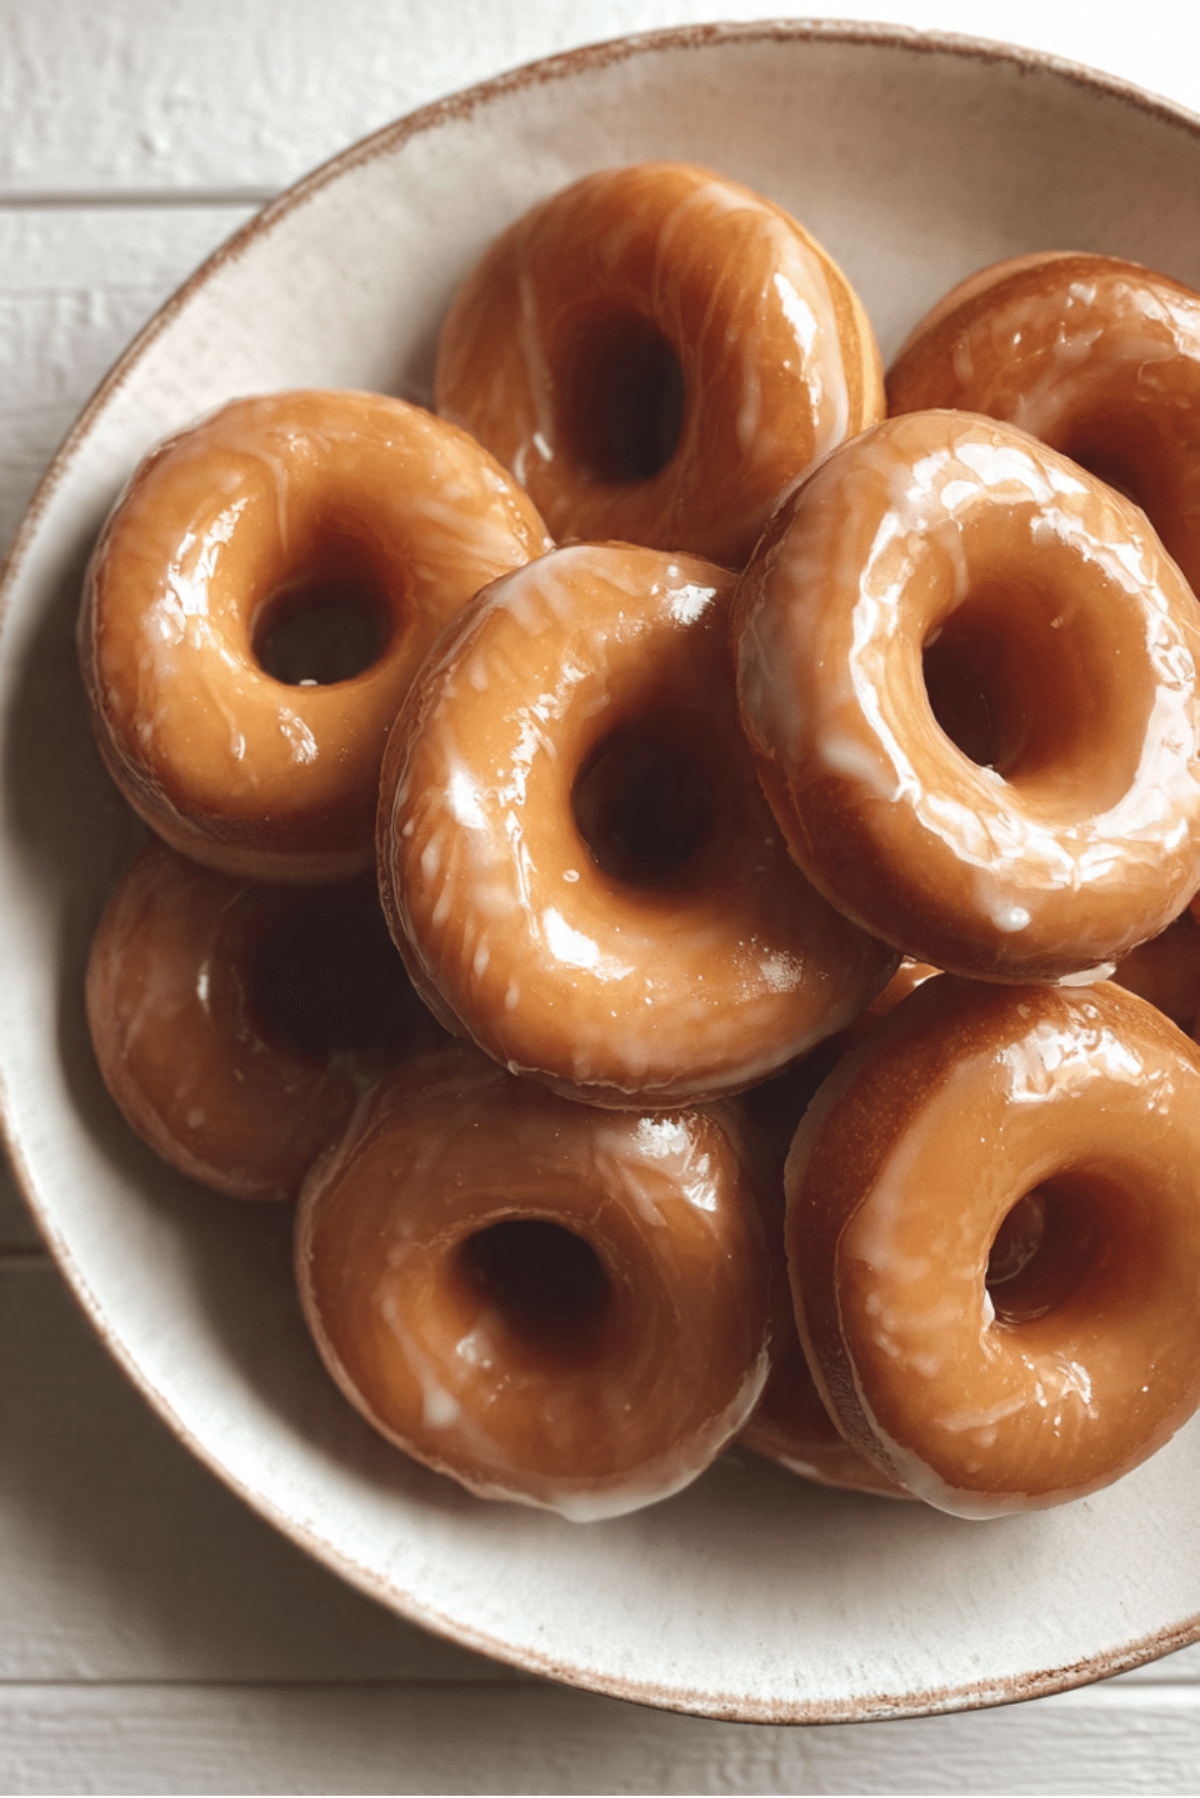
Glazed Donuts
There’s something truly magical about the scent of fresh donuts wafting through the kitchen. These golden, pillowy rings of sweetness come with a touch of nostalgia, a bit of indulgence, and a whole lot of joy. Whether it’s your first time making them or your fiftieth, every bite promises a melt-in-your-mouth moment you’ll want to relive again and again.
Why These Donuts Are Worth Every Bite
Light, fluffy, and coated in a silky glaze that clings just right, these donuts are the ultimate homemade treat. Making them from scratch brings comfort and satisfaction that store-bought ones can’t match. Plus, there’s nothing quite like watching the glaze set as they cool.
A Brief Look Into Their Delicious Roots
Donuts have found their way into nearly every culture in some form. The version we’re making today traces its roots to the Dutch “olykoek,” or oily cake, which made its way to America in the 18th century. Over time, this sweet fried dough evolved into the classic ring-shaped delight we all know today. They’ve become a staple of breakfast counters, coffee shops, and home kitchens around the world.
Why You’ll Love Making These at Home
Mastering glazed donuts at home brings a kind of joy that’s both personal and shareable. Here’s what makes them extra special:
Versatile: Enjoy them plain, filled, or topped with fun extras like sprinkles or chocolate drizzle.
Budget-Friendly: All the ingredients are pantry staples and cost less than buying a dozen from the shop.
Quick and Easy: While they require rising time, the actual hands-on process is simple and relaxing.
Customizable: You can tweak the glaze, add cinnamon, or go wild with toppings.
Crowd-Pleasing: Who doesn’t love a fresh, warm donut? They disappear fast at any gathering.
Make-Ahead Friendly: Prepare the dough the night before and fry them fresh in the morning.
Great for Leftovers: Reheat in the microwave for a few seconds and they’re almost as good as new.
Insider Tips for Perfect Donuts Every Time
Before we dive into the process, let’s talk a few key tricks that will make all the difference.
- Proof with care: Make sure your yeast is active and your milk is warm but not hot—around 110°F works best.
- Don’t over-knead: Stop when the dough becomes smooth and elastic. Over-kneading can make them dense.
- Let them rise fully: Give your dough time to double in size. This gives you that airy texture.
- Monitor oil temp: Keep your oil around 350°F. Too hot and they burn, too cool and they soak up oil.
- Glaze while warm: Dip the donuts in glaze when they’re just slightly cooled for that perfect finish.
Essential Tools You’ll Want Nearby
You won’t need anything fancy, but a few tools will make the process smoother.
Mixing Bowls: For combining ingredients and letting the dough rise.
Stand Mixer with Dough Hook (optional): Makes kneading easier, but you can do it by hand.
Rolling Pin: To flatten the dough evenly before cutting.
Donut Cutter or Biscuit Cutter: For shaping those perfect rings.
Thermometer: Keeps your oil temperature spot-on.
Wire Rack: Lets excess glaze drip off without making a mess.
Slotted Spoon or Tongs: Helps lift donuts from the oil safely.
Ingredients You’ll Need For This Sweet Magic
Every component of this recipe plays a part in creating that fluffy, golden goodness.
- All-purpose flour: 4 cups – The base structure of the donuts.
- Granulated sugar: 1/4 cup – Adds sweetness to the dough.
- Whole milk: 1 cup, warm – Activates the yeast and hydrates the dough.
- Active dry yeast: 2 1/4 teaspoons – Helps the dough rise and get fluffy.
- Eggs: 2 large – Adds richness and tenderness to the texture.
- Unsalted butter: 1/4 cup, softened – Gives flavor and softness.
- Salt: 1/2 teaspoon – Balances the sweetness.
- Vegetable oil: For frying – Neutral in flavor and great for crisping.
- Powdered sugar: 2 cups – Forms the base of the glaze.
- Vanilla extract: 1 teaspoon – Adds depth and aroma to the glaze.
- Whole milk (for glaze): 3–4 tablespoons – Gives the glaze its smooth, pourable consistency.
Ingredient Swaps That Still Work Like a Charm
Don’t worry if you’re missing a thing or two. These subs work great.
Whole milk: You can use 2% milk or a plant-based alternative like oat milk.
Active dry yeast: Instant yeast works too, just skip the blooming step.
Butter: Margarine or plant-based butter can be used.
Vegetable oil: Canola or sunflower oil are great alternatives.
Powdered sugar: Blend granulated sugar in a blender if needed.
Star of the Show: Two Key Players
Active dry yeast: This is what gives your donuts their signature rise and lightness. Always make sure it’s fresh.
Powdered sugar: The key to that silky, melt-in-your-mouth glaze. It coats beautifully and sets like a dream.

Let’s Get Cooking: Your Step-by-Step Guide
Now comes the fun part. The kitchen will smell incredible, and the result will be worth every second.
1. Preheat Your Equipment:
Heat oil in a deep pot to 350°F. Line a tray with paper towels and set a wire rack on top.
2. Combine Ingredients:
Bloom yeast in warm milk for 5 minutes. Add sugar, eggs, butter, and salt. Stir in flour and knead until smooth.
3. Prepare Your Cooking Vessel:
Lightly oil a bowl. Place dough inside and cover. Let it rise in a warm spot for 1 to 2 hours, until doubled.
4. Assemble the Dish:
Roll dough to 1/2 inch thick. Cut donuts and holes using a donut cutter. Place on a floured surface and let rise 30 minutes.
5. Cook to Perfection:
Fry donuts in batches, about 1 minute per side, until golden brown. Drain on the wire rack.
6. Finishing Touches:
Mix powdered sugar, milk, and vanilla into a glaze. Dip warm donuts into glaze and let excess drip off.
7. Serve and Enjoy:
Let the glaze set slightly before serving. Enjoy with a cup of coffee or tea.
The Texture and Flavor Journey
These donuts deliver the dream combo: crispy edges that yield to a soft, airy interior. The sweet glaze sets into a shiny coat that gives each bite a delicate crunch before melting into sugary bliss. Warm, rich, and just the right amount of indulgent.
Cooking Tips to Make It Even Better
Here’s how to elevate your homemade donut game.
- Let the dough rise in a slightly warm oven (turned off) for even proofing.
- Use a light hand when rolling so the dough stays tender.
- Test oil temp with a small piece of dough—it should sizzle and float.
- Glaze while donuts are still warm for best absorption and shine.
Avoid These Common Pitfalls
Keep your donut dreams on track with these helpful don’ts.
- Don’t rush the rise. It’s essential for fluffiness.
- Avoid overheating the oil. Use a thermometer to keep it steady.
- Don’t overcrowd the pot when frying. It drops the oil temp.
- Skipping the cooling rack can lead to soggy bottoms.
Nutrition At a Glance
Servings: 12
Calories per serving: 320
Note: These are approximate values.
Time Investment
Prep Time: 2 hours
Cook Time: 20 minutes
Total Time: 2 hours 20 minutes
Storing and Making Ahead
You can absolutely make these ahead. Prepare the dough the night before and let it rise in the fridge. Fried donuts can be stored in an airtight container for up to 2 days. To reheat, pop them in the microwave for 10 seconds. For longer storage, freeze them unglazed and add glaze after reheating.
Serving Suggestions
Serve these warm, with a mug of coffee, hot chocolate, or even a scoop of vanilla ice cream for a decadent dessert twist. Sprinkle with cinnamon sugar or dip in chocolate for extra flair.
Leftovers, Reimagined
Turn leftover donuts into:
- Donut bread pudding with a simple egg custard
- Mini ice cream sandwiches using halved donuts
- Donut French toast for a wild brunch upgrade
Extra Tips for Success
- Use high-quality vanilla for the best glaze flavor.
- Don’t skip the salt—it balances the sweetness beautifully.
- Let donuts rest for 5 minutes after glazing for the perfect texture.
Make It a Showstopper
Presentation matters. Stack donuts on a cake stand, drizzle extra glaze over the top, and dust with powdered sugar just before serving. Or display them on parchment in a rustic basket for that cozy bakery feel.
Variations to Try
- Chocolate Glaze: Swap half the powdered sugar with cocoa powder.
- Lemon Glaze: Use lemon juice and zest for a bright finish.
- Maple Glaze: Add maple syrup and a pinch of cinnamon.
- Filled Donuts: Skip the hole and pipe in jam or custard.
- Cinnamon Sugar: Roll hot donuts in cinnamon sugar instead of glazing.
FAQ’s
Q1: Can I bake these instead of frying?
No, this dough is meant for frying. Baking will give a different texture.
Q2: Can I use instant yeast?
Yes. Just mix it in with the dry ingredients and skip blooming.
Q3: How long does the dough last in the fridge?
Up to 24 hours if stored tightly wrapped.
Q4: Can I use plant-based milk?
Absolutely. Oat or almond milk works well.
Q5: Why are my donuts greasy?
Your oil was likely too cool. Keep it around 350°F.
Q6: Can I freeze the dough?
Yes, freeze after shaping. Let thaw and rise before frying.
Q7: How do I get my glaze extra shiny?
Glaze while donuts are warm and use a smooth milk-to-sugar ratio.
Q8: Can I double the recipe?
Yes. Just make sure to fry in batches to avoid overcrowding.
Q9: What if I don’t have a donut cutter?
Use a biscuit cutter or a glass and a bottle cap for the center.
Q10: Can I make mini donuts with this?
Totally. Just reduce the frying time to avoid overcooking.
Conclusion
These homemade glazed donuts are more than just a sweet treat. They’re a baking adventure, a comfort bite, and a memory in the making. From the airy dough to the glossy glaze, every element brings joy to the kitchen. Trust me, you’re going to love this.
Print
Glazed Donuts
- Prep Time: 2 hours
- Cook Time: 20 minutes
- Total Time: 2 hours 20 minutes
- Yield: 12 donuts 1x
- Category: Dessert
- Method: Frying
- Cuisine: American
- Diet: Vegetarian
Description
Golden, fluffy, and glazed to perfection, these homemade donuts are a classic treat made from simple pantry staples. Each bite melts in your mouth with soft texture and a sweet finish.
Ingredients
- 4 cups all-purpose flour
- 1/4 cup granulated sugar
- 1 cup whole milk, warm
- 2 1/4 teaspoons active dry yeast
- 2 large eggs
- 1/4 cup unsalted butter, softened
- 1/2 teaspoon salt
- Vegetable oil, for frying
- 2 cups powdered sugar
- 3–4 tablespoons whole milk (for glaze)
- 1 teaspoon vanilla extract
Instructions
- Heat oil in a deep pot to 350°F. Line a tray with paper towels and set a wire rack on top.
- Bloom yeast in warm milk for 5 minutes. Add sugar, eggs, butter, and salt. Stir in flour and knead until smooth.
- Lightly oil a bowl. Place dough inside and cover. Let it rise in a warm spot for 1 to 2 hours, until doubled.
- Roll dough to 1/2 inch thick. Cut donuts and holes using a donut cutter. Place on a floured surface and let rise 30 minutes.
- Fry donuts in batches, about 1 minute per side, until golden brown. Drain on the wire rack.
- Mix powdered sugar, milk, and vanilla into a glaze. Dip warm donuts into glaze and let excess drip off.
- Let the glaze set slightly before serving. Enjoy warm.
Notes
- Proof the dough in a slightly warm oven (turned off) for faster rising.
- Use a thermometer to maintain oil temperature.
- Donuts are best glazed while still warm for a perfect finish.
- Reheat leftovers in the microwave for 10 seconds to restore freshness.
Nutrition
- Serving Size: 1 donut
- Calories: 320
- Sugar: 18g
- Sodium: 85mg
- Fat: 14g
- Saturated Fat: 4g
- Unsaturated Fat: 9g
- Trans Fat: 0g
- Carbohydrates: 42g
- Fiber: 1g
- Protein: 5g
- Cholesterol: 45mg
Keywords: glazed donuts, homemade donuts, easy donut recipe, sweet breakfast treat, fried dessert