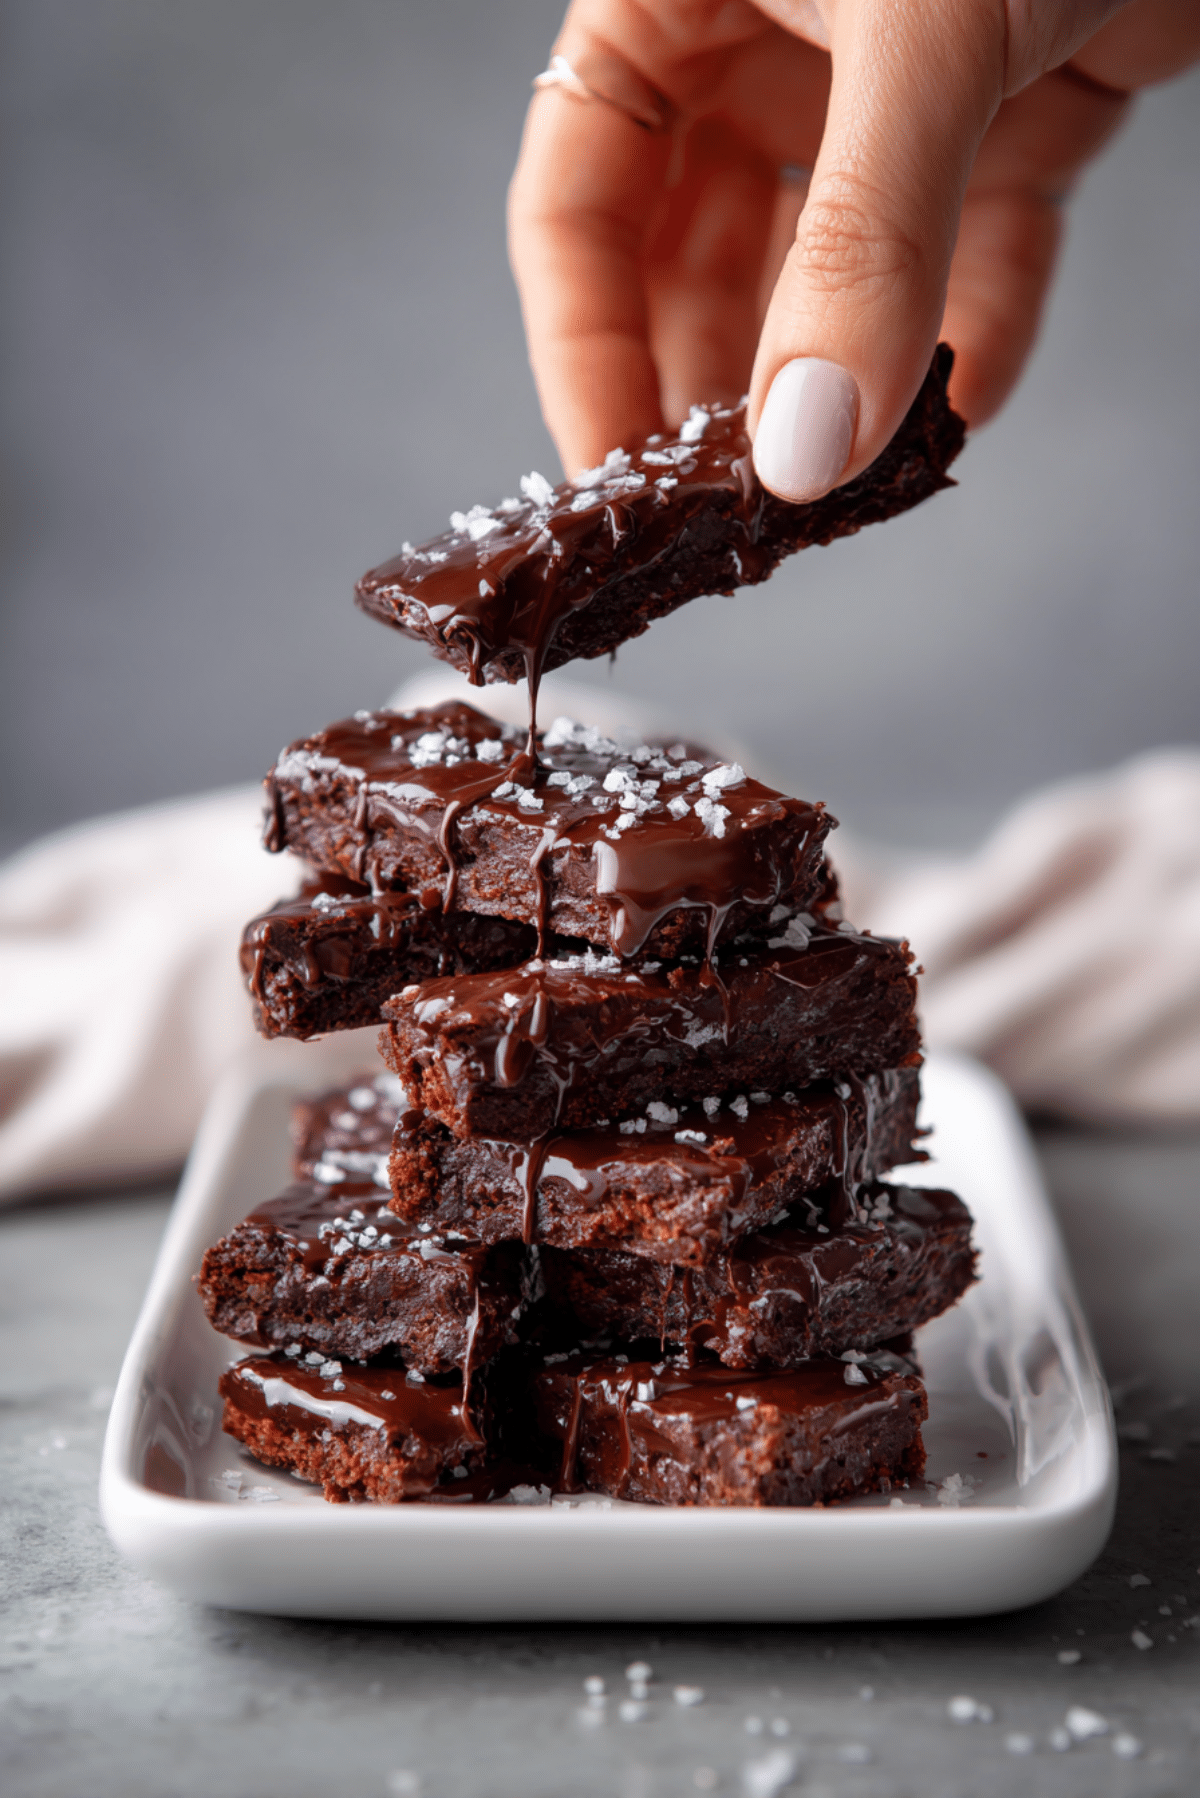
Milk and Brownie Fries
If you’re anything like me, you know the struggle of choosing between a rich brownie and a cold glass of milk. Well, what if I told you that you could have both, in the most playful and crave-worthy form? That’s exactly what Milk and Brownie Fries are. Think chewy brownie strips baked to perfection and served with a chilled glass of creamy milk, perfect for dipping. This isn’t just dessert—it’s a full-on experience for your senses. From the slightly crisp edges of the brownie “fries” to the way they soak up just enough milk to melt in your mouth, this treat is pure joy on a plate.
Behind the Recipe
This recipe was born from a late-night craving. I wanted something indulgent, but fun too. As a kid, I used to dip everything in milk—cookies, cereal, even toast. One night, I found myself staring at a pan of leftover brownies and thought, why not give them the fry treatment? And just like that, Milk and Brownie Fries were born. They’re playful, a bit nostalgic, and ridiculously easy to love.
Recipe Origin or Trivia
Brownies as we know them first appeared in American cookbooks in the early 1900s, believed to have originated from Chicago’s Palmer House Hotel. Turning them into “fries” is a modern twist that taps into the trend of food mashups—like cronut or sushi burritos. It’s a fun, kid-friendly way to enjoy a classic dessert in a new format. This isn’t something you’ll find in your average bakery, which makes it all the more exciting to bring to your kitchen.
Why You’ll Love Milk and Brownie Fries
This sweet snack is more than just a novelty. Here’s why you’ll be making it again and again:
Versatile: Serve it as dessert, a party snack, or even a cheeky brunch treat.
Budget-Friendly: Uses pantry staples and leftovers, so you’re not spending extra.
Quick and Easy: Minimal prep, and it bakes in under 30 minutes.
Customizable: Add chocolate chips, drizzle with caramel, or sprinkle crushed nuts on top.
Crowd-Pleasing: Kids and adults will go wild over the playful presentation.
Make-Ahead Friendly: Brownies store well, so you can slice and reheat as needed.
Great for Leftovers: A smart way to reinvent a batch of day-old brownies.
Chef’s Pro Tips for Perfect Results
Want to make your brownie fries unforgettable? Here’s how:
- Use a slightly underbaked brownie base so they stay chewy after slicing and baking again.
- Chill the brownies before slicing to keep your “fries” clean and uniform.
- Use a serrated knife for best slicing results—no crumbling, clean edges.
- Sprinkle a pinch of flaky sea salt on top after baking to balance the sweetness.
- Warm the milk slightly for a cozier dipping experience.
Kitchen Tools You’ll Need
No fancy equipment needed, just a few basics to bring this recipe to life.
Mixing Bowl: For combining your brownie batter.
Whisk: Helps you get that smooth, lump-free batter.
Baking Pan (8×8 inch): Perfect size for thick, chewy brownies.
Parchment Paper: Makes it easier to lift and slice brownies cleanly.
Serrated Knife: Essential for clean “fry” cuts.
Cooling Rack: Prevents the fries from getting soggy underneath.
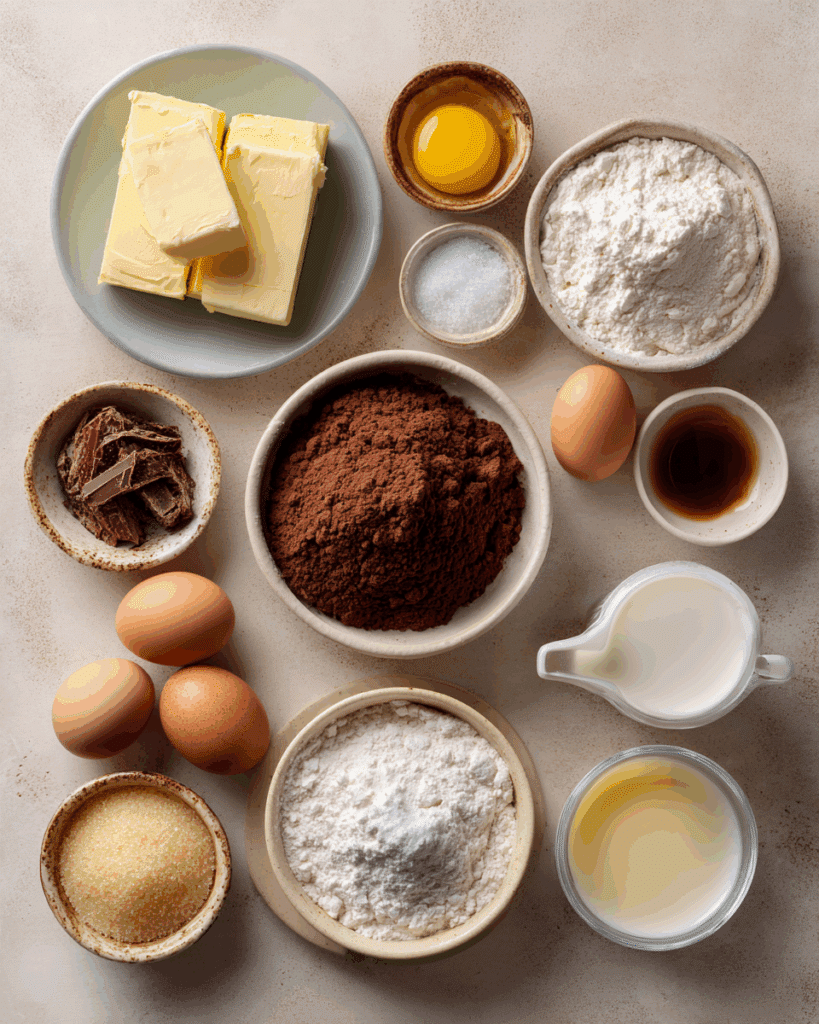
Ingredients in Milk and Brownie Fries
This recipe keeps it simple, but each ingredient plays a key role in building the perfect brownie fry.
- Unsalted Butter: ½ cup (1 stick) melted. Adds richness and chewy texture.
- Granulated Sugar: 1 cup. Sweetens and creates that signature crackly top.
- Brown Sugar: ¼ cup. Adds depth and a slight molasses undertone.
- Eggs: 2 large. Bind the ingredients and add structure.
- Vanilla Extract: 1 teaspoon. Brings out the chocolate’s full flavor.
- All-Purpose Flour: ¾ cup. Gives the brownies body without being too cakey.
- Unsweetened Cocoa Powder: ½ cup. For rich, deep chocolate flavor.
- Salt: ¼ teaspoon. Enhances sweetness and balances flavors.
- Milk (for serving): 1 cup cold or slightly warmed. Complements the chocolate and adds that comforting touch.
Ingredient Substitutions
If you’re missing something, no worries. Here’s how to swap smartly:
Unsalted Butter: Coconut oil or vegan butter.
Brown Sugar: Use more white sugar with a teaspoon of molasses.
All-Purpose Flour: Substitute with gluten-free baking flour.
Cocoa Powder: Melted dark chocolate (adjust sugar accordingly).
Milk: Try almond milk or oat milk for a dairy-free dip.
Ingredient Spotlight
Unsweetened Cocoa Powder: This is the backbone of your brownies. It delivers that rich, chocolatey intensity that milk just loves to mellow out.
Brown Sugar: Adds moisture and that caramel-y chew that makes each bite stick-to-your-teeth delicious.
Instructions for Making Milk and Brownie Fries
Let’s turn your kitchen into a brownie fry station! Here are the steps to follow:
- Preheat Your Equipment:
Set your oven to 350°F (175°C). Line an 8×8 baking pan with parchment paper. - Combine Ingredients:
In a mixing bowl, whisk melted butter, granulated sugar, and brown sugar. Add eggs and vanilla, mixing until smooth. Stir in cocoa powder, flour, and salt until fully combined. - Prepare Your Cooking Vessel:
Pour the batter into your prepared pan, smoothing the top evenly. - Assemble the Dish:
Bake for 25–28 minutes until the center is set but still slightly fudgy. Let cool completely, then chill in the fridge for 30 minutes. - Cook to Perfection:
Once chilled, slice brownies into thin “fries” using a serrated knife. Spread them on a parchment-lined baking sheet and return to oven for 5–7 minutes to crisp the edges. - Finishing Touches:
Optional but encouraged: Sprinkle flaky salt or drizzle with chocolate sauce. - Serve and Enjoy:
Serve warm or at room temp with a cold glass of milk for dipping.
Texture & Flavor Secrets
Expect chewy edges with soft, dense centers, just like the best brownie corners. When dipped in milk, they absorb just enough to melt in your mouth while still holding their form. The cocoa delivers deep chocolate notes, enhanced by the pinch of salt and a whisper of vanilla.
Cooking Tips & Tricks
Get the best from your batch with these helpful reminders:
- Chill the brownies before slicing for clean, sharp “fry” shapes.
- Don’t overbake the second time or they’ll dry out.
- Use good quality cocoa for maximum chocolate flavor.
What to Avoid
Steer clear of these common mistakes to keep your brownie fries on point:
- Overbaking the first time. You want them fudgy, not cakey.
- Skipping the chilling step. Warm brownies crumble too easily.
- Overcrowding during the second bake. Space them out for even crisping.
Nutrition Facts
Servings: 6
Calories per serving: 310
Note: These are approximate values.
Preparation Time
Prep Time: 10 minutes
Cook Time: 35 minutes
Total Time: 45 minutes
Make-Ahead and Storage Tips
You can totally prep these ahead of time. Bake the brownies, chill, and slice into fries a day in advance. Store them in an airtight container at room temperature for 2–3 days, or freeze for up to 2 months. Reheat in the oven to re-crisp before serving.
How to Serve Milk and Brownie Fries
Serve with a tall glass of milk, of course! You can also try them with:
- A scoop of vanilla ice cream on the side
- Dipping sauces like caramel or peanut butter
- A dusting of powdered sugar for a snowy finish
Creative Leftover Transformations
Have leftovers? Turn them into something new:
- Chop and layer into a brownie parfait with whipped cream
- Crumble over pancakes or waffles for a brunch surprise
- Blend into a milkshake for the ultimate chocolate fix
Additional Tips
- Use parchment over foil for crispier edges.
- Let kids decorate with colorful sprinkles or mini chocolate chips.
- Add a pinch of espresso powder to the batter for deeper flavor.
Make It a Showstopper
Plate your brownie fries like a classic fry basket. Use a small dipping bowl for milk or sauces, and sprinkle the fries with sea salt or powdered sugar. Add a sprig of mint for a touch of color and freshness.
Variations to Try
- Peanut Butter Brownie Fries: Swirl peanut butter into the batter before baking.
- S’mores Style: Add mini marshmallows and graham cracker crumbs on top before second bake.
- Spicy Kick: Mix a pinch of cayenne or cinnamon into the batter.
- Mocha Brownie Fries: Add espresso powder and top with chocolate-covered coffee beans.
- Minty Fresh: Add a drop of peppermint extract and sprinkle with crushed mint candy.
FAQ’s
Q1: Can I use boxed brownie mix?
Yes, just make sure it’s a fudgy variety and don’t overbake.
Q2: Can I make this gluten-free?
Absolutely, just use a 1:1 gluten-free baking flour.
Q3: Can I dip in something other than milk?
Try chocolate ganache, caramel, or even whipped cream.
Q4: What if I don’t have parchment paper?
Use greased foil, but parchment gives better results.
Q5: How do I make them crispier?
Bake slightly longer during the second bake, just don’t let them dry out.
Q6: Can I use almond flour?
Not for this recipe—it’ll change the texture too much.
Q7: How long do they stay good?
Up to 3 days at room temp or freeze for longer.
Q8: Can I double the batch?
Yes, use a 9×13 pan and adjust baking time accordingly.
Q9: What’s the best way to reheat?
Pop them in a 350°F oven for 5 minutes to refresh the edges.
Q10: Can I skip the second bake?
You can, but they’ll be soft rather than fry-like.
Conclusion
Milk and Brownie Fries are that magical blend of childhood fun and grown-up indulgence. Whether you’re serving them at a party, enjoying them as a late-night snack, or surprising your kids after school, they deliver every time. So go ahead, whip up a batch, pour a glass of milk, and savor the sweetness—one dip at a time.
Print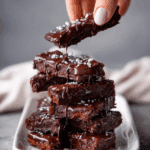
Milk and Brownie Fries
- Prep Time: 10 minutes
- Cook Time: 35 minutes
- Total Time: 45 minutes
- Yield: 6 servings 1x
- Category: Dessert
- Method: Baking
- Cuisine: American
- Diet: Vegetarian
Description
Chewy, chocolatey brownie fries served with a cold glass of milk for dipping. A playful dessert that’s part treat, part experience.
Ingredients
- 1/2 cup unsalted butter, melted
- 1 cup granulated sugar
- 1/4 cup brown sugar
- 2 large eggs
- 1 teaspoon vanilla extract
- 3/4 cup all-purpose flour
- 1/2 cup unsweetened cocoa powder
- 1/4 teaspoon salt
- 1 cup milk (for serving)
Instructions
- Preheat your oven to 350°F (175°C). Line an 8×8 baking pan with parchment paper.
- In a mixing bowl, whisk together melted butter, granulated sugar, and brown sugar. Add eggs and vanilla extract, mixing until smooth.
- Stir in cocoa powder, flour, and salt until fully combined.
- Pour the batter into the lined pan and smooth the top evenly.
- Bake for 25–28 minutes until set but still slightly fudgy in the center. Cool completely, then refrigerate for 30 minutes.
- Once chilled, slice into thin “fries” using a serrated knife. Arrange them on a parchment-lined baking sheet.
- Return to the oven and bake for an additional 5–7 minutes to crisp the edges.
- Serve warm or at room temperature with a cold glass of milk.
Notes
- Chill brownies before slicing for cleaner cuts.
- Sprinkle flaky sea salt on top after baking for extra flavor contrast.
- Try almond or oat milk for a dairy-free version.
Nutrition
- Serving Size: 1 portion
- Calories: 310
- Sugar: 28g
- Sodium: 90mg
- Fat: 15g
- Saturated Fat: 9g
- Unsaturated Fat: 5g
- Trans Fat: 0g
- Carbohydrates: 42g
- Fiber: 3g
- Protein: 4g
- Cholesterol: 60mg
Keywords: milk and brownie fries, brownie sticks, chocolate dessert, fun kids dessert, brownie dipping