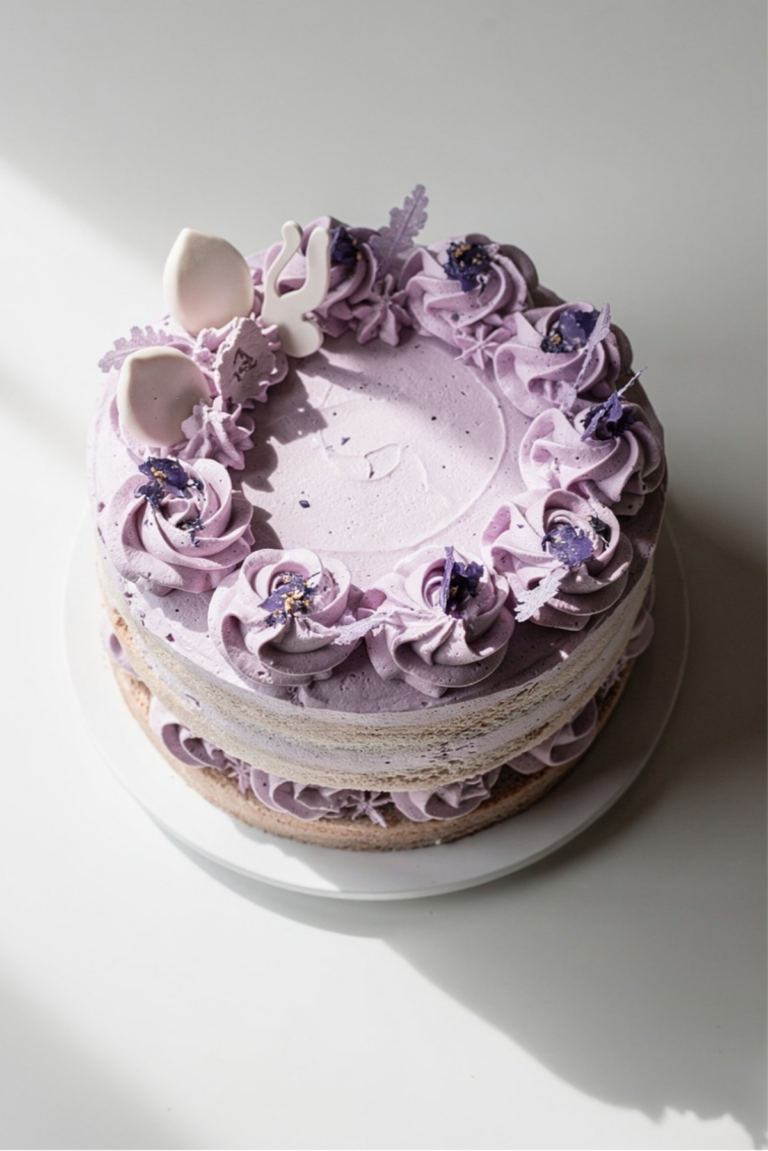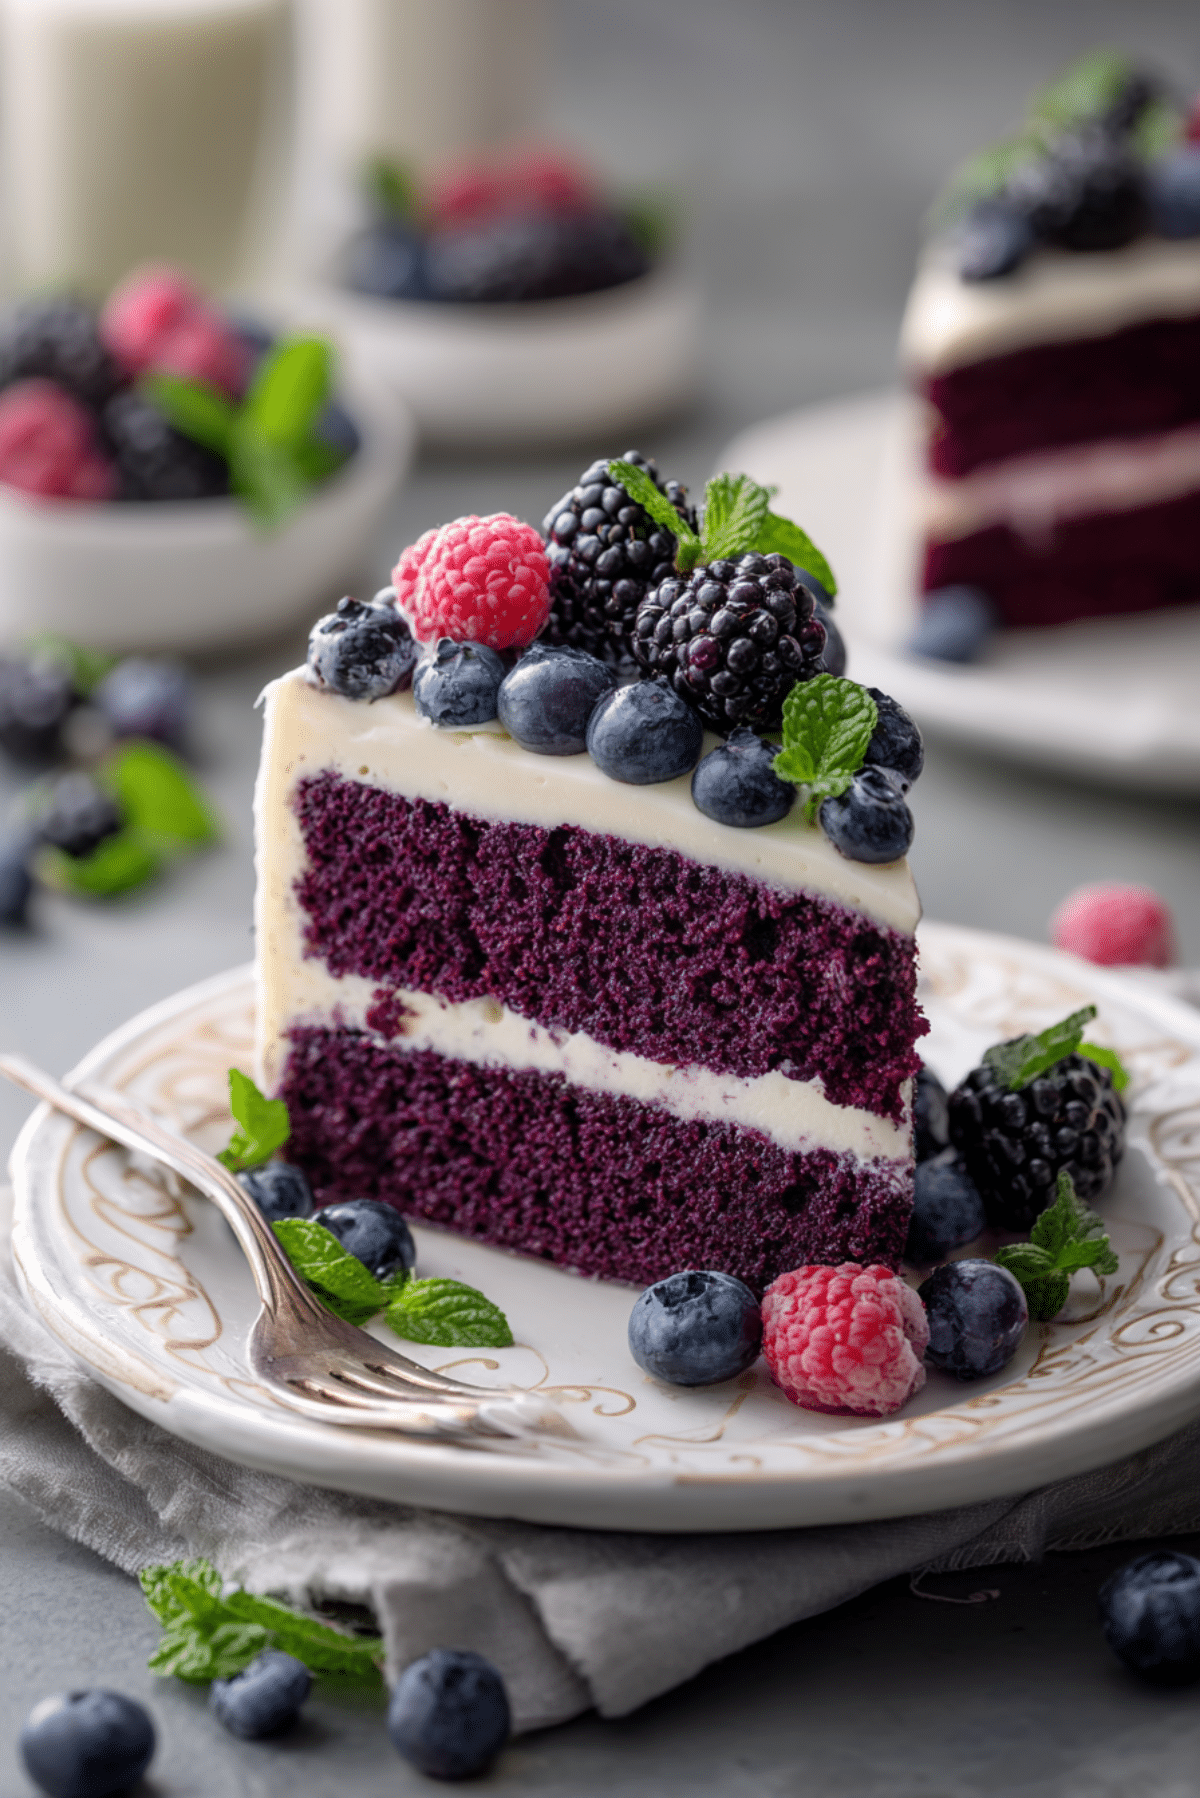
Purple Velvet Cake with Cream Cheese Frosting
There’s something magical about slicing into a cake and revealing a vibrant hue that’s both unexpected and stunning. Purple Velvet Cake with Cream Cheese Frosting brings that surprise with every slice. The soft, velvety crumb practically melts on your tongue, while the tangy, whipped cream cheese frosting wraps around it like a sweet, creamy blanket. Topped with fresh berries, it’s not just a dessert—it’s a statement.
Behind the Recipe
This cake was born out of a simple desire for something whimsical. Red velvet has had its moment, but I craved a color that made people do a double-take. Purple was the answer. The first time I served it, people couldn’t believe their eyes—and then they couldn’t believe their taste buds. It quickly became a requested favorite for birthdays and weekend baking projects. It’s a cake that sparks joy even before the first bite.
Recipe Origin or Trivia
Purple velvet cake is a modern twist on the classic red velvet. While red velvet dates back to the early 1900s and was a staple of Southern baking, the purple variation is a more recent trend that emerged with the rise of vibrant, photogenic desserts. The beautiful hue can be achieved with food coloring or even natural options like purple sweet potato or ube. Its unique color has made it a popular centerpiece for themed parties and Instagram-worthy dessert spreads.
Why You’ll Love Purple Velvet Cake with Cream Cheese Frosting
This cake isn’t just pretty—it delivers on flavor, texture, and satisfaction. Here’s why it’ll win you over:
Versatile: Perfect for birthdays, baby showers, or just because—it fits any celebration.
Budget-Friendly: Uses pantry staples and a touch of food coloring or natural alternatives.
Quick and Easy: No complex steps, just classic cake-making with a colorful twist.
Customizable: Add berries, swap frostings, or play with layering—make it yours.
Crowd-Pleasing: Its rich color and tangy-sweet flavor combo make it a guaranteed favorite.
Make-Ahead Friendly: Bake the layers ahead and frost the next day for easy planning.
Great for Leftovers: Keeps well in the fridge and tastes just as delicious chilled.
Chef’s Pro Tips for Perfect Results
When making a velvet-style cake, a few tricks can really elevate the result.
- Use room temperature ingredients for a smoother batter.
- Add a touch of vinegar to react with baking soda for that classic velvet crumb.
- Don’t overmix once the flour is added—just until incorporated.
- Use gel-based food coloring for a more vibrant and stable purple hue.
- Chill the cake layers before frosting to reduce crumbs and help the frosting glide.
Kitchen Tools You’ll Need
You won’t need anything fancy, just some reliable kitchen staples.
Mixing Bowls: For combining wet and dry ingredients separately.
Electric Mixer: Hand or stand mixer to cream butter and sugar to a fluffy consistency.
Measuring Cups and Spoons: Precision makes for the perfect rise.
Cake Pans (8-inch): Round pans give you beautiful, evenly baked layers.
Rubber Spatula: To scrape every bit of batter and smooth your frosting.
Wire Rack: Essential for cooling your cake layers evenly.
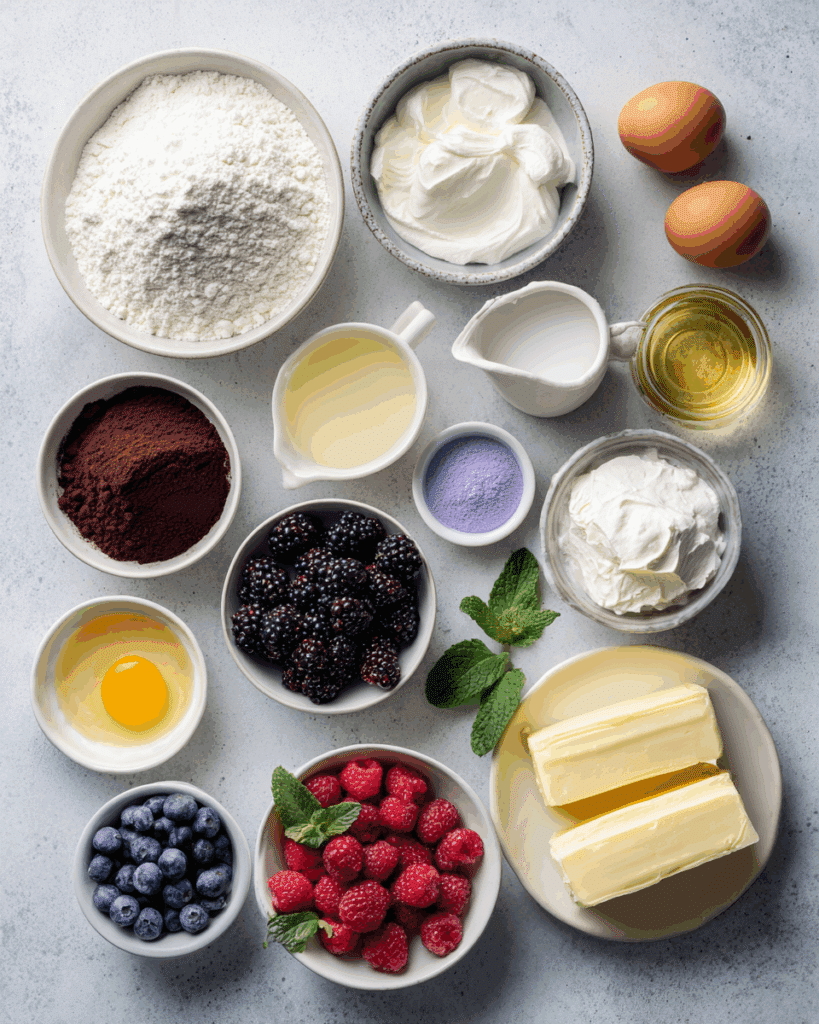
Ingredients in Purple Velvet Cake with Cream Cheese Frosting
This cake is all about balance—sweet, tangy, smooth, and vibrant. Here’s what you’ll need:
- All-Purpose Flour: 2 ½ cups, gives the cake structure and softness.
- Granulated Sugar: 1 ¾ cups, sweetens and helps with browning.
- Unsweetened Cocoa Powder: 2 tablespoons, just enough for depth without turning it into chocolate cake.
- Baking Soda: 1 teaspoon, helps the cake rise.
- Salt: ½ teaspoon, balances the sweetness.
- Buttermilk: 1 cup, adds tang and tenderness.
- Vegetable Oil: 1 cup, keeps the crumb moist and tender.
- Eggs: 2 large, provide structure and richness.
- White Vinegar: 1 teaspoon, reacts with soda for that velvet texture.
- Vanilla Extract: 2 teaspoons, adds depth to the flavor.
- Purple Food Coloring: 2 teaspoons, or adjust to get the right shade.
- Cream Cheese: 8 oz (softened), base of the frosting with a tangy kick.
- Unsalted Butter: ½ cup (softened), makes the frosting silky.
- Powdered Sugar: 4 cups, adds sweetness and thickness.
- Heavy Cream: 2 tablespoons, for a light, spreadable frosting.
- Fresh Berries and Mint (optional): For garnish and a pop of color and freshness.
Ingredient Substitutions
Sometimes, you need to work with what you have. Here’s how:
Buttermilk: 1 cup milk plus 1 tablespoon lemon juice or vinegar.
Vegetable Oil: Melted coconut oil or canola oil.
Purple Food Coloring: Natural purple yam (ube) powder or beet juice.
Cream Cheese: Mascarpone for a milder, less tangy option.
Heavy Cream: Milk with a little butter for richness.
Ingredient Spotlight
Purple Food Coloring: The soul of this recipe—it brings the wow factor. Gel or natural forms work best to avoid watering down your batter.
Buttermilk: Not just for tang, it creates that signature tender crumb in velvet cakes.
Instructions for Making Purple Velvet Cake with Cream Cheese Frosting
Baking this cake feels like crafting a masterpiece. Here’s how to bring it to life:
- Preheat Your Equipment:
Preheat your oven to 350°F (175°C). Grease and flour two 8-inch round cake pans and line bottoms with parchment paper. - Combine Ingredients:
In one bowl, whisk flour, cocoa, baking soda, and salt. In another, beat sugar and oil, then mix in eggs, buttermilk, vinegar, vanilla, and food coloring until smooth. - Prepare Your Cooking Vessel:
Divide the batter evenly between the prepared pans, smoothing the tops. - Assemble the Dish:
Bake for 30 to 35 minutes or until a toothpick comes out clean. Let cool in pans for 10 minutes, then transfer to wire racks to cool completely. - Cook to Perfection:
While the cake cools, beat cream cheese and butter until fluffy. Gradually add powdered sugar, then cream and mix until silky smooth. - Finishing Touches:
Frost the cooled cake, stacking the layers and spreading frosting evenly. Garnish with fresh berries and mint if using. - Serve and Enjoy:
Slice into this stunning cake and serve to delighted guests. Watch as their eyes light up at the color and flavor.
Texture & Flavor Secrets
This cake delivers a pillowy-soft crumb that melts in your mouth, thanks to the buttermilk and oil combination. The slight tang of the cream cheese cuts through the sweetness, while the cocoa gives just enough complexity. The frosting is smooth, fluffy, and balances the cake’s richness perfectly.
Cooking Tips & Tricks
Let’s make this cake unforgettable:
- Make sure your eggs and dairy are at room temperature.
- Chill the cake before slicing for neater layers.
- Use an offset spatula for a smoother frosting finish.
- Level the cake layers for a professional look.
What to Avoid
Here’s how to dodge common cake catastrophes:
- Overmixing the batter—it can make the cake dense.
- Using too much food coloring—it can leave a bitter taste.
- Frosting a warm cake—the frosting will melt and slide.
Nutrition Facts
Servings: 12
Calories per serving: Approx. 460
Note: These are approximate values.
Preparation Time
Prep Time: 25 minutes
Cook Time: 35 minutes
Total Time: 1 hour
Make-Ahead and Storage Tips
This cake is perfect for prepping ahead. You can bake the layers a day before and store them wrapped at room temperature. The frosted cake keeps in the fridge for up to 4 days. Want to freeze it? Wrap slices individually for easy future cravings. Just thaw in the fridge overnight before serving.
How to Serve Purple Velvet Cake with Cream Cheese Frosting
This cake pairs beautifully with fresh berries, a cup of coffee, or even a glass of cold milk. Serve it as a show-stopping dessert at celebrations or slice it small for a luxurious afternoon treat.
Creative Leftover Transformations
Don’t toss those extras—reinvent them:
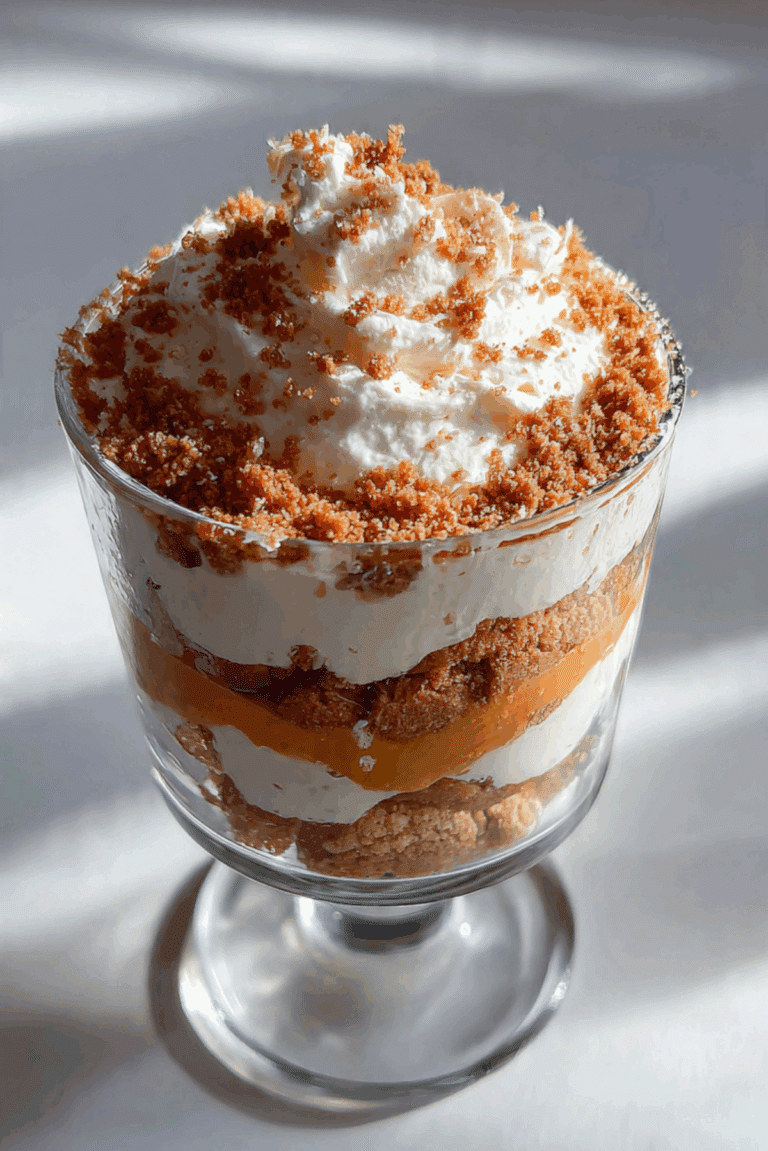
- Crumble slices into parfaits with whipped cream and berries.
- Cube and layer into a trifle.
- Freeze and dip chunks in melted chocolate for cake bites.
Additional Tips
A few final thoughts to keep your cake experience top-tier:
- Sift dry ingredients for a fluffier cake.
- Chill frosting slightly before spreading.
- Decorate with edible flowers or gold leaf for extra flair.
Make It a Showstopper
Presentation makes the difference. Use a cake stand for height, garnish with fresh berries, and sprinkle a few edible petals or dust with powdered sugar. The striking purple against the white frosting already does most of the work for you.
Variations to Try
Let your creativity lead the way:
- Ube Purple Velvet: Use ube extract and powder for a natural twist.
- Berry-Filled Layers: Add berry compote between layers.
- Mini Cupcakes: Bake in mini molds and top with a swirl of frosting.
- Lemon Cream Cheese Frosting: Add lemon zest and juice to the frosting.
- Marbled Velvet Cake: Swirl in a bit of vanilla batter for a marbled look.
FAQ’s
Q1: Can I use natural food coloring?
Yes, you can use purple sweet potato or ube powder for a vibrant, natural hue.
Q2: How do I store leftover cake?
Wrap slices and refrigerate for up to 4 days or freeze for longer storage.
Q3: Can I make this gluten-free?
Absolutely, just swap the flour for a gluten-free blend.
Q4: Is the cocoa flavor strong?
No, it’s very mild—just enough to enhance depth.
Q5: Can I double the recipe?
Yes, but use larger pans and adjust baking time.
Q6: What if I don’t have buttermilk?
Use milk with a tablespoon of lemon juice or vinegar.
Q7: Can I use this for cupcakes?
Definitely—just adjust baking time to about 18–20 minutes.
Q8: How do I get a smooth frosting finish?
Use an offset spatula and chill the cake between crumb and final coat.
Q9: Can I add fruit inside?
Yes, fresh or compote-style fruit between layers works great.
Q10: Is this cake kid-friendly?
Absolutely—it’s colorful, fun, and not overly sweet.
Conclusion
Purple Velvet Cake with Cream Cheese Frosting isn’t just another dessert. It’s an experience that starts the moment you slice into its bold color and taste its dreamy texture. Whether you’re celebrating or just baking for fun, trust me, this one’s a total game-changer. Worth every bite.
Print
Purple Velvet Cake with Cream Cheese Frosting
- Prep Time: 15 minutes
- Cook Time: 0 minutes
- Total Time: 2 hours
- Yield: 12 servings 1x
- Category: Snacks, Desserts
- Method: No-Bake
- Cuisine: American
- Diet: Vegetarian
Description
These No-Bake Peanut Butter Oat Cups are a quick and easy treat made with wholesome ingredients. Featuring a chewy oat base, creamy peanut butter, and a smooth chocolate topping, they’re perfect for snacks, desserts, or on-the-go energy bites.
Ingredients
- 2 cups old-fashioned rolled oats
- 1 cup creamy peanut butter
- 1/2 cup maple syrup or honey
- 1/4 cup coconut oil
- 1 teaspoon vanilla extract
- 1/4 teaspoon salt
- 1 cup semi-sweet chocolate chips
- 2 tablespoons peanut butter (for drizzle)
- 2 tablespoons chopped peanuts (optional)
Instructions
- Line a standard cupcake pan with paper liners and set aside.
- In a large bowl, mix rolled oats, peanut butter, maple syrup, melted coconut oil, vanilla extract, and salt until well combined.
- Scoop the oat mixture evenly into the lined cupcake pan, pressing down firmly to create a base layer.
- Melt the chocolate chips using a microwave or double boiler. Spoon melted chocolate over each oat cup and tap the pan gently to even out the layer.
- Refrigerate for 1–2 hours until firm.
- Drizzle with additional peanut butter and sprinkle chopped peanuts on top.
- Remove from liners and enjoy chilled or at room temperature.
Notes
- Press down oat mixture firmly for compact cups.
- Freeze for faster setting if needed.
- Store in an airtight container in the fridge for up to 7 days or freeze up to 2 months.
Nutrition
- Serving Size: 1 cup
- Calories: 220
- Sugar: 10g
- Sodium: 100mg
- Fat: 15g
- Saturated Fat: 6g
- Unsaturated Fat: 8g
- Trans Fat: 0g
- Carbohydrates: 18g
- Fiber: 3g
- Protein: 6g
- Cholesterol: 0mg
Keywords: no-bake peanut butter oat cups, easy snack recipe, chocolate oat cups, healthy dessert, quick no-bake treat