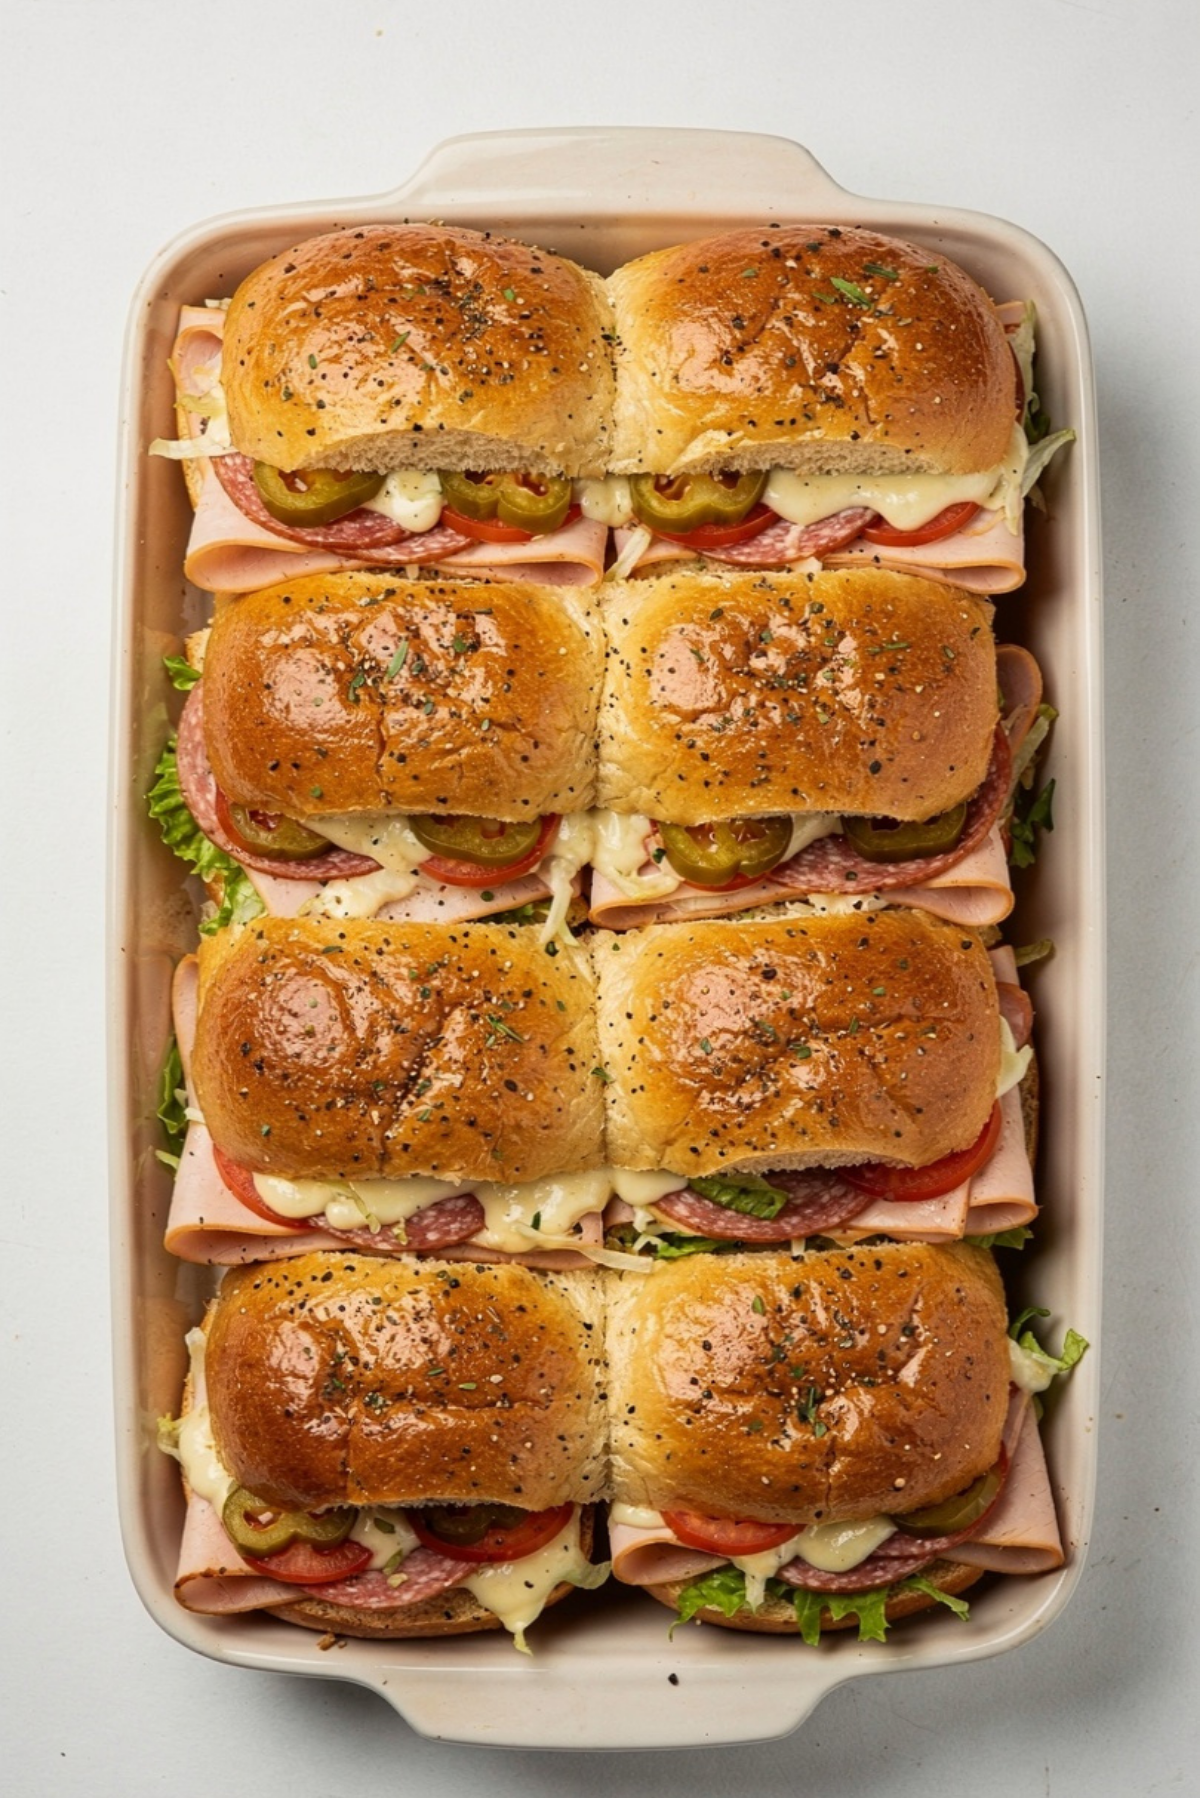
Cheesy Baked Italian Grinder Sliders Recipe
There’s something ridiculously satisfying about pulling apart warm, cheesy sliders straight from the oven. The buttery tops, the gooey melted cheese, and those layers of savory deli meats all come together in the most comforting way possible. These baked Italian grinder sliders are packed with flavor, yet they feel fun and casual enough for game nights, family dinners, or lazy weekend lunches. Trust me, you’re going to love this one because every bite gives you crispy edges, melty centers, and that tangy grinder-style freshness that keeps you reaching for another.
Why Everyone Keeps Coming Back for These Sliders
Some recipes disappear after one try, but this one tends to become a regular request. It has all the flavors of a classic Italian grinder sandwich, but baked into soft pull-apart sliders that feel extra cozy and satisfying. The combination of warm deli meats, stretchy cheese, buttery toasted rolls, and cool crunchy toppings creates the kind of contrast that makes every bite exciting.
And honestly, they’re almost impossible to mess up. Even beginner cooks can pull these together without stress, which makes them even more lovable.
The Story Behind Italian Grinder Sandwiches
Italian grinder sandwiches have roots in East Coast deli culture, especially in places where hearty sandwiches became the go-to comfort food for busy workers and big families. Traditionally, grinders were loaded with layers of meats, cheese, shredded lettuce, tomatoes, peppers, and tangy dressing, all tucked into crusty bread.
Over time, people started turning those bold deli flavors into warm baked versions, and that’s exactly where these sliders shine. Instead of one giant sandwich, you get individual pull-apart portions that are perfect for sharing. Let me tell you, it’s worth every bite.
What Makes These Sliders So Reliable and Delicious
Before you even start layering ingredients, it helps to know why this recipe works so beautifully every single time.
Versatile: These sliders fit almost any occasion, from quick dinners to party platters. You can serve them casually or dress them up with sides and dipping sauces.
Budget-Friendly: Deli meats, rolls, and cheese stretch surprisingly far here, which makes feeding a crowd easier without spending a fortune.
Quick and Easy: Most of the work is simple layering and baking, which means less stress and more enjoying.
Customizable: You can swap meats, cheeses, or toppings depending on what you already have in the fridge.
Crowd-Pleasing: Warm sandwiches with melted cheese rarely disappoint anybody, especially when the tops get buttery and golden.
Make-Ahead Friendly: You can assemble them ahead of time and bake later, which is a total lifesaver for parties.
Great for Leftovers: They reheat beautifully, and honestly, the flavors become even better the next day.
Smart Tips That Make These Sliders Taste Restaurant-Level Good
A few little details can completely change the final texture and flavor, so here are some tricks that make a huge difference.
- Toast the bottoms lightly before assembling if you want extra protection against sogginess.
- Shred the lettuce finely so it mixes better with the dressing and stays balanced in every bite.
- Let the sliders rest for about 5 minutes after baking so the cheese settles slightly before serving.
- Brush the tops generously with butter and Italian seasoning for that bakery-style finish.
- Use freshly sliced tomatoes instead of watery packaged ones for better texture.
Kitchen Tools That Make Everything Easier
You really do not need fancy equipment here, which is part of the charm.
Baking Dish: A 9×13-inch baking dish holds the sliders perfectly while helping the tops bake evenly.
Sharp Knife: Makes slicing the rolls easier without tearing them apart.
Mixing Bowl: Useful for tossing the lettuce and dressing together.
Pastry Brush: Helps spread the buttery topping evenly across every slider.
Aluminum Foil: Keeps the tops from browning too quickly during the first part of baking.
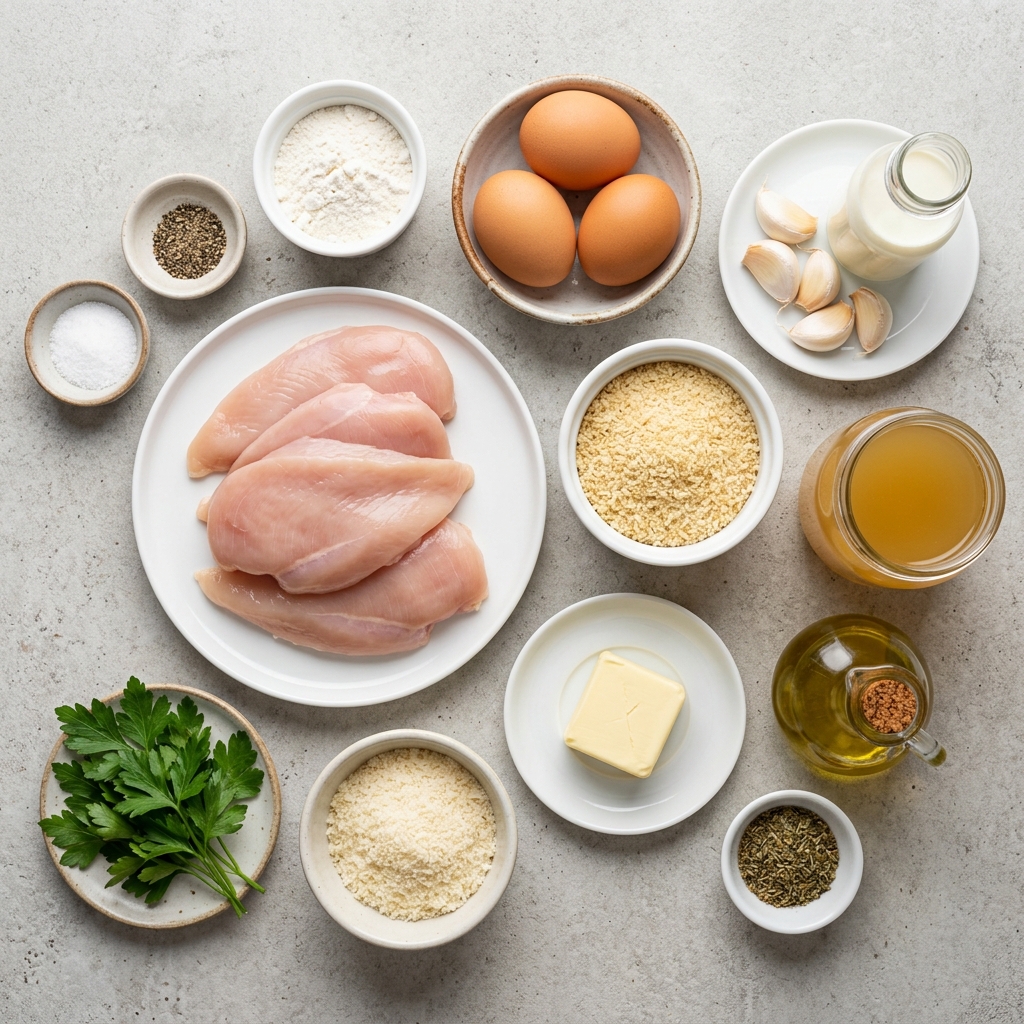
Ingredients That Bring Everything Together
Every ingredient has a role here, and together they create layers of flavor, crunch, creaminess, and melty goodness that taste absolutely incredible.
- Hawaiian Rolls: 12 rolls, soft and slightly sweet, perfect for balancing the salty meats.
- Turkey Ham: 8 slices, adds savory flavor without being too heavy.
- Beef Salami: 16 slices, brings that classic Italian deli richness.
- Provolone Cheese: 12 slices, melts beautifully and adds creamy sharpness.
- Shredded Lettuce: 1 cup, gives freshness and crunch.
- Tomatoes: 1 medium tomato, thinly sliced for juicy brightness.
- Banana Peppers: 1/3 cup sliced, adds tangy bite and extra flavor.
- Mayonnaise: 1/3 cup, forms the creamy base of the grinder dressing.
- Red Wine Vinegar: 1 tablespoon, gives the dressing its signature tang.
- Italian Seasoning: 2 teaspoons, adds herby depth throughout the sliders.
- Butter: 3 tablespoons melted, brushed on top for golden baked flavor.
- Parmesan Cheese: 2 tablespoons grated, finishes the tops with salty richness.
Easy Ingredient Swaps for Different Flavor Twists
One of the best things about these sliders is how flexible they are.
Turkey Ham: Smoked turkey slices work beautifully too.
Beef Salami: Try roast beef for a heartier texture.
Provolone Cheese: Mozzarella gives a milder and stretchier finish.
Hawaiian Rolls: Soft dinner rolls can replace them if preferred.
Banana Peppers: Pickled jalapeños add extra heat.
The Ingredients That Truly Steal the Show
Some ingredients quietly carry the entire recipe, and these two deserve special attention.
Provolone Cheese: This cheese melts into creamy layers that hold everything together while adding rich flavor without overpowering the meats.
Banana Peppers: Their tangy brightness cuts through the richness and keeps the sliders tasting balanced instead of heavy.
Let’s Build These Incredible Sliders Step by Step
Now comes the fun part, and honestly, your kitchen is about to smell amazing.
- Preheat Your Equipment: Preheat your oven to 350°F and lightly grease a 9×13-inch baking dish.
- Combine Ingredients: In a small bowl, mix the mayonnaise, red wine vinegar, and 1 teaspoon of Italian seasoning. Toss the shredded lettuce with part of the dressing mixture.
- Prepare Your Cooking Vessel: Slice the Hawaiian rolls horizontally while keeping the rolls connected. Place the bottom half into the prepared baking dish.
- Assemble the Dish: Layer the turkey ham, beef salami, and provolone cheese evenly across the rolls. Add tomato slices and banana peppers. Spoon the dressed lettuce over the top, then place the top half of the rolls back on.
- Cook to Perfection: Brush the tops with melted butter and sprinkle with Parmesan cheese and remaining Italian seasoning. Cover loosely with foil and bake for 15 minutes. Remove the foil and bake another 5 minutes until golden and melty.
- Finishing Touches: Let the sliders cool for about 5 minutes before slicing to help everything hold together.
- Serve and Enjoy: Pull apart the sliders while warm and serve immediately with chips, salad, or soup.
The Texture and Flavor Magic Happening in Every Bite
These sliders are all about contrast, and that’s what makes them addictive. The tops become buttery and lightly crisp while the inside stays soft and cheesy. The meats bring savory richness, the dressing adds creamy tanginess, and the banana peppers brighten everything with sharp acidity.
Then you get the cool crunch from the lettuce against the warm melted cheese, which honestly feels like the perfect balance.
Helpful Tricks for Even Better Results
Making a great slider recipe is already easy, but these little tricks make things even smoother.
- Use freshly grated Parmesan for stronger flavor on top.
- Cover with foil during the first bake so the tops stay soft and golden instead of drying out.
- Slice the tomatoes thinly to prevent excess moisture.
- Serve immediately while the cheese is perfectly melted.
Mistakes That Can Ruin the Texture
A few common mistakes can throw off the balance, but they’re easy to avoid.
- Adding too much dressing can make the rolls soggy.
- Overbaking can dry out the meats and harden the bread.
- Thick tomato slices release too much liquid during baking.
- Skipping the resting time makes the sliders slide apart too easily.
Nutrition Snapshot You Should Know
These sliders feel indulgent, but they’re surprisingly balanced for such a satisfying meal.
Servings: 12 sliders
Calories per serving: 320
Note: These are approximate values.
Timing That Fits Busy Days Perfectly
This recipe moves quickly, which makes it even more practical for hectic evenings.
Prep Time: 15 minutes
Cook Time: 20 minutes
Total Time: 35 minutes
Prep Ahead and Store Them Like a Pro
These sliders are wonderful for planning ahead because the flavors hold up beautifully.
You can fully assemble them several hours before baking and keep them covered in the refrigerator. If storing leftovers, wrap them tightly and refrigerate for up to 3 days.
For reheating, bake at 325°F for about 10 minutes until warmed through. You can also freeze them individually and reheat directly from frozen for quick lunches.
The Best Ways to Serve These Sliders
These sliders pair perfectly with crispy potato chips, pasta salad, pickle spears, or tomato soup. For parties, arrange them on a large wooden board with extra banana peppers and dipping sauces nearby.
They also work beautifully for casual dinners with roasted vegetables or a crunchy side salad.
Leftovers That Feel Like a Whole New Meal
If you somehow end up with leftovers, there are plenty of fun ways to use them.
Turn chopped leftovers into a warm pasta bake, dice them into a breakfast scramble, or wrap the fillings into tortillas for quick lunch wraps.
Honestly, they almost taste better the next day.
A Few Extra Tricks Worth Remembering
Small details really elevate this recipe from good to unforgettable.
Use quality deli meats from the counter instead of prepackaged slices when possible. Freshly sliced meats taste richer and less processed.
You can also add crushed red pepper flakes for subtle heat if your crowd enjoys spice.
How to Make These Sliders Look Absolutely Irresistible
Presentation matters more than people think, especially for party food.
Brush the tops generously so they shine beautifully after baking. Sprinkle extra Parmesan and chopped parsley right before serving for color and freshness.
Serve them warm in the baking dish so everyone can pull them apart easily.
Delicious Variations You Should Definitely Try
There are so many ways to customize these sliders while keeping that cozy grinder vibe.
- Spicy Version: Add sliced jalapeños and spicy pepper jack cheese.
- Extra Cheesy: Mix mozzarella with provolone for more cheese pull.
- Veggie Style: Skip the meats and load up on roasted peppers and mushrooms.
- Garlic Butter Upgrade: Add minced garlic to the melted butter topping.
- Crunchy Version: Add thin sliced red onions for extra bite.
FAQ’s
1. Can I make these sliders ahead of time?
Yes, you can assemble them several hours ahead and refrigerate before baking.
2. What cheese melts best for sliders?
Provolone melts beautifully while still giving classic Italian sandwich flavor.
3. Can I use different rolls?
Absolutely. Soft dinner rolls or brioche buns work nicely too.
4. How do I keep the sliders from getting soggy?
Use thin tomato slices and avoid adding too much dressing.
5. Can I freeze leftovers?
Yes, wrap them tightly and freeze for up to 2 months.
6. What sides pair well with these sliders?
Chips, pasta salad, soup, or roasted vegetables all work wonderfully.
7. Can I make them spicy?
Definitely. Jalapeños or spicy cheese are great additions.
8. Do I have to use Hawaiian rolls?
No, but their slight sweetness balances the savory fillings beautifully.
9. Can I serve them cold?
You can, but they taste best warm with melted cheese.
10. How long do leftovers last in the fridge?
They stay fresh for about 3 days when properly stored.
Conclusion
These cheesy baked Italian grinder sliders really are one of those recipes that instantly feels comforting and fun at the same time. Between the buttery golden tops, the melty cheese, the savory meats, and that fresh tangy crunch inside, every bite feels packed with flavor. Whether you’re making them for a casual dinner, a party spread, or just because you’re craving something seriously satisfying, this one’s a total game-changer. Trust me, once you make them, they’ll end up on repeat in your kitchen.
Print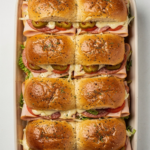
Cheesy Baked Italian Grinder Sliders Recipe
- Prep Time: 15 minutes
- Cook Time: 20 minutes
- Total Time: 35 minutes
- Yield: 12 sliders 1x
- Category: Main Course
- Method: Baking
- Cuisine: Italian-American
- Diet: Low Lactose
Description
Warm, cheesy baked Italian grinder sliders layered with turkey ham, beef salami, provolone cheese, crisp lettuce, tomatoes, banana peppers, and creamy grinder dressing, all tucked into buttery toasted Hawaiian rolls.
Ingredients
- 12 Hawaiian rolls
- 8 slices turkey ham
- 16 slices beef salami
- 12 slices provolone cheese
- 1 cup shredded lettuce
- 1 medium tomato, thinly sliced
- 1/3 cup sliced banana peppers
- 1/3 cup mayonnaise
- 1 tablespoon red wine vinegar
- 2 teaspoons Italian seasoning
- 3 tablespoons melted butter
- 2 tablespoons grated Parmesan cheese
Instructions
- Preheat the oven to 350°F and lightly grease a 9×13-inch baking dish.
- In a small bowl, mix the mayonnaise, red wine vinegar, and 1 teaspoon of Italian seasoning. Toss the shredded lettuce with part of the dressing mixture.
- Slice the Hawaiian rolls horizontally while keeping them connected. Place the bottom half into the prepared baking dish.
- Layer the turkey ham, beef salami, and provolone cheese evenly across the rolls.
- Add the tomato slices and banana peppers over the cheese layer.
- Spoon the dressed lettuce evenly over the top and place the top half of the rolls back on.
- Brush the tops with melted butter and sprinkle with Parmesan cheese and the remaining Italian seasoning.
- Cover loosely with foil and bake for 15 minutes.
- Remove the foil and bake for another 5 minutes until golden and the cheese is melted.
- Let the sliders rest for 5 minutes before slicing and serving warm.
Notes
- Use freshly sliced deli meats for the best flavor and texture.
- Do not overfill with dressing to avoid soggy rolls.
- These sliders can be assembled ahead of time and refrigerated before baking.
- Add crushed red pepper flakes for a spicy variation.
Nutrition
- Serving Size: 1 slider
- Calories: 320
- Sugar: 6g
- Sodium: 780mg
- Fat: 19g
- Saturated Fat: 8g
- Unsaturated Fat: 9g
- Trans Fat: 0g
- Carbohydrates: 20g
- Fiber: 1g
- Protein: 15g
- Cholesterol: 40mg
Keywords: cheesy baked sliders, Italian grinder sliders, baked sandwich sliders, Hawaiian roll sliders, party sandwiches, easy dinner sliders, cheesy deli sliders