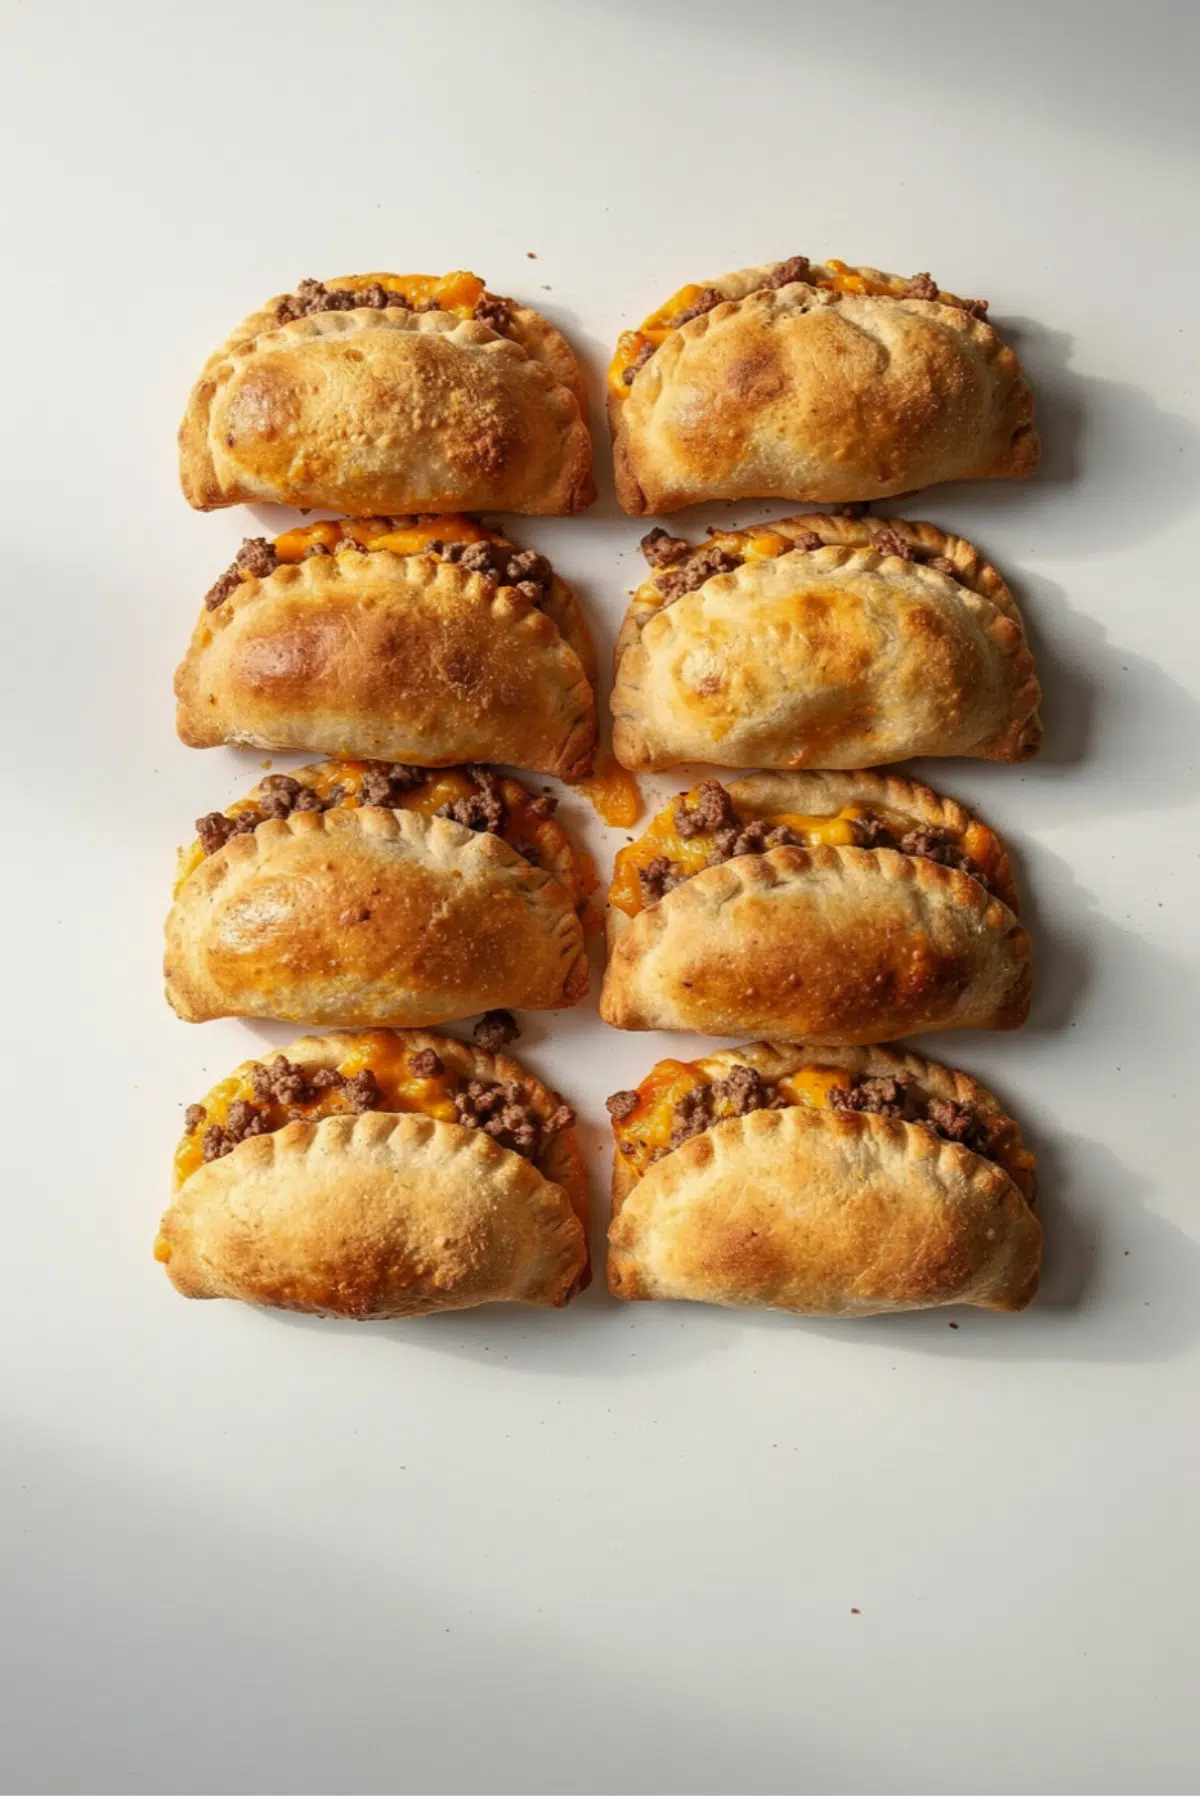
Cheesy Beef Pockets
There is something incredibly comforting about biting into a warm, golden pocket filled with juicy beef and melted cheese. The outside has that gentle crisp, while the inside stays soft, rich, and packed with flavor. Trust me, you’re going to love this. It is the kind of recipe that feels like a little reward after a long day, simple yet deeply satisfying.
Why These Cheesy Pockets Keep Everyone Coming Back
As you take that first bite, you will notice how everything just works together. The savory beef, the creamy cheese, and that soft dough create a balance that feels both indulgent and familiar. This one’s a total game changer when you want something hearty without spending hours in the kitchen.
A Little Backstory Behind This Comfort Classic
These stuffed pockets take inspiration from handheld meals found all around the world. From Middle Eastern pastries to European meat pies, the idea is always the same, wrap something delicious in dough and bake it until golden. Over time, home cooks made their own versions, adding cheese for richness and seasoning the filling to match their taste.
Why You’ll Keep Making This Again and Again
Let me tell you, it’s worth every bite, and also worth making more than once.
Versatile: You can serve these for lunch, dinner, or even as a snack. They fit almost any occasion.
Budget-Friendly: Ground beef and simple pantry ingredients keep costs low without sacrificing flavor.
Quick and Easy: The steps are straightforward and beginner friendly, no complicated techniques involved.
Customizable: You can adjust spices, swap cheeses, or even add vegetables if you like.
Crowd-Pleasing: Everyone loves a warm cheesy filling wrapped in soft dough.
Make-Ahead Friendly: You can prepare them ahead and bake when needed.
Great for Leftovers: They reheat beautifully and stay delicious the next day.
Pro Tips That Make All the Difference
Before we dive into the cooking, here are a few small secrets that elevate the final result.
- Let the beef cook until lightly browned for deeper flavor
- Do not overfill the pockets, it helps prevent leaks
- Seal the edges firmly so the filling stays inside
- Allow them to rest briefly after baking so the cheese sets slightly
Kitchen Tools That Make It Easy
Now let’s talk about what you will need to bring this together smoothly.
Mixing Bowl: Used to combine and prepare the filling.
Skillet: Helps cook the beef evenly and develop flavor.
Rolling Pin: Makes shaping the dough easier and consistent.
Baking Sheet: Provides a stable surface for baking.
Parchment Paper: Prevents sticking and keeps cleanup simple.
Ingredients You Will Need For This Recipe
Now we arrive at the heart of the recipe, where each ingredient plays its role in building that perfect bite.
- Ground Beef: 500 grams, provides the rich and savory base of the filling
- Shredded Cheese: 1 cup, melts into the beef creating a creamy texture
- All Purpose Flour: 2 cups, forms the structure of the dough
- Milk: 1 cup, adds softness and helps bind the dough
- Egg: 1 large, gives richness and helps the dough hold together
- Butter: 2 tablespoons, adds flavor and tenderness to the dough
- Onion: 1 medium finely chopped, brings sweetness and depth
- Garlic: 2 cloves minced, enhances the overall flavor
- Salt: 1 teaspoon, balances and enhances all ingredients
- Black Pepper: 1 teaspoon, adds a gentle warmth
Easy Swaps If You Need Them
Sometimes you work with what you have, and that is perfectly fine.
Ground Beef: Ground turkey or chicken
Shredded Cheese: Mozzarella or cheddar alternatives
Milk: Any plant based milk
Butter: Margarine or oil
Flour: Whole wheat flour
Spotlight on Key Ingredients
Let’s take a closer look at what really makes this dish shine.
Ground Beef: It delivers that hearty, savory flavor that makes every bite satisfying.
Shredded Cheese: The melted texture creates that irresistible stretch and richness.
Let’s Get Cooking Step by Step
And now let’s dive into the part where everything comes together.
- Preheat Your Equipment: Set your oven to 180°C so it is ready when needed
- Combine Ingredients: Cook the ground beef with onion, garlic, salt, and pepper in a skillet until browned
- Prepare Your Cooking Vessel: Line a baking sheet with parchment paper
- Assemble the Dish: Mix flour, milk, egg, and butter to form dough, roll it out, add filling and cheese, then fold into pockets
- Cook to Perfection: Bake for 20 minutes until golden and slightly crisp
- Finishing Touches: Let them cool slightly so the filling settles
- Serve and Enjoy: Serve warm and enjoy the gooey cheesy center
The Texture and Flavor Experience
What makes this dish so special is the contrast. The outside develops a light crispness while staying soft inside. Then you hit the filling, juicy beef mixed with melted cheese that stretches just enough. The onion and garlic bring subtle sweetness and aroma, making every bite layered and satisfying.
Helpful Cooking Tips You’ll Appreciate
Getting this just right is easier with a few small pointers.
- Use freshly shredded cheese for better melting
- Do not overwork the dough to keep it soft
- Cook the beef fully before assembling
- Leave space between pockets when baking
What to Avoid for Best Results
Even simple recipes have a few things to watch out for.
- Overfilling the pockets can cause them to burst
- Undercooking the beef affects flavor and safety
- Skipping parchment paper can lead to sticking
- Baking at too high heat can burn the outside too quickly
Nutrition Facts You Should Know
Servings: 4
Calories per serving: 450
Note: These are approximate values.
Time Breakdown for This Recipe
Prep Time: 20 minutes
Cook Time: 20 minutes
Total Time: 40 minutes
Make-Ahead and Storage Tips
If you want to plan ahead, you can assemble the pockets and keep them in the fridge for up to a day before baking. Once cooked, store leftovers in an airtight container for up to three days. Reheat in the oven to bring back that crisp texture, or freeze them for longer storage.
Serving Ideas That Make It Shine
Serve these with a fresh salad or a light yogurt dip to balance the richness. They also pair nicely with a simple tomato sauce for dipping.
Creative Ways to Use Leftovers
Leftovers can turn into something new and exciting.
- Slice and add to a wrap with fresh veggies
- Chop and mix into a quick skillet meal
- Serve with eggs for a hearty breakfast
Extra Tips for Even Better Results
A few final touches can make a difference.
- Brush the tops with a little egg wash for extra color
- Add herbs like parsley for freshness
- Adjust seasoning to your taste
Make It Look As Good As It Tastes
Presentation matters more than you think. Arrange the pockets neatly on a plate, maybe add a sprinkle of herbs, and serve while still warm so the cheese stays perfectly melty.
Fun Variations to Try
If you feel like experimenting, here are a few ideas.
- Add chopped bell peppers to the filling
- Use spicy cheese for extra kick
- Include mushrooms for added texture
- Try a mix of cheeses for deeper flavor
FAQ’s
Q1: Can I make these ahead of time?
Yes, you can assemble them and refrigerate before baking.
Q2: Can I freeze them?
Yes, freeze before or after baking for later use.
Q3: What cheese works best?
Cheddar or mozzarella both melt beautifully.
Q4: Can I use store bought dough?
Yes, it saves time and works well.
Q5: How do I keep them from opening?
Seal the edges tightly and avoid overfilling.
Q6: Can I make them smaller?
Yes, just adjust baking time slightly.
Q7: Are they good for kids?
Absolutely, they are very kid friendly.
Q8: Can I add spices?
Yes, feel free to customize seasoning.
Q9: What can I serve with them?
Salads, dips, or simple sauces work great.
Q10: How do I reheat them?
Use the oven for best texture.
Conclusion
And there you have it, a warm, comforting dish that brings together simple ingredients in the best possible way. Once you try it, you will see how easy and rewarding it is. Let me tell you, it is the kind of recipe that quickly becomes a favorite in your kitchen.
Print
Cheesy Beef Pockets
- Prep Time: 20 minutes
- Cook Time: 20 minutes
- Total Time: 40 minutes
- Yield: 4 servings 1x
- Category: Main Course
- Method: Baking
- Cuisine: International
- Diet: Low Lactose
Description
Golden baked pockets filled with seasoned beef and melted cheese, soft inside with a lightly crisp exterior.
Ingredients
- 500 grams ground beef
- 1 cup shredded cheese
- 2 cups all purpose flour
- 1 cup milk
- 1 large egg
- 2 tablespoons butter
- 1 medium onion, finely chopped
- 2 cloves garlic, minced
- 1 teaspoon salt
- 1 teaspoon black pepper
Instructions
- Preheat oven to 180°C.
- Cook ground beef with onion, garlic, salt, and pepper in a skillet until browned.
- Line a baking sheet with parchment paper.
- Mix flour, milk, egg, and butter to form dough. Roll out dough, add beef mixture and shredded cheese, then fold into pockets.
- Bake for 20 minutes until golden.
- Let cool slightly before serving.
- Serve warm and enjoy.
Notes
- Do not overfill to prevent leaking.
- Seal edges well for best results.
- Use freshly shredded cheese for better melting.
- Let rest before serving for cleaner texture.
Nutrition
- Serving Size: 1 portion
- Calories: 450
- Sugar: 3g
- Sodium: 520mg
- Fat: 22g
- Saturated Fat: 10g
- Unsaturated Fat: 10g
- Trans Fat: 0g
- Carbohydrates: 38g
- Fiber: 2g
- Protein: 24g
- Cholesterol: 85mg
Keywords: cheesy beef pockets, stuffed dough, beef pastry, easy dinner recipe, baked pockets