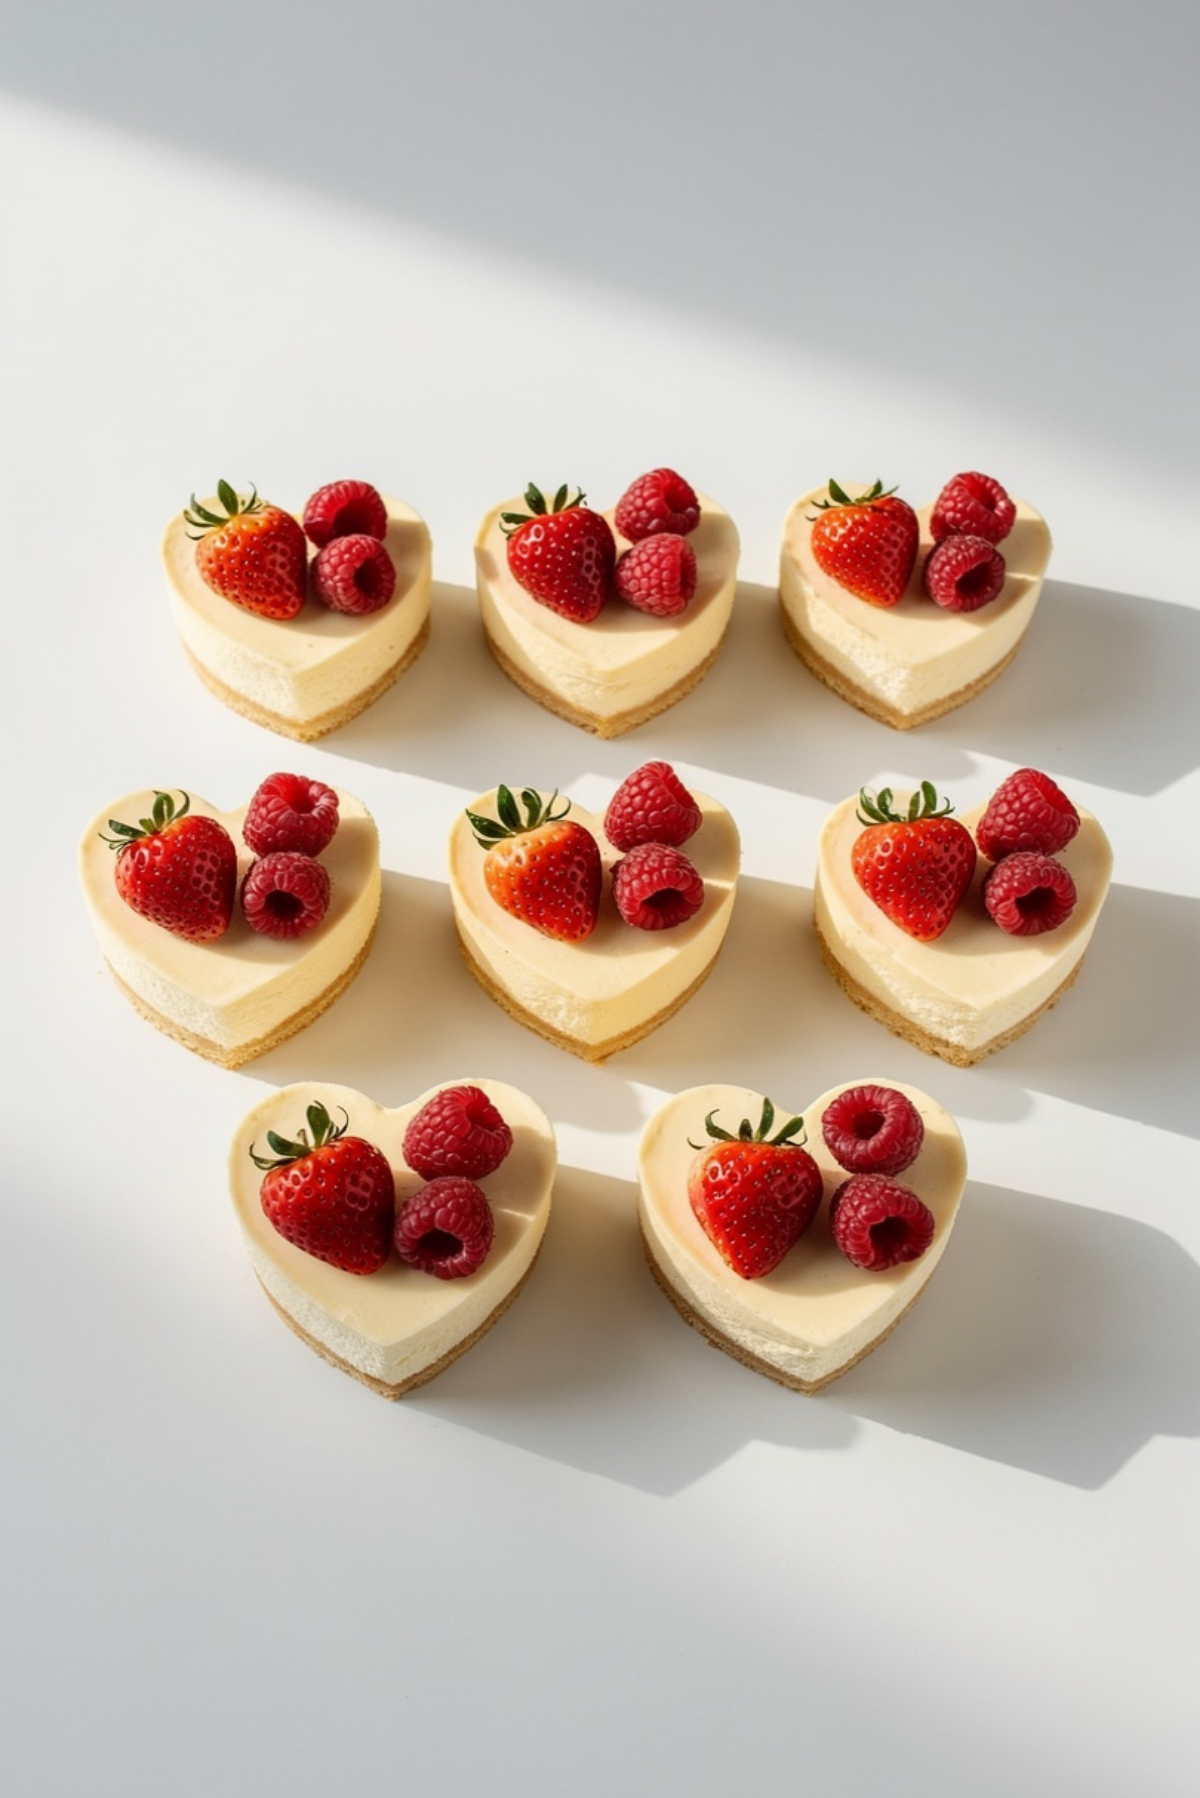
Mini Cheesecake Hearts
There is something so charming about tiny desserts, especially when they come in the shape of little hearts. These creamy cheesecake bites feel playful, elegant, and comforting all at once. The buttery crust, silky filling, and fresh berry topping create that perfect balance between rich and refreshing. Trust me, you’re going to love this. They look bakery-worthy, yet they are surprisingly simple to make right at home.
And now that you can already picture those creamy little bites sitting on a dessert table, let’s dive into what makes this recipe such a favorite for every occasion.
Why These Sweet Little Cheesecakes Always Steal the Show
Mini desserts have a way of making people instantly excited, and these heart-shaped cheesecakes are no exception. They feel festive without requiring complicated decorating skills. The smooth cream cheese filling melts beautifully with the crisp cookie crust, while the berries add a fresh burst of flavor that keeps every bite balanced.
What makes them extra special is how personal they feel. Instead of slicing a large cheesecake, everyone gets their own adorable serving. This one’s a total game-changer for parties, birthdays, bridal showers, or even cozy weekends when you want something a little extra special without spending hours in the kitchen.
A Little Story Behind Heart-Shaped Cheesecake Treats
Cheesecake itself has been around for centuries, with versions appearing in ancient Greece long before modern cream cheese existed. Over time, the dessert evolved into the rich and creamy style many people know today, especially in American baking traditions.
Mini cheesecakes became especially popular because they are easier to serve and bake faster than full-sized versions. The heart shape adds a sweet symbolic touch that makes them perfect for celebrations filled with warmth and love. Let me tell you, desserts like this have a way of bringing people together around the table in the best possible way.
What Makes This Recipe So Reliable and Fun to Make
These little cheesecake hearts are not only beautiful, they are incredibly practical too. Once you make them once, you’ll want to keep the recipe forever.
Versatile: They work for romantic dinners, baby showers, birthdays, or simple weekend treats. You can even switch toppings depending on the season.
Budget-Friendly: Most ingredients are simple baking staples that are easy to find without spending a fortune.
Quick and Easy: Since they are mini sized, they bake faster and chill more quickly than a traditional cheesecake.
Customizable: You can use different cookies for the crust or swap berries for chocolate, caramel, or citrus toppings.
Crowd-Pleasing: Almost everyone loves cheesecake, especially when it comes in adorable bite-sized portions.
Make-Ahead Friendly: These chill beautifully overnight, which makes entertaining far less stressful.
Great for Leftovers: They store wonderfully in the fridge, and the texture stays creamy for days.
Smart Baking Secrets for the Creamiest Results
Making cheesecake can feel intimidating at first, but a few simple tricks make all the difference.
- Use room temperature cream cheese so the filling blends smoothly without lumps.
- Do not overmix the batter once the eggs are added because too much air can cause cracking.
- Bake just until the centers are slightly jiggly because they continue setting as they cool.
- Chill thoroughly before serving because cheesecake tastes even better when fully cold.
- Wipe your knife clean between slices if cutting larger heart shapes for cleaner edges.
Kitchen Tools That Make Everything Easier
Before starting, gathering the right tools makes the process smooth and stress-free.
Mixing Bowls: Helpful for keeping crust and filling ingredients separate and organized.
Electric Mixer: Creates that silky smooth cheesecake texture quickly and evenly.
Heart-Shaped Muffin Pan or Silicone Mold: Gives the cheesecakes their adorable shape.
Measuring Cups and Spoons: Important for accurate baking results.
Rubber Spatula: Helps scrape every bit of creamy filling from the bowl.
Cooling Rack: Allows the cheesecakes to cool evenly before chilling.
The Ingredients That Bring These Cheesecake Hearts to Life
The beauty of this dessert comes from simple ingredients working together perfectly. Every ingredient has a role in creating that creamy, buttery, slightly tangy bite everyone loves.
- Graham Cracker Crumbs: 1 cup, creates the buttery crunchy base that balances the creamy filling.
- Unsalted Butter: 4 tablespoons melted, helps bind the crust together while adding rich flavor.
- Cream Cheese: 16 ounces softened, forms the rich and creamy foundation of the cheesecake filling.
- Granulated Sugar: 1/2 cup, sweetens the filling without overpowering the tangy cream cheese.
- Vanilla Extract: 1 teaspoon, adds warm bakery-style flavor.
- Eggs: 2 large, help the filling set with a smooth texture.
- Sour Cream: 1/4 cup, gives the filling extra creaminess and slight tanginess.
- Fresh Strawberries: 1/2 cup sliced, add bright fruity freshness on top.
- Fresh Raspberries: 1/2 cup, bring a juicy tart contrast to the rich filling.
Easy Ingredient Swaps You Can Try
One of the best things about this recipe is how adaptable it is.
Graham Cracker Crumbs: Crushed vanilla cookies or digestive biscuits work beautifully.
Sour Cream: Plain Greek yogurt creates a similar creamy texture.
Fresh Strawberries: Fresh cherries or blueberries can be used instead.
Vanilla Extract: Almond extract creates a slightly more bakery-style flavor.
The Ingredients That Truly Make the Magic Happen
Some ingredients quietly transform the entire dessert, and these two deserve special attention.
Cream Cheese: This is the heart of the recipe. It creates that smooth, rich texture that makes cheesecake irresistible.
Fresh Berries: The berries brighten every bite and prevent the dessert from feeling too heavy.
Let’s Bake These Creamy Little Hearts Together
Now comes the fun part. Once the kitchen starts smelling buttery and sweet, you’ll know something amazing is on the way.
- Preheat Your Equipment: Preheat your oven to 325°F and lightly grease a heart-shaped muffin pan or silicone mold.
- Combine Ingredients: Mix the graham cracker crumbs and melted butter until the texture resembles wet sand. In another bowl, beat the cream cheese and sugar until smooth. Add vanilla extract, eggs, and sour cream, mixing gently until creamy.
- Prepare Your Cooking Vessel: Press the crust mixture firmly into the bottom of each heart mold to create an even base.
- Assemble the Dish: Spoon the cheesecake filling evenly over the crusts, smoothing the tops gently with a spatula.
- Cook to Perfection: Bake for 18 to 22 minutes until the edges are set but the centers still jiggle slightly.
- Finishing Touches: Allow the cheesecakes to cool completely before chilling for at least 3 hours. Top with sliced strawberries and raspberries before serving.
- Serve and Enjoy: Serve chilled and enjoy every creamy, buttery, fruity bite.
The Texture and Flavor That Make Every Bite Worth It
The first thing you notice is the contrast between the crisp buttery crust and the silky smooth filling. Then come the berries, juicy and fresh against the rich creaminess of the cheesecake. Every layer brings something different, which keeps each bite exciting.
As the cheesecakes chill, the flavors deepen and become even more balanced. The vanilla becomes warmer, the cream cheese turns extra velvety, and the fruit adds the perfect bright finish.
Helpful Tricks for Foolproof Cheesecake Success
A few little details can make your cheesecakes look and taste bakery-perfect.
- Let the cream cheese soften fully before mixing.
- Chill the cheesecakes overnight for the best texture.
- Use fresh berries right before serving for maximum freshness.
- Press the crust firmly so it holds together perfectly.
Mistakes to Skip for Perfect Mini Desserts
Even simple recipes can go sideways if certain details are overlooked.
- Avoid overbaking because the cheesecakes can become dry instead of creamy.
- Do not skip chilling time because the texture needs time to fully set.
- Avoid overmixing after adding eggs because it can create cracks.
- Do not use cold cream cheese because lumps are difficult to smooth out.
Nutrition Information You’ll Want to Know
Servings: 12 mini cheesecakes
Calories per serving: 210
Note: These are approximate values.
Time Breakdown for Easy Planning
Prep Time: 20 minutes
Cook Time: 22 minutes
Total Time: 42 minutes plus chilling time
Simple Ways to Prepare and Store Them Ahead
These cheesecake hearts are fantastic for planning ahead because the flavor actually improves after chilling overnight.
Store them in an airtight container in the refrigerator for up to 4 days. You can also freeze them without toppings for up to 2 months. When ready to enjoy, thaw overnight in the refrigerator and add fresh berries before serving.
Delicious Ways to Serve These Mini Treats
These little cheesecakes shine beautifully on dessert platters with fresh fruit and coffee. They also pair wonderfully with hot chocolate, tea, or iced coffee.
For extra elegance, dust them lightly with powdered sugar or drizzle a little berry sauce over the top.
Fun Ideas for Turning Leftovers Into Something New
Leftover cheesecakes can become entirely different desserts.
- Crumble them into parfait glasses with whipped cream and berries.
- Blend them into a milkshake for a creamy dessert drink.
- Chop them into chunks and fold into vanilla ice cream.
Extra Tips That Make Everything Even Better
Small details often create the biggest flavor payoff.
- Use high-quality vanilla extract for deeper flavor.
- Chill your serving plates for an elegant presentation.
- Add lemon zest to the filling for a brighter finish.
- Top with berries right before serving for the freshest appearance.
Make These Cheesecake Hearts Look Bakery Perfect
Presentation turns simple desserts into memorable centerpieces.
Arrange the cheesecakes on a white platter with neatly placed berries around them. A tiny mint leaf on top instantly adds color and freshness. Let me tell you, the glossy berries against the creamy filling look absolutely stunning.
Creative Twists You’ll Want to Try Next
Once you master the base recipe, there are endless possibilities.
- Chocolate Version: Add melted chocolate to the filling and top with chocolate curls.
- Lemon Berry Style: Add lemon zest and lemon juice for a citrusy flavor.
- Cookies and Cream: Mix crushed chocolate sandwich cookies into the filling.
- Caramel Pecan: Drizzle caramel sauce and chopped pecans on top.
- Berry Swirl: Swirl berry puree into the cheesecake batter before baking.
FAQ’s
1. Can I make these without a heart-shaped pan?
Yes, regular muffin tins work perfectly if you do not have heart molds.
2. How long should they chill?
At least 3 hours, although overnight gives the best texture.
3. Can I freeze them?
Absolutely. Freeze without toppings in an airtight container.
4. Why did my cheesecakes crack?
Overmixing or overbaking can cause cracking.
5. Can I use low-fat cream cheese?
Yes, but the texture may be slightly less creamy.
6. What other toppings work well?
Chocolate drizzle, caramel sauce, or crushed cookies are delicious.
7. Can I make them gluten free?
Yes, simply use gluten-free cookies for the crust.
8. How do I know when they are done baking?
The edges should look set while the centers still jiggle slightly.
9. Can I use frozen berries?
Fresh berries are best for topping, but thawed frozen berries can work in a pinch.
10. How should I store leftovers?
Keep them refrigerated in an airtight container for up to 4 days.
Conclusion
These mini cheesecake hearts are the kind of dessert that instantly makes people smile. They are creamy, buttery, fruity, and surprisingly simple to make at home. Whether you serve them for a celebration or just because you deserve something sweet, they always feel special. Trust me, once you taste that silky filling with the crisp crust and juicy berries, you’ll understand why this recipe disappears so quickly. This one’s worth every single bite.
Print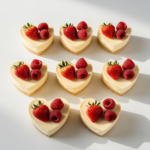
Mini Cheesecake Hearts
- Prep Time: 20 minutes
- Cook Time: 22 minutes
- Total Time: 42 minutes plus chilling time
- Yield: 12 mini cheesecakes 1x
- Category: Dessert
- Method: Baking
- Cuisine: American
- Diet: Vegetarian
Description
Creamy mini cheesecake hearts with buttery graham cracker crusts and fresh berry topping. These adorable bite-sized desserts are smooth, rich, and perfect for celebrations, parties, or cozy homemade treats.
Ingredients
- 1 cup graham cracker crumbs
- 4 tablespoons unsalted butter, melted
- 16 ounces cream cheese, softened
- 1/2 cup granulated sugar
- 1 teaspoon vanilla extract
- 2 large eggs
- 1/4 cup sour cream
- 1/2 cup fresh strawberries, sliced
- 1/2 cup fresh raspberries
Instructions
- Preheat the oven to 325°F and lightly grease a heart-shaped muffin pan or silicone mold.
- Mix the graham cracker crumbs and melted butter until combined.
- Press the crust mixture firmly into the bottom of each heart mold.
- In a mixing bowl, beat the cream cheese and sugar until smooth.
- Add the vanilla extract, eggs, and sour cream, mixing gently until creamy.
- Spoon the cheesecake filling evenly over the crusts and smooth the tops.
- Bake for 18 to 22 minutes until the edges are set and the centers still jiggle slightly.
- Cool completely, then refrigerate for at least 3 hours.
- Top with sliced strawberries and raspberries before serving.
Notes
- Use room temperature cream cheese for the smoothest texture.
- Do not overmix after adding the eggs to prevent cracking.
- Chill overnight for even better flavor and texture.
- Add fresh berries right before serving for the freshest appearance.
Nutrition
- Serving Size: 1 mini cheesecake
- Calories: 210
- Sugar: 12g
- Sodium: 140mg
- Fat: 15g
- Saturated Fat: 9g
- Unsaturated Fat: 5g
- Trans Fat: 0g
- Carbohydrates: 16g
- Fiber: 1g
- Protein: 4g
- Cholesterol: 55mg
Keywords: mini cheesecake hearts, heart shaped cheesecake, mini cheesecake recipe, berry cheesecake bites, easy cheesecake desserts, romantic desserts, cheesecake cupcakes