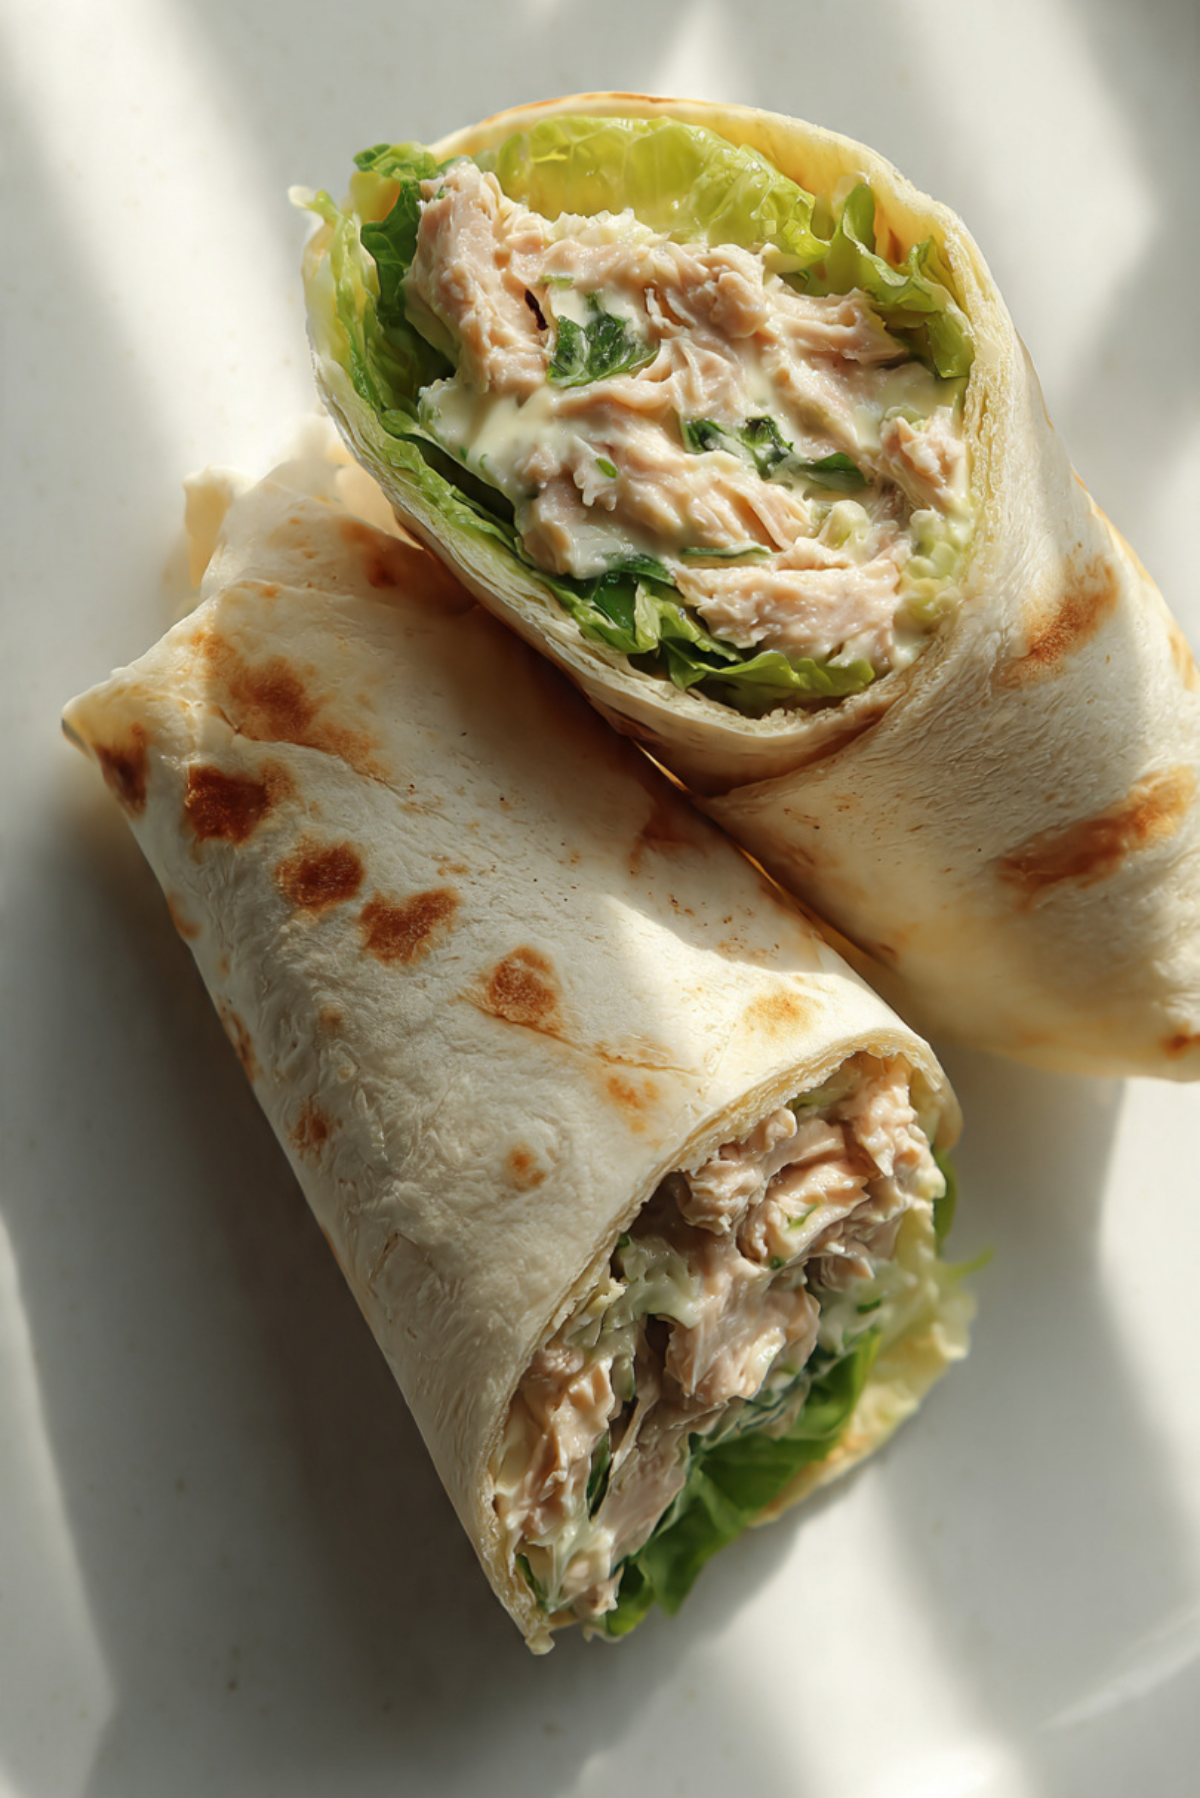
Tuna Melt Wrap
There is something about a warm wrap filled with creamy tuna and gooey melted cheese that just feels like comfort in every bite. The tortilla gets lightly crisp, the filling stays soft and rich, and every bite gives you that perfect balance of crunch and creaminess. Trust me, you’re going to love this, it is quick, satisfying, and honestly a little addictive.
Why This Wrap Just Works Every Time
As we settle into the idea of this cozy meal, you start to notice how simple ingredients come together into something truly special. This one’s a total game-changer when you want something fast but still homemade.
A Little Backstory Behind This Classic Twist
Now let’s dive into where this idea comes from. The classic tuna melt has been around for decades, often served on toasted bread in diners across the United States. Over time, home cooks started adapting it into wraps for a lighter, more portable option. The wrap version keeps all the comforting flavors while making it easier to enjoy anywhere, whether at home or on the go.
Why You’ll Keep Coming Back to This Recipe
Before we jump into cooking, let me tell you why this wrap deserves a permanent spot in your routine.
Versatile: You can enjoy it for lunch, dinner, or even a quick snack. It fits into almost any part of your day.
Budget-Friendly: The ingredients are simple and affordable, making it perfect when you want something tasty without spending much.
Quick and Easy: From start to finish, it comes together in under 20 minutes, which is perfect for busy days.
Customizable: Add veggies, switch the cheese, or adjust the seasoning to make it your own.
Crowd-Pleasing: It is comforting, cheesy, and familiar, which makes it a hit for both kids and adults.
Make-Ahead Friendly: You can prepare the filling ahead and assemble when ready to eat.
Great for Leftovers: Any extra filling can be used in sandwiches, salads, or even stuffed into another wrap.
Pro Tips to Get That Perfect Melt
Now that you are excited, let’s make sure every bite turns out just right.
- Use well-drained tuna so the wrap does not get soggy
- Toast the wrap slowly so the cheese melts evenly
- Spread the filling evenly for consistent flavor in every bite
- Lightly butter the outside for that golden crisp finish
Kitchen Tools You’ll Need
Before we move forward, gather these simple tools so everything flows smoothly.
Mixing bowl: For combining the tuna filling easily
Spoon or spatula: To mix and spread the filling evenly
Skillet or pan: For toasting the wrap to perfection
Knife: To slice the wrap cleanly before serving
Ingredients That Bring It All Together
Now let’s talk about what makes this wrap so flavorful and satisfying. Each ingredient plays its own role in building that perfect bite.
- Canned Tuna: 2 cans, drained, this is the main protein and gives the wrap its rich, savory base
- Mayonnaise: 3 tablespoons, adds creaminess and binds everything together
- Shredded Cheese: 1 cup, melts beautifully and creates that signature gooey texture
- Lettuce: 1 cup, chopped, adds freshness and a slight crunch
- Flour Tortillas: 4 large, soft and perfect for wrapping everything neatly
- Butter: 2 tablespoons, used for toasting and adding a golden crisp exterior
- Salt: 1/2 teaspoon, enhances all the flavors
- Black Pepper: 1/4 teaspoon, adds a gentle warmth and depth
Easy Swaps You Can Try
If you feel like experimenting a little, here are some easy substitutions.
Mayonnaise: Greek yogurt for a lighter option
Cheese: Mozzarella or cheddar both work beautifully
Lettuce: Spinach or arugula for a different flavor
Butter: Olive oil if you prefer a lighter fat
Spotlight on Key Ingredients
Let’s pause for a second and appreciate what really makes this dish shine.
Tuna: The heart of the recipe, it brings a rich, savory flavor that pairs perfectly with creamy elements.
Cheese: This is what transforms the wrap into a melt, adding that irresistible stretch and richness.
Let’s Bring It All Together
And now let’s dive into the cooking process, where everything starts to come alive.
- Preheat Your Equipment: Heat a skillet over medium heat so it is ready for toasting
- Combine Ingredients: In a bowl, mix the drained tuna, mayonnaise, salt, and black pepper until smooth and creamy
- Prepare Your Cooking Vessel: Lightly butter the skillet to prevent sticking and add flavor
- Assemble the Dish: Lay out the tortillas, spread the tuna mixture evenly, add shredded cheese and lettuce, then fold into wraps
- Cook to Perfection: Place the wraps in the skillet and cook for 2 to 3 minutes on each side until golden and the cheese is melted
- Finishing Touches: Remove from heat and let them rest for a minute before slicing
- Serve and Enjoy: Slice in half and serve warm while the cheese is still gooey
Texture and Flavor That Make Every Bite Count
As you take that first bite, you will notice the contrast between the crispy tortilla and the soft, creamy filling. The tuna mixture is rich and slightly tangy, while the melted cheese adds a smooth, comforting layer. The lettuce brings a fresh crunch that balances everything out perfectly.
Helpful Tips for Best Results
If you want to make it even better, keep these in mind.
- Toast on medium heat to avoid burning the wrap
- Do not overfill or the wrap may break
- Use freshly shredded cheese for better melting
Common Mistakes to Avoid
Even simple recipes can go wrong, so here is what to watch out for.
- Using too much mayonnaise which can make the filling overly heavy
- Skipping the draining step for tuna which leads to sogginess
- Cooking on high heat which burns the outside before the inside warms through
Nutrition Snapshot
Servings: 4
Calories per serving: 420
Note: These are approximate values.
Time Breakdown for This Recipe
Prep Time: 10 minutes
Cook Time: 10 minutes
Total Time: 20 minutes
Make-Ahead and Storage Tips
If you want to plan ahead, you can prepare the tuna mixture and store it in the fridge for up to two days. When ready, just assemble and toast. Leftover wraps can be refrigerated and reheated in a skillet to bring back that crisp texture. Freezing is not recommended as the texture may change.
Serving Ideas You’ll Love
Serve these wraps with a light salad, crispy fries, or even a bowl of soup. They also pair nicely with fresh fruit for a balanced meal.
Creative Ways to Use Leftovers
If you have extra filling, try using it in a sandwich, stuffing it into pita bread, or adding it to a fresh salad for a quick lunch.
Extra Tips for Even Better Flavor
Adding a squeeze of lemon juice can brighten the filling. A sprinkle of herbs like parsley can also give it a fresh twist.
Make It Look as Good as It Tastes
Slice the wrap diagonally and serve on a clean plate. A little garnish of lettuce on the side makes it look fresh and inviting.
Fun Variations to Try
Try adding sliced tomatoes for extra juiciness. Swap in spicy cheese for a bit of heat. Add pickles for a tangy crunch. Mix in corn for a slightly sweet twist.
FAQ’s
1. Can I use fresh tuna instead of canned?
Yes, just cook and flake it before mixing.
2. Can I make this without cheese?
You can, but it will not have the classic melt texture.
3. What type of tortilla works best?
Soft flour tortillas work best for wrapping and toasting.
4. Can I make it ahead?
Yes, prepare the filling in advance and assemble later.
5. How do I keep it from getting soggy?
Drain the tuna well and avoid too much mayonnaise.
6. Can I add vegetables?
Absolutely, chopped veggies work great.
7. Is it good cold?
It can be eaten cold, but it is best warm.
8. Can I use a different spread?
Yes, yogurt or light dressing works.
9. How do I reheat it?
Use a skillet to bring back the crispness.
10. Can I freeze it?
Not recommended due to texture changes.
Conclusion
This wrap is simple, comforting, and full of flavor in every bite. It is one of those recipes you can rely on when you need something quick yet satisfying. Let me tell you, it’s worth every bite, and once you try it, you will keep coming back to it again and again.
Print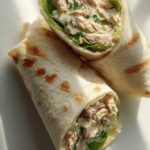
Tuna Melt Wrap
- Prep Time: 10 minutes
- Cook Time: 10 minutes
- Total Time: 20 minutes
- Yield: 4 servings 1x
- Category: Main Course
- Method: Stovetop
- Cuisine: American
- Diet: Low Lactose
Description
A warm and crispy wrap filled with creamy tuna, melted cheese, and fresh lettuce, perfect for a quick and satisfying meal.
Ingredients
- 2 cans tuna, drained
- 3 tablespoons mayonnaise
- 1 cup shredded cheese
- 1 cup lettuce, chopped
- 4 large flour tortillas
- 2 tablespoons butter
- 1/2 teaspoon salt
- 1/4 teaspoon black pepper
Instructions
- Preheat a skillet over medium heat.
- In a mixing bowl, combine the drained tuna, mayonnaise, salt, and black pepper until smooth.
- Lightly butter the skillet to prepare for cooking.
- Lay out the tortillas, spread the tuna mixture evenly, add shredded cheese and lettuce, then fold into wraps.
- Place the wraps in the skillet and cook for 2 to 3 minutes on each side until golden and the cheese is melted.
- Remove from heat and let rest for one minute.
- Slice in half and serve warm.
Notes
- Drain the tuna well to avoid a soggy wrap.
- Use medium heat to ensure even melting without burning.
- Do not overfill the wraps to keep them intact while cooking.
Nutrition
- Serving Size: 1 wrap
- Calories: 420
- Sugar: 3g
- Sodium: 620mg
- Fat: 22g
- Saturated Fat: 9g
- Unsaturated Fat: 11g
- Trans Fat: 0g
- Carbohydrates: 30g
- Fiber: 2g
- Protein: 24g
- Cholesterol: 45mg
Keywords: tuna melt wrap, easy tuna wrap, cheesy tuna wrap, quick lunch wrap, tuna recipe